This is a walkthrough for the SOC170 — Passwd Found in Requested URL — Possible LFI Attack Practice alert on LetsDefend. Before i continue, let me say this. There is no "shame" in needing a walkthrough. I would say even going to look for a walkthrough when stuck shows how much a person is willing to learn. That being said, let's get started.
We start by reviewing the alert and the details of the alert. This is very important as you can see a number of important information from here alone.

From the alert, we can already see important pieces of information such as:
- The source IP Address
- The target IP Address
- The hostname of the device being targeted
- The URL that triggered the alert.
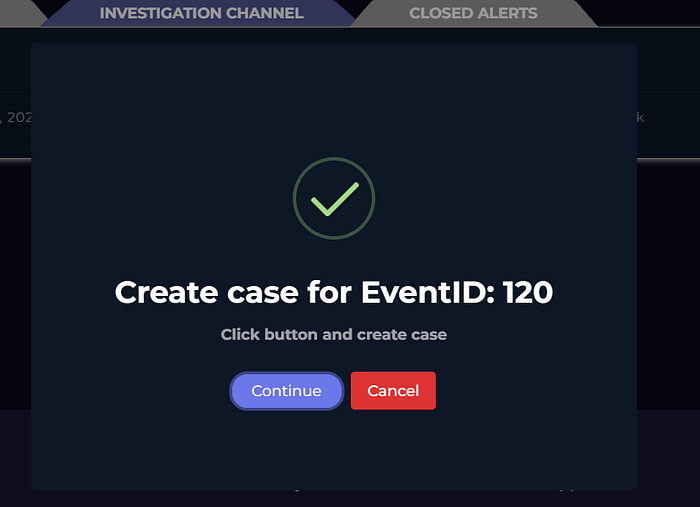
Once the alert details has been reviewed, it's time to get into the actual investigation. You start the investigation by opening up the playbook (this differs per company/organisation). LetsDefend has given us a simple but powerful playbook and we're going to use that. You activate the playbook by clicking the ">>" button on the alert you want to investigate and then create the case.
Once the case has been created, the playbook opens. It's essential to follow each step of the playbook. For me, it takes away the guesswork and not knowing how and where to begin. The first step of the playbook is to understand WHY the alert was triggered. We mentioned this earlier. A lot of information is contained in the alert pane and knowing why it was triggered helps you narrow your focus.
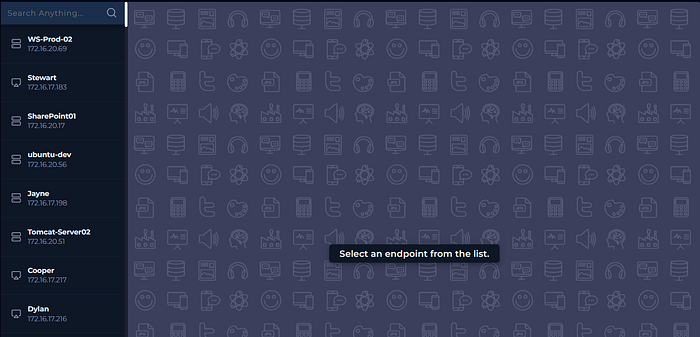
Based on the playbook, the 1st step was determining if the traffic came from an external IP (the Internet) or an IP within the internal network. IT/Security teams of an organisation know the block of IPs used in the internal network. For this practice room, to check this, I just go to "Endpoint Security". Here you see a list of hosts within the internal network. By simply looking at the hosts, you can tell the source IP Address isn't a part of the internal network so it's coming from an external source. You can also just search the list of host by putting in the IP Address in the search bar.
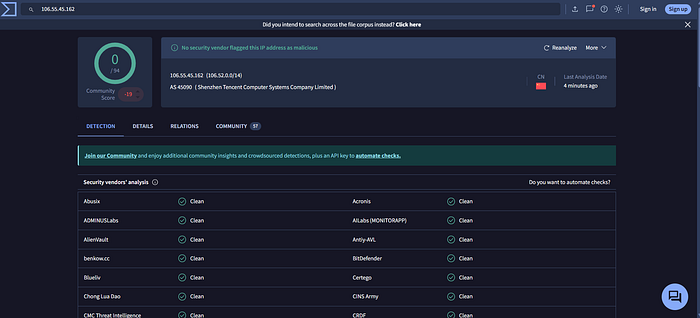
Next step? We collect data. Data regarding this IP Address to be more specific. We use platforms like Virustotal, abuseipdb and Cisco Talos. Checking the IP Address on these platforms show the IP Address isn't currently being used for malicious purposes.
PS: always make sure to get the latest information you can when using these platforms. An IP might have been used for malicious purposes in the past but could be clean presently and vice-versa.
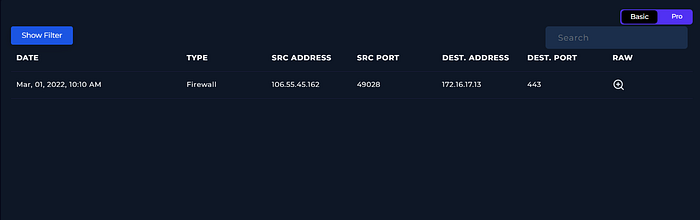
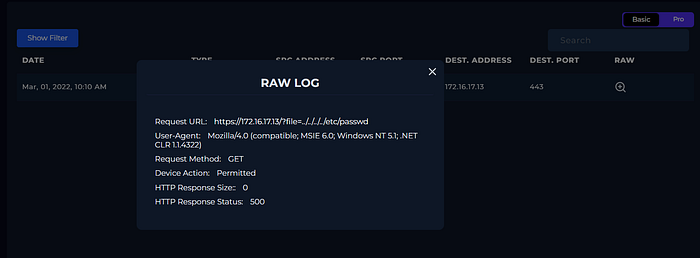
Once we've gotten all relevant information regarding the IP Reputation, we move to the next step of the playbook: Examining the traffic. What i do is switch to the "Log Management" tab and before i do anything, i switch the view from "Pro" to "Basic". This let's me see the logs more clearly. After this, i select the "show filter" button, select the source address field and put in the source ip address gotten from the alert. Since this is a possible LFI Attack, you have to look through the entire fields in the URL to confirm if there are any LFI Attack Indicators. In this case, they were easy to spot.
Once you've reviewed the traffic, you have to decide if it's malicious or not. In this case, it is. No normal user would try to access a URL that way. We can mark it as malicious and move to the next step of the playbook.
Indicating the attack type is the next step of the playbook. Based on the alert and the investigation so far, it's safe to say this is a Possible LFI Attack
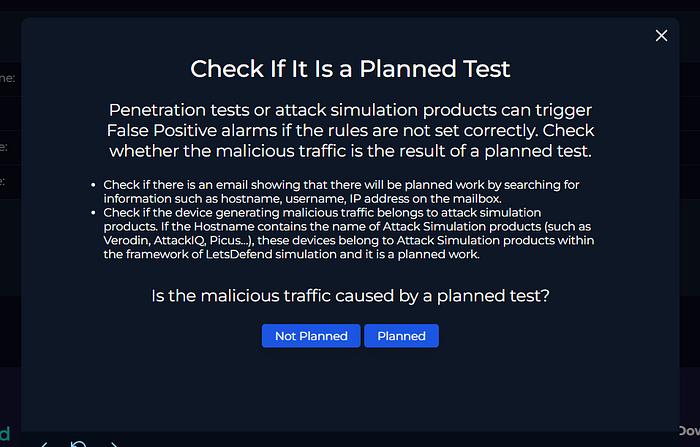
The next step of the playbook asks if this is a planned test. It's definitely not planned. Not by anyone within the company at least. Do not assume this though. The playbook gives you ways to check and confirm this. See image below.
The direction of the traffic is from an external network (Internet) to an internal network as we found out during the initial phase of our investigation.
Next step is to confirm if the attack was successful. I did this by reviewing the firewall logs again. If you look closely, you see that the HTTP Response size was 0 and the HTTP Response Status: 500. A combination of these two things points to a failed attempt (if anyone else found another way to confirm if the attack was successful or failed, do let me know. This was just my way of confirming it)
The next step is adding artifacts. So far, these are what we found during our triage:
- The attacker's IP Address
- The IP Address of the host targeted.
We include this in the "Add Artifacts" step. We're rounding up this investigation. We do not need escalation to Tier 2 as we've determined the attack wasn't successful. Next step is writing a brief report. Be thorough as possible here. This will allow any team member that reads this report to easily understand what happened and pull out all relevant information.
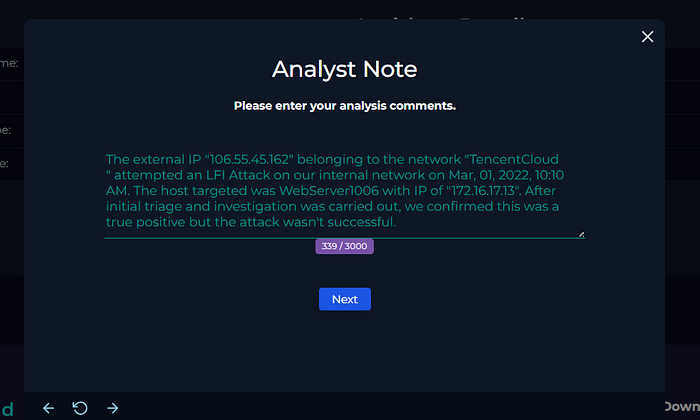
After filling in the Analyst Note (or report), you can finish the playbook. Once that's done, you'll be redirected to the alert screen again. To close out the alert, you click on the "check" button. Finally, you select if it's a true positive or false positive. It's a true positive in this case.
That's it guys. Thank you for joining me on this walkthrough. I hope to keep doing more of this.