

The difference between a tester who gets stuck and one who keeps going is knowing how to read what the application is actually saying.
Why This Blog Exists
You are testing a login. The server sets a cookie after authentication. It looks like this:
eyJhbGciOiJIUzI1NiIsInR5cCI6IkpXVCJ9.eyJ1c2VyX2lkIjoxMjM0LCJyb2xlIjoidXNlciJ9.SflKxwRJSMeKKF2QT4fwpMeJf36POk6yJV_adQssw5cA beginner looks at that and moves on. An experienced tester looks at that and immediately recognizes it as a JWT token — decodes it in seconds — finds "role": "user" inside — changes it to "role": "admin" — re-encodes it — and tests whether the server accepts it.
That is what this blog is about. Encoding is everywhere in web applications. Tokens, session IDs, parameters, file names, redirect URLs, API keys — all of it gets encoded, obfuscated, or transformed before it travels over HTTP. The tester who cannot read encoded data is working blind. The tester who can is reading a language most people cannot see.
Burp Suite's Decoder and Comparer are the tools that give you that ability.
Encoding vs Encryption vs Hashing — Know the Difference First
Before we touch Decoder, understand these three concepts clearly. Beginners mix them up constantly, and it costs them findings.
Encoding
- Purpose: Transform data into a different format for safe transmission
- Reversible: Yes — always. No key needed.
- Examples: Base64, URL encoding, HTML encoding, hex
- Security: Zero. Encoding is not security. It is just formatting.
- Tester takeaway: If you see encoded data, you can always decode it. There is no protection.
Encryption
- Purpose: Protect data confidentiality
- Reversible: Yes — but only with the correct key
- Examples: AES, RSA, TLS
- Security: Strong when implemented correctly
- Tester takeaway: You need the key to decrypt. But you can test for weak keys, algorithm misuse, and padding oracle attacks.
Hashing
- Purpose: Verify data integrity, store passwords
- Reversible: No — one-way by design
- Examples: MD5, SHA1, SHA256, bcrypt
- Security: Depends on the algorithm and salting
- Tester takeaway: You cannot reverse a hash. But you can crack weak ones with rainbow tables or brute force, and identify unsalted hashes.
The critical insight: When you see data in a cookie, a parameter, or a header that looks scrambled — your first question is always: is this encoded, encrypted, or hashed? If it is encoded, you decode it in Decoder and read it. If it looks hashed, you check the length and format to identify the algorithm. If it is encrypted, you look for misconfigurations.
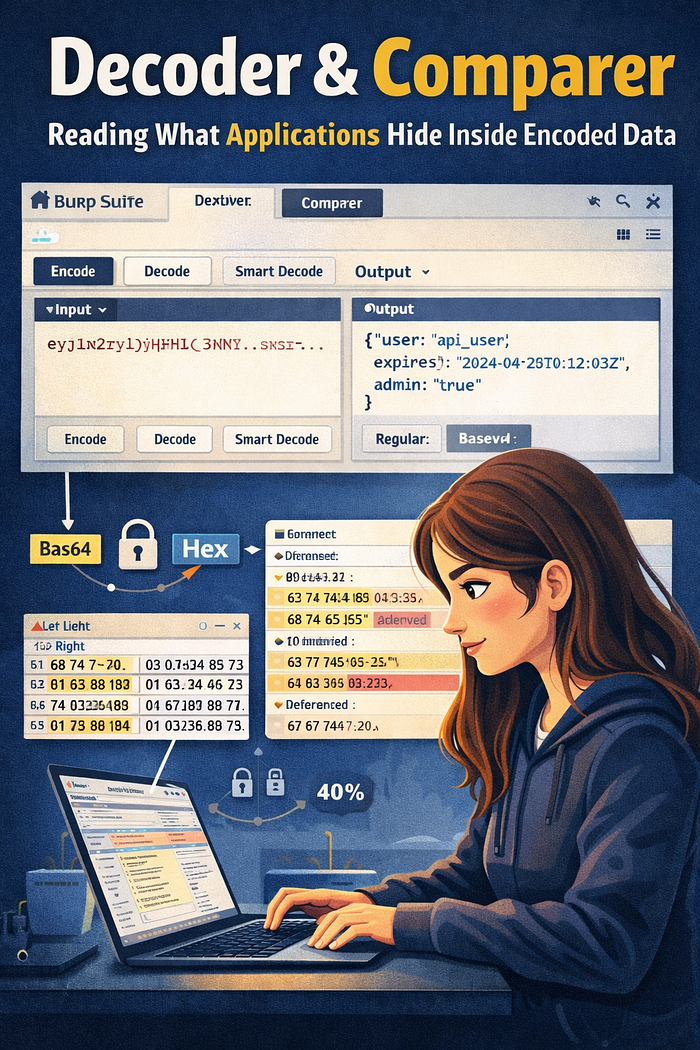
The Decoder Tab — Your Swiss Army Knife for Data Transformation
Opening Decoder
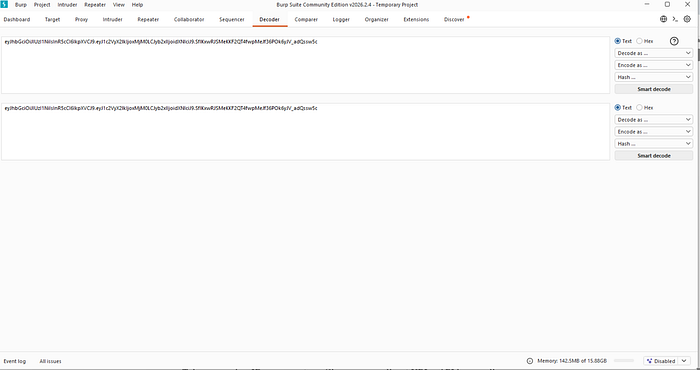
Click the Decoder tab in the main Burp Suite navigation bar. You will see a clean two-panel interface — input on the left, output on the right, with encode/decode action buttons in between.
You can also send data directly to Decoder from anywhere in Burp: highlight any text in a request or response, right-click, and select "Send to Decoder". The highlighted text appears in the Decoder input automatically.
Base64 — The Most Common Encoding You Will See
What It Is
Base64 converts binary data into a string of ASCII characters using 64 printable characters — A through Z, a through z, 0 through 9, plus + and /. The output always ends with = or == as padding.
It was designed to safely transmit binary data through systems that only handle text. It is not security. It is not encryption. Anyone can decode it instantly.
How to Spot Base64
- Characters: only
A-Z,a-z,0-9,+,/,= - Always ends with
=or==(sometimes no padding) - Length is always a multiple of 4 characters
- Looks like:
dXNlcm5hbWU6cGFzc3dvcmQ=
Decoding in Burp Decoder
- Paste the Base64 string into the Decoder input
- Click "Decode as" → select "Base64"
- Read the output
Example: dXNlcm5hbWU6cGFzc3dvcmQ= decodes to username:password
That exact pattern — Base64 encoded username:password — is HTTP Basic Authentication. If you see an Authorization header with Basic followed by a Base64 string, decode it. You are looking at credentials in plain text.
Where Base64 Appears in Web Apps
- HTTP Basic Auth:
Authorization: Basic dXNlcjpwYXNz - JWT tokens: the first two parts of a JWT are Base64 encoded (more on this shortly)
- Session cookies: many frameworks Base64-encode session data before storing it in a cookie
- API responses: binary data like images or files embedded in JSON
- Hidden form fields: state data passed between pages
- Email links: confirmation tokens and password reset URLs
Encoding in Decoder
You can also encode data. Type any text, click "Encode as" → "Base64". This is useful when you need to craft a payload that the application expects in Base64 format.
URL Encoding — What Lives Inside URLs
What It Is
URLs can only safely contain a limited set of characters. Special characters like spaces, &, =, ?, #, +, and many others have reserved meanings in URL syntax or are unsafe to transmit. URL encoding (also called percent encoding) replaces these characters with a % followed by their two-digit hexadecimal ASCII code.
Space becomes %20. & becomes %26. = becomes %3D. < becomes %3C. > becomes %3E.
Why It Matters for Pen Testers
URL encoding is critical for two reasons.
First, when you see a URL-encoded value in a parameter, decode it to understand what the actual data is. A parameter like redirect=%2Fadmin%2Fdashboard decodes to redirect=/admin/dashboard — a redirect to an admin page. That is an open redirect vulnerability candidate.
Second, URL encoding is frequently used to bypass input validation filters. If an application blocks the string <script> but does not properly decode URL-encoded input before checking it, the payload %3Cscript%3E bypasses the filter entirely. This is one of the most common XSS filter bypass techniques.
Decoding in Burp Decoder
- Paste the URL-encoded string
- Click "Decode as" → "URL"
- Read the decoded output
Double URL Encoding
Some applications URL-decode input twice. This means %253Cscript%253E — where %25 is the URL encoding of % — decodes first to %3Cscript%3E and then to <script> on the second pass. If a filter only runs one decode cycle, double-encoded payloads bypass it completely.
In Decoder, you can chain operations — decode URL once, see the intermediate result, decode URL again, see the final result.
HTML Encoding — What Lives Inside HTML Pages
What It Is
HTML encoding converts characters that have special meaning in HTML into entity references that display as the intended character without being interpreted as HTML. The angle bracket < becomes <. The > becomes >. The ampersand & becomes &. The quote " becomes ".
Why It Matters for Pen Testers
HTML encoding is the primary defense against Cross-Site Scripting. When an application properly HTML-encodes user input before inserting it into the page, a <script> tag submitted by an attacker becomes the harmless string <script> on screen instead of executing as code.
Understanding this encoding tells you immediately whether an application is defending against XSS. If you submit <b>test</b> and see bold text in the response, the application is not encoding output — it is reflecting your HTML directly, which means XSS is likely possible. If you see <b>test</b> as literal text, the application is encoding — you need to look for encoding bypass techniques.
HTML entities also appear in data you extract from responses. An email address displayed as user@company.com is using @ as the HTML entity for @. Decode it in Burp Decoder to read the actual value.
Hex Encoding — Reading Raw Bytes
What It Is
Hex encoding represents each byte as its two-character hexadecimal value. The letter A in ASCII is decimal 65, which is 41 in hex. The string hello in hex is 68656c6c6f.
Where You See It
- Binary file uploads and responses
- Cryptographic values — hashes, signatures, keys
- Session tokens in some frameworks
- Database identifiers
- Memory addresses in error messages that reveal stack traces
Using Hex in Decoder
Paste hex data and decode as "Hex" to convert it to ASCII text or binary. Encode text as Hex to produce hex output. The hex view is also useful for examining binary data byte by byte when you are looking for structure or patterns.
JWT Tokens — The Most Important Decoding Skill in Modern Web Testing
What a JWT Is
JSON Web Token is the dominant authentication token format in modern web applications. If you see a cookie or Authorization header that contains a long string with exactly two dots in it, it is almost certainly a JWT.
Structure:
header.payload.signatureAll three parts are Base64URL encoded (Base64 with - instead of + and _ instead of /, no padding).
Decoding a JWT in Burp Decoder
Take a JWT and split it at the dots. Paste the first part (header) into Decoder and decode as Base64. Read the JSON. Then paste the second part (payload) and decode as Base64. Read the JSON.
Header example decoded:
{
  "alg": "HS256",
  "typ": "JWT"
}
Payload example decoded:
{
  "user_id": 1234,
  "role": "user",
  "exp": 1893456000
}
You are now reading the application's authentication token in plain text.
What to Look For in a Decoded JWT
The alg field in the header is critical. If it says "alg": "none", the application may accept unsigned tokens — one of the most severe JWT vulnerabilities. Change the algorithm to none, remove the signature, and test whether the server accepts it.
The role field in the payload — if present — is a privilege escalation target. Change "role": "user" to "role": "admin" or "role": "administrator", re-encode the payload, reassemble the token with the modified payload, and test whether the server accepts the modified token without validating the signature.
The user_id or sub field — change it to another user's ID and test for authentication bypass. If the server trusts the token without verifying the signature, you can impersonate any user.
The exp field — this is the expiration timestamp. If you can remove it or set it far in the future, you may be able to use expired tokens indefinitely.
Re-Encoding a Modified JWT
- Modify the payload JSON
- In Decoder, encode the modified JSON as Base64
- Replace the original payload section in the token
- If testing the
alg: noneattack, remove the signature entirely (keep the trailing dot) - Replace the token in your request in Repeater and send
Chaining Encodings — When One Layer Is Not Enough
Real applications frequently layer multiple encodings. A value might be URL-encoded and then Base64-encoded. Or HTML-encoded inside a JSON string inside a Base64-encoded cookie.
Decoder handles this through chaining. After decoding one layer, the output becomes the input for the next decode operation. You keep decoding until you reach readable data.
Example chain:
%64%58%4e%6c%63%6d%35%68%62%57%55%36%63%47%46%7a%63%33%64%76%63%6d%51%3d
→ Decode URL → dXNlcm5hbWU6cGFzc3dvcmQ=
→ Decode Base64 → username:password
The habit to build: when you see an encoded value, decode it once and ask yourself — does this output look like another encoded value? If yes, decode again. Keep going until you hit plain text.
The Comparer — Finding the One Different Response
What Comparer Does
The Comparer takes two pieces of data — two requests, two responses, two cookies, two anything — and shows you exactly where they differ, byte by byte, highlighted in colour. Word-level diff and byte-level diff are both available.
This sounds simple. In practice, it is one of the most powerful analysis tools in Burp Suite because the most important signal in web application testing is often not what a response says — it is how one response differs from another.

Sending Data to Comparer
From anywhere in Burp — HTTP History, Repeater, Intruder results — right-click and select "Send to Comparer". Data is queued. Send two items, then click "Compare" in the Comparer tab to see the diff.
When to Use Comparer — Real Testing Scenarios
Scenario 1 — Detecting Blind SQL Injection
You are testing a parameter for SQL Injection, but the application shows no error messages — it returns the same page regardless of what you inject. This is blind injection territory.
Send two requests to Comparer:
- Request A:
id=1(normal) - Request B:
id=1 AND 1=1(always true — should behave identically to normal) - Request C:
id=1 AND 1=2(always false — should return different/empty content)
If Response B matches Response A but Response C differs — the application is evaluating your SQL condition. Blind Boolean SQL Injection confirmed.
Scenario 2 — Username Enumeration
You test a login form with two requests:
- Request A: existing username, wrong password →
"Invalid password" - Request B: non-existent username, any password →
"Invalid username"
The response messages look the same to the naked eye. Send both to Comparer. The diff reveals subtle differences — maybe the response time, maybe a hidden field value, maybe one extra character in the HTML. Even a one-byte difference in response length is enough to enumerate valid usernames, which feeds directly into a Intruder brute-force attack.
Scenario 3 — Access Control Testing
You have two accounts — a regular user and an admin. You capture the same request made by each account and send both to Comparer.
The diff shows you exactly what changes in the response for an admin vs a regular user — what HTML elements appear, what API data is returned, what fields are present. This intelligence tells you precisely what you gain by escalating privileges, and shows you what to look for when testing whether a regular user can access admin functionality.
Scenario 4 — Session Token Analysis
Capture 10 session tokens generated by the application. Are they random? Are they predictable? Send pairs to Comparer. Look for patterns. If tokens differ only in one small section, that section may be the only part being randomized — and if the randomization is weak, session tokens may be predictable.
Scenario 5 — Spotting WAF Behaviour
You send two payloads — one benign, one containing an injection string. The application returns a 200 for both but the responses look different. Send to Comparer. The diff reveals whether a WAF is stripping your payload, modifying your request, or inserting a block page — invisible to casual inspection but obvious in a diff.
Practical Exercise — Full Decoder Workflow
Here is a complete exercise you can do right now using PortSwigger Web Security Academy.
Target Lab
https://portswigger.net/web-security/jwt/lab-jwt-authentication-bypass-via-unverified-signature
Steps
Step 1: Log in with the provided credentials. Intercept the POST login request and forward it. Observe the response — a JWT is set in a cookie.
Step 2: Copy the JWT cookie value. Go to Decoder. Paste it in. Split at the first dot — decode the header as Base64. Note the algorithm.
Step 3: Split at the second dot — decode the payload as Base64. Read the JSON. Find the username or role field.
Step 4: Modify the payload — change the username to administrator. Re-encode the modified JSON as Base64.
Step 5: Reconstruct the token: [original header].[new payload].[original signature]
Step 6: Go to Repeater. Replace the JWT cookie with your modified token. Send a request to /admin. Read the response.
If the application does not verify the signature, you are now authenticated as administrator using a forged token.
Key Takeaways
- Encoding is not security. It is formatting. Always decode it.
- Base64, URL, HTML, and hex are the four encodings you will encounter on every assessment
- JWT tokens are Base64URL encoded JSON — always decode them. Always check the
algfield. - Chain decoding operations in Decoder when one layer reveals another encoded layer
- Comparer finds the signal in the noise — the one response that differs from all others
- Blind SQLi, username enumeration, access control testing, and session analysis all rely on Comparer
- The tester who reads encoded data sees what most people walk past
Coming Up in Blog #7
Finding Your First XSS with Burp Suite — A Complete Hands-On Guide
- What XSS actually is and why it matters beyond just alert boxes
- Reflected, Stored, and DOM-based XSS — the three types explained
- Using Burp Proxy and Repeater to find and confirm XSS manually
- Encoding bypass techniques for XSS filters
- Burp's XSS-specific payloads and how to use them
- A complete PortSwigger lab walkthrough
- From finding XSS to proving real-world impact
In Blog #6, you learned:
- The critical difference between encoding, encryption, and hashing — and why confusing them costs you findings
- Base64 — how to spot it, decode it, encode it, and where it appears in every web application
- URL encoding — how to decode it, why it matters for filter bypasses, and double URL encoding
- HTML encoding — how it relates to XSS defense and offense
- Hex encoding — where it appears and how to use it in Decoder
- JWT tokens — structure, decoding both parts, what fields to look for, and how to forge a modified token
- Chaining encodings — the habit of decoding layer by layer until you reach plain text
- The Comparer — what it does and five real testing scenarios where it reveals what naked-eye inspection misses
- A complete practical JWT bypass exercise
Follow the series — Blog #7 drops next. XSS hands-on.
Tags: BurpSuite — BurpDecoder — BurpComparer — JWT — Base64 — XSS — EthicalHacking — PenTesting — BugBounty — WebSecurity — CyberSecurity — PortSwigger
Part of the Burp Suite Learning Series — Zero to Professional Web Application Penetration Testing.
← Blog #5: Mapping the Full Attack Surface — Target Tab and Crawler → Blog #7: Finding Your First XSS with Burp Suite — Coming Soon