
Copilot Studio recently introduced support for Model Context Protocol (MCP) servers, opening the door to extending copilots with custom tools, domain-specific logic, and enterprise workflows.
It's a powerful capability — but if you've tried to add an MCP server already, you may have noticed something frustrating:
Some of the UI fields are missing labels.
The good news? The integration works perfectly once you know how the fields map. This post walks through how to successfully add an MCP server to Copilot Studio using an API key, step by step.
What Is an MCP Server (and Why It Matters)
An MCP server exposes tools and capabilities using the Model Context Protocol, allowing Copilot Studio to:
- Call custom APIs and workflows
- Add domain-specific intelligence (inventory, ITSM, finance, etc.)
- Standardize tools across multiple copilots
- Secure access using API keys or OAuth
- Enable real-time interaction with enterprise systems
In short: MCP servers let your copilot do real work.
What You're Connecting
Your Copilot Studio agent connects to your MCP server via an SSE (Server-Sent Events) endpoint, for example:
https://mcp-product-server.azurewebsites.net/runtime/webhooks/mcp/sseThis endpoint is how Copilot Studio discovers tools, understands schemas, and invokes your server securely.
Prerequisites
Before you begin, make sure you have:
- A running MCP server
- An API key generated by your server
- Access to Copilot Studio with permission to configure tools/plugins
(Optional) Step 0: Get Your API Key from Azure Functions
If your MCP server is hosted as an Azure Function App:
- Open your Function App in Azure
- Navigate to App keys
- Copy the key you want to use (for example,
mcp_extension)
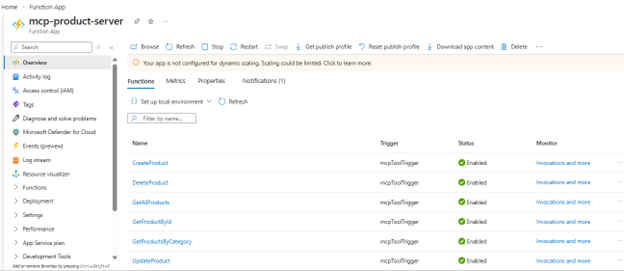

Treat this key like a secret — don't commit it to source control.
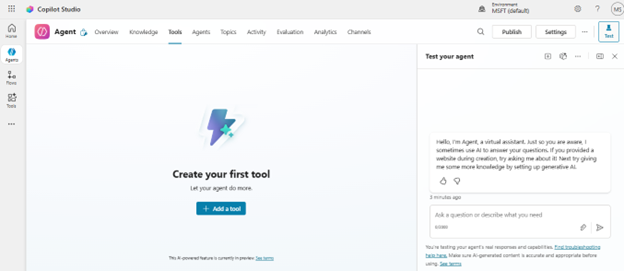
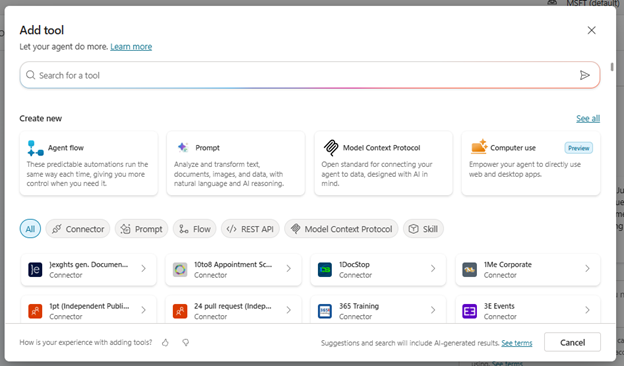
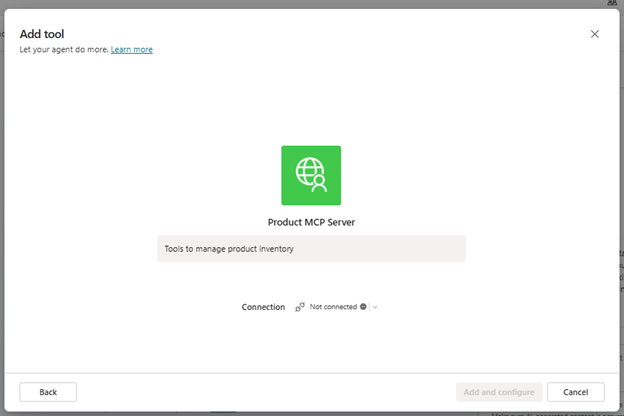
Step 1: Open MCP Servers in Copilot Studio
- Open your copilot in Copilot Studio
- Navigate to Plugins / Tools
- Select Add tool
- Choose Model Context Protocol
- Click Add MCP Server

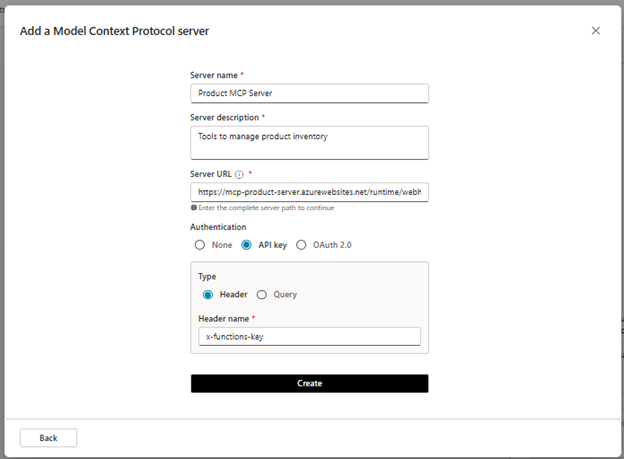
Step 2: Enter MCP Server Details
Fill in the fields as follows:
- Server name:
Product MCP Server - Description: MCP server exposing product inventory tools
- Server URL:
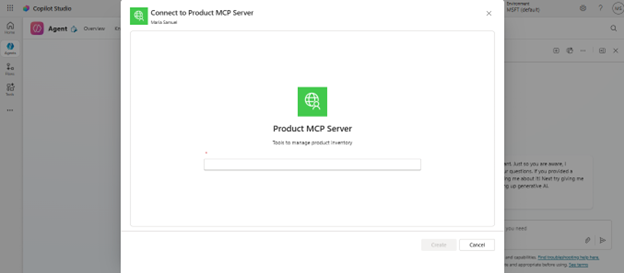
https://mcp-product-server.azurewebsites.net/runtime/webhooks/mcp/sseStep 3: Configure API Key Authentication
Even if labels are missing, configure the fields like this:
- Authentication type: API Key
- Key location: Header
- Header name:
x-functions-keyClick Create.
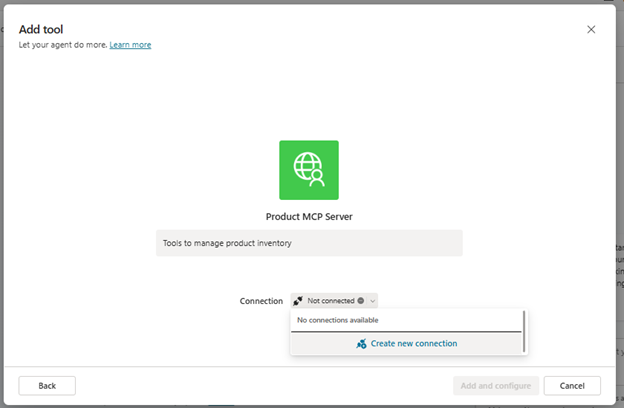
Step 4: Create the Connection
- Select Create new connection
- Confirm the API key
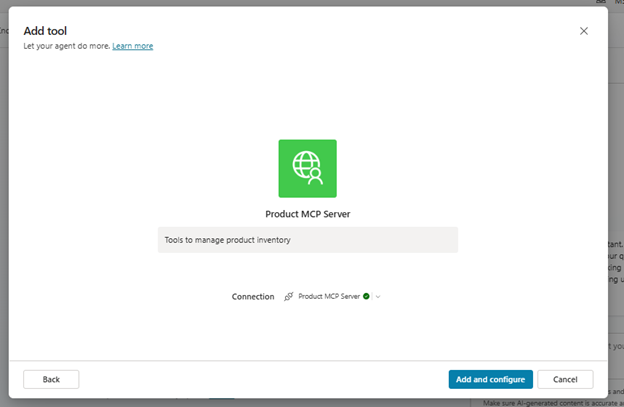
- Save the connection
Once connected, MCP server is finally added and configured.
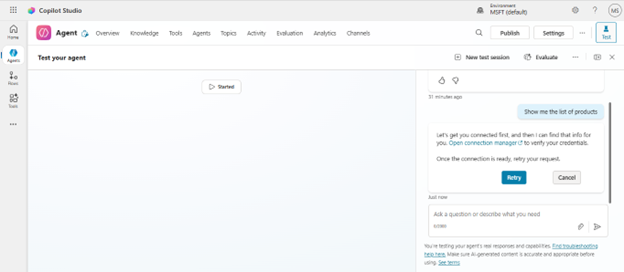
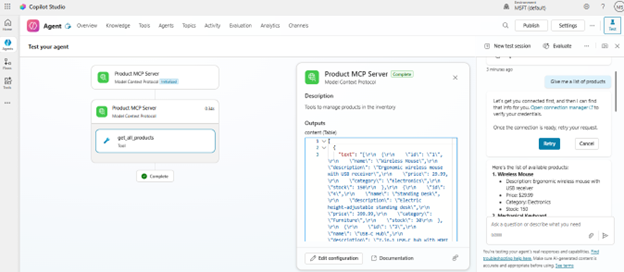
Ask the agent
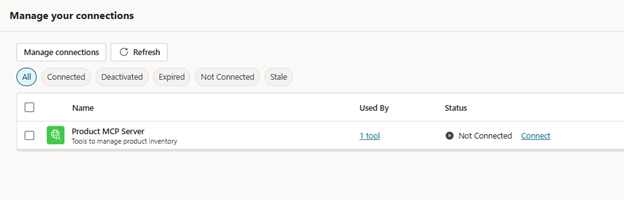
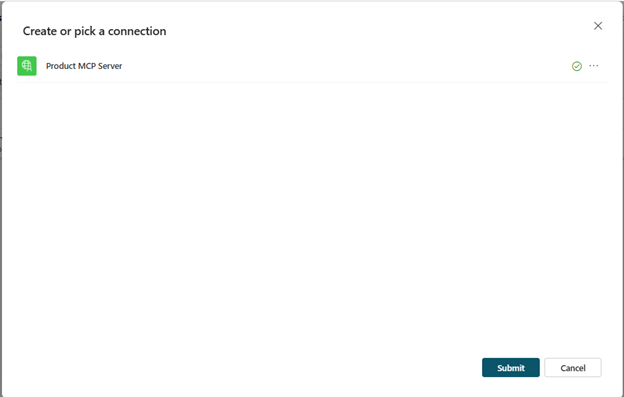
Once the tool list is visible, ask the agent a question e.g. Show me all the products. The first time a question is asked you will most probably be asked to authorize connection to the MCP server.
- Select Open Connection Manager
- Click Connect under the Status column
- Click Submit
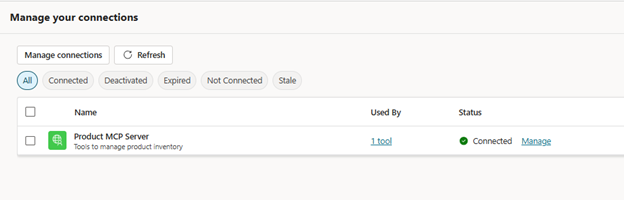
Once the agent connects to MCP server during this session, agent is ready to answer questions.
Troubleshooting
Missing labels
When entering the API Key, the label is missing. Use the above screenshots to guide you.
Tools not loading
Ensure your MCP server returns a valid capabilities response with a tools array and supports SSE.
Connection errors
Verify the endpoint URL, API key, and public accessibility of the server.
Final Thoughts
Even with current UI gaps, adding an MCP server to Copilot Studio using an API key is straightforward once you understand the steps. This integration enables copilots to securely interact with real systems and business logic.
What's Next
The next step is integrating MCP servers using OAuth 2.0 for enterprise-grade authentication and governance.