

In this project, I built a travel bucket list application where users can explore destinations through short travel videos and save places they want to visit.
This AWS project combines cloud storage with a frontend by using Amazon S3 to store videos, React to build the interactive interface, and ImageKit to deliver videos quickly through a CDN. The following steps walk through how these technologies were integrated to create the application.
These steps are referenced from a YouTube video from Tech with Lucy.
🔥 Top Tech Jobs Are Hiring NOW — Don't Miss Out.
🚀 Multiple Roles Available 👉R Aply & Secure Your Job

References:
- Project Instructions from Techwithlucy GitHub README page - (https://github.com/techwithlucy/youtube/blob/main/Imagekit-main/README.md#steps-1)
- Let's Build Together! AWS Video Streaming Project with ImageKit, React & S3 (Beginner-Friendly)
- Pexels: Website for free stock photos, royalty-free images & videos shared by creators (https://www.pexels.com/videos/)
Note: Something to keep in mind when testing this out is the limits on video transformations when using the image kit.
When I made a change, such as adding text, I got a message about exceeding the limit on video transformations.
This is followed by an email about using 100% of my monthly video processing units.

Though I didn't have issues changing the size or length of the videos.
Procedure
Step 0: Gathering videos for travel bucket list
The first step is selecting videos for the travel bucket list.
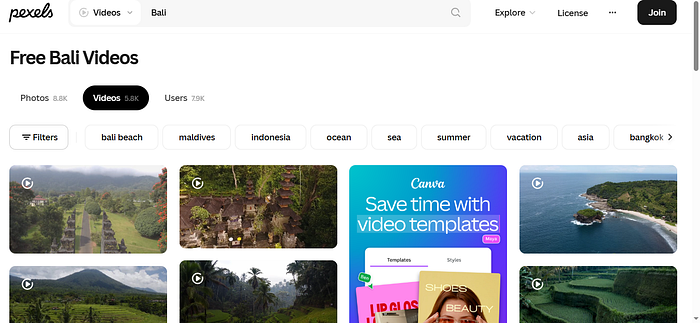
In the references section of the blog, you can go to the Pexels website and search for videos on different places, like Bali, for example.
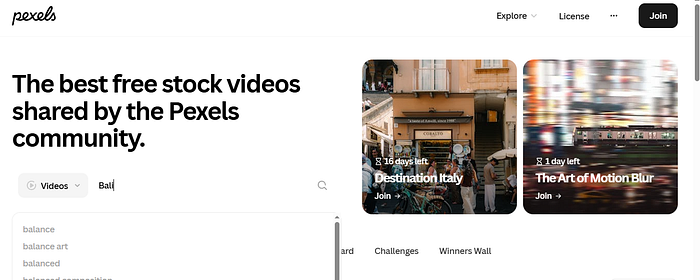
Once you search for those places, you can select the videos shown and download them. For this example, I downloaded 3 videos from 3 different locations.
Step 1: Create an S3 bucket for storing travel videos
The next step is creating a storage location for the travel videos.
Open the AWS Console and navigate to S3. Click Create bucket.
Enter a unique bucket name, such as:
imagekit-video-origin-<unique-name>
Choose the region closest to you or your users. Selecting a nearby region helps reduce latency when the CDN fetches content from the bucket.
Select Block all public access and leave the remaining settings as default, and create the bucket.
At this point, you now have a secure storage location for the travel videos used in the application.
Step 2: Upload the travel videos
After creating the bucket, the next step is uploading the video files that will be used in the travel bucket list application.
Open the bucket and click Upload. Select the travel videos you want to include in the project.
Example files used in the application include:
bali.mp4 london.mp4 sydney.mp4
To keep the bucket organized, it is a good practice to group related files inside folders. In this project, a folder called travel is used to store all destination videos.
Example file paths:
/travel/bali.mp4 /travel/london.mp4 /travel/sydney.mp4
Using folders makes it easier to scale the application later by adding more destinations such as Barcelona, Switzerland, Brazil, or New York.
Once uploaded, your bucket structure will look similar to this:
These videos will later be streamed through the CDN in the frontend application.
Step 3: Create an IAM user for ImageKit
Since the S3 bucket is private, ImageKit needs permission to retrieve the video files.
To do this securely, create a dedicated IAM user that will only be used for accessing the bucket.
Open the AWS Console and go to IAM. Select Users and click Create user.
Enter the username: imagekit-s3-readonly
After creating the IAM user, select Create Access Key (under access key). Set the access key best practices outside of AWS, add a description and create the access key.
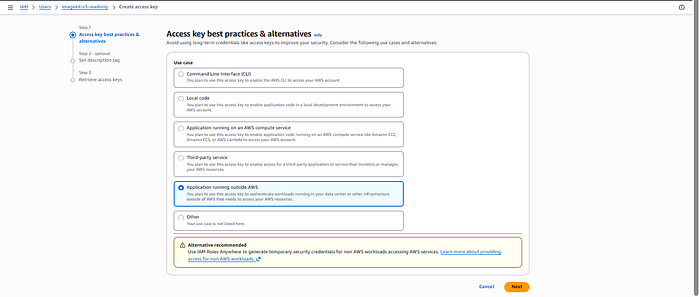
This generates an Access Key ID and Secret Access Key, which allow external services like ImageKit to interact with AWS resources.
Make sure that the Access Key and Secret Access Key are saved because you won't see the Secret Access Key again.
Creating a dedicated user instead of using your main AWS credentials follows security best practices and allows you to control exactly what permissions ImageKit receive.
Step 4: Create a read only IAM policy
Next, create a policy that restricts what the IAM user can do.
Following the principle of least privilege, ImageKit should only have permission to read video files from the bucket. It should not be able to upload, delete, or modify objects.
Go to IAM → Policies → Create policy and switch to the JSON editor.
Paste the following policy and replace the bucket name with your own.
JSON
{ "Version":"2012–10–17", "Statement":[ { "Effect":"Allow", "Action":["s3:GetObject"], "Resource":"arn:aws:s3:::imagekit-video-origin-<your-bucket-name>/*" } ] }
This policy allows the user to retrieve objects from the bucket but blocks all other actions.
Give the policy a clear name such as: ImageKitS3ReadOnly. Then create the policy.
Step 5: Attach the policy to the IAM user
After creating the policy, it must be attached to the IAM user created earlier.
Return to IAM → Users and open the user imagekit-s3-readonly.
Click Add permissions, then choose Attach policies directly.
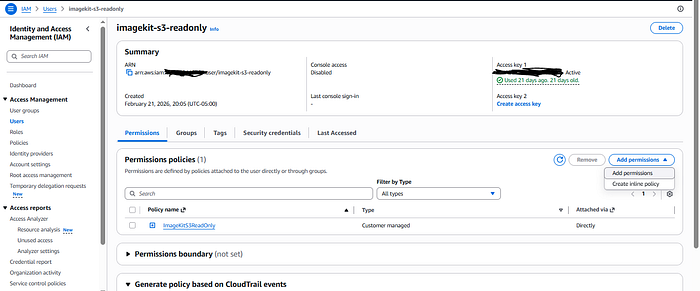
Search for and select ImageKitS3ReadOnly, then save the changes.
The IAM user now has the exact permissions needed to read the travel videos from the S3 bucket.
Step 6: Save the IAM credentials
When the IAM user is created, AWS generates two credentials that are required for external access.
Access Key ID Secret Access Key
These credentials must be copied and stored securely. The secret key cannot be viewed again later.
These credentials will be used by ImageKit to authenticate with AWS and retrieve the videos stored in S3.
Step 7: Connect S3 to ImageKit using external storage
Now the S3 bucket needs to be connected to ImageKit so that the CDN can fetch the videos.
Open the dashboard for ImageKit.
Navigate to:
Settings → External Storage
Click Add External Storage and select AWS S3.
Fill in the configuration fields.
Storage Name: aws-video-origin
Bucket Name: imagekit-video-origin-<name>
Region: Same region used when creating the bucket
Access Key: IAM Access Key
Secret Key: IAM Secret Key
Folder: / or /travel
After entering the information, save the configuration and click Test Connection.
If the connection succeeds, ImageKit can now retrieve the travel videos stored in S3.
Step 8: Access the videos through the CDN
Once the integration is complete, ImageKit generates CDN URLs that can be used to stream the videos.
For example, if a video is stored in S3 at:
s3://imagekit-video-origin/travel/bali.mp4
The CDN URL becomes:
https://ik.imagekit.io/<imagekit_id>/travel/bali.mp4
Users access videos through this CDN URL instead of accessing the S3 bucket directly. Using a CDN improves performance because the video can be cached at servers located closer to users around the world.
ImageKit also allows video transformations through URL parameters.
Example: https://ik.imagekit.io/<imagekit_id>/travel/bali.mp4?tr=w-600,h-300
This example adjusts the corners of the video for the width to be 600px and height to be 300px.
Another example could be: https://ik.imagekit.io/<imagekit_id>/travel/bali.mp4?tr=so-2,du-8
This example starts the video at two seconds and plays eight seconds of footage, which can be useful for short previews of destinations.
Step 9: Run the travel bucket list application with React and Vite
After the backend infrastructure is configured, the final step is running the frontend application.
The user interface was built using React and bundled using Vite. React allows the application to display destination cards, video players, and bucket list features in a component based structure.
For this project, I went to Lucy's GitHub page, go to the youtube section, select code, downloaded a zip file, and open visual studio.
In Virtual studio code, I opened the zip file and selected the Imagekit-main folder, which opens the code needed for this project.
To create the application using Vite, run the following commands:
npm create vite@latest travel-bucket-list — — template react cd travel-bucket-list npm install npm run dev
This starts a development server where the travel bucket list application can be viewed locally.
Inside the project, components are used to organize the interface.
The VideoPlayer component loads travel videos using the CDN URLs generated by ImageKit. The DestinationCard component displays information about each location such as Bali, London, or Sydney.
For this example, open the ImageKit-Main, src, App. jsx, and change the URLs and title from the ones created out of ImageKit.
When users open the application, they can browse destinations, watch travel videos, and add places they want to visit to their personal travel bucket list.
Final Result
By combining cloud storage, a CDN, and a modern frontend framework, this project creates a scalable travel discovery platform.
Travel videos are stored securely in Amazon S3, delivered quickly through the CDN provided by ImageKit, and displayed in a user friendly interface built with React and Vite.
This architecture separates storage, delivery, and frontend logic, making it easy to scale the application as more travel destinations and videos are added.
Let me know what feedback you have for this blog.