

Welcome to the walkthrough of my first vulnerability scanning project. The primary tool that I'll be using throughout it is OpenVAS, which is a free and open-source vulnerability scanning tool. I'll be conducting a credentialed vulnerability scan of a single port of the targeted host. This will also include me demonstrating how to configure known credentials in OpenVAS, how to specify the details of the machine that I'm targeting, how to initiate the vulnerability scan, and finally how to analyze the results.
Starting Up OpenVAS on My Local System
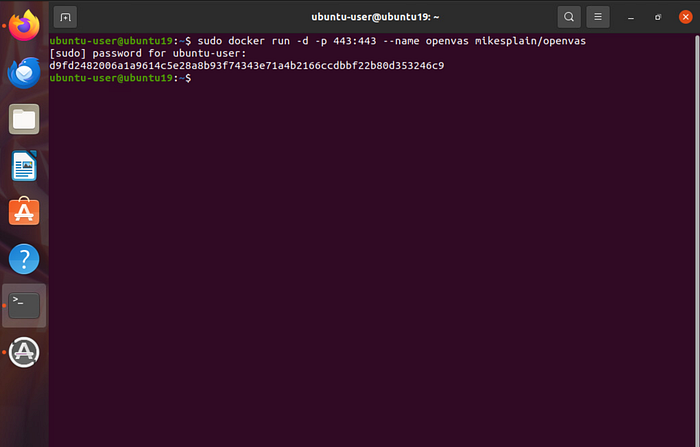
The instance of the OpenVAS scanner that I'll be using for this project is stored in a Docker container (a lightweight, standalone, executable software package that includes an application, its dependencies, libraries, and configuration files, all bundled together to run consistently across any computing environment). The following command will allow me to initiate the container that the application is located on in order to get everything started: "sudo docker run -d -p 443:443 — name openvas mikesplain/openvas".
The command includes "sudo," which provides the elevated privileges that I need to execute the command, then "docker" for the actual container that I'm attempting to initiate, "443" for the HTTPS port that I want everything to run on, and finally "openvas" for the application that is stored on the container.
Once the command is executed, I provide my account password since I'm requesting the use of elevated privileges.
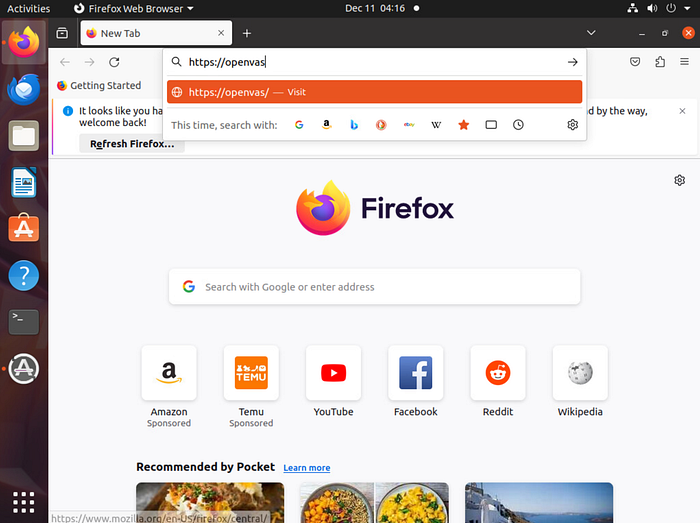
Now the Docker container should be hosting OpenVAS over port 443. I'm able to reach the tool by opening my web browser and navigating to https://openvas.
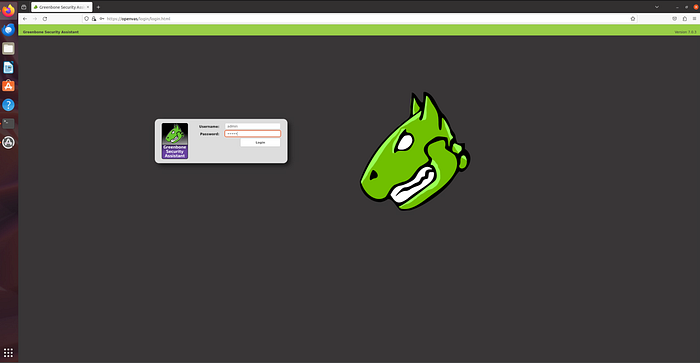
My arrival at OpenVAS' login page verifies that everything has been properly initiated. I provide it with my login credentials (username: admin, password: admin).
Configuring SSH Credentials
The type of vulnerability testing that I will be conducting during this project is known as "white-box testing." In the real world, this would be where a client has already provided me with the system information necessary to configure the scanner, saving the time that system recon and enumeration would usually take up.
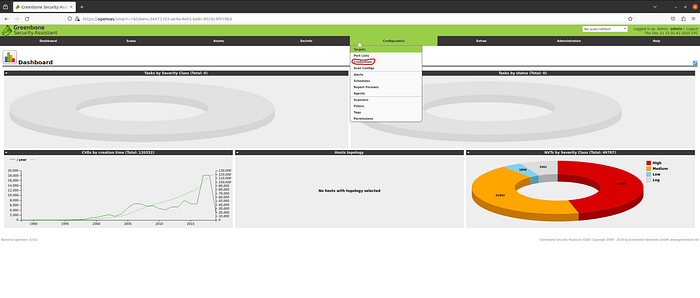
To start things off, I'm going to first provide OpenVAS with the credentials necessary to access the system through the SSH protocol. At the very top of the window, I click the "Configuration" menu and choose the "Credentials" menu item to proceed to where I need to enter these details.
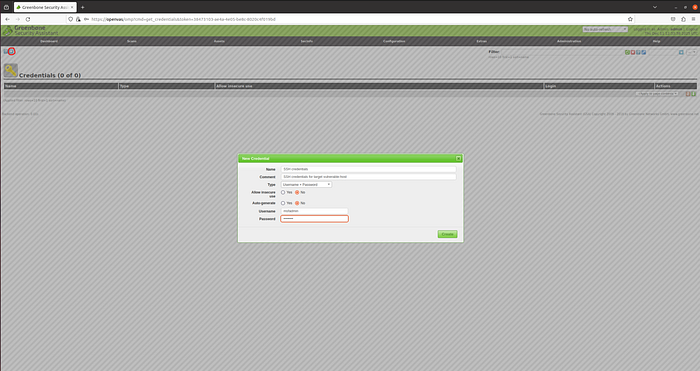
The next page starts off fairly empty since currently there aren't any credentials being stored in OpenVAS. To add the ones that I need, I start by clicking the small blue star highlighted in the upper leftmost corner. This will bring up a menu that will ask for the details. I'm going to name this set of credentials "SSH credentials" and leave a comment simply stating "SSH credentials for target vulnerable-host." Next, I'm going to leave the Type as its default value of "Username + Password" since that is what I'll be providing, and I'll also leave the two radio boxes alone as well. Lastly, I enter the SSH credentials (username: msfadmin, password: msfadmin) and click the green "create" button to store the credentials.
Adding Targets

Back at the very top, I click the "Configuration" menu again, but this time choose the "Target" option in order to begin entering the information about the host that I will be running the vulnerability scan against.
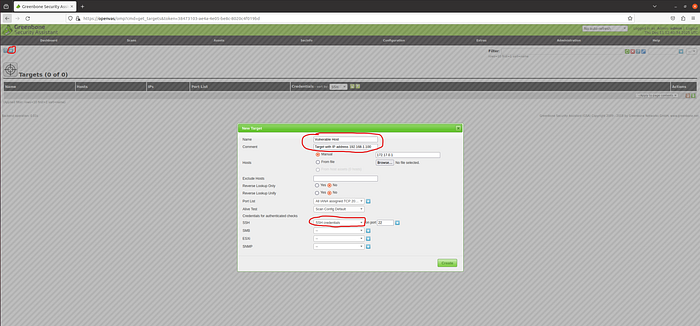
As before, I click the blue star in the upper leftmost corner of the window to bring up the menu that I need to enter the system details into. I'm going to name the target "Vulnerable Host" and add a comment stating "Target with IP address 192.168.1.100." I include this same IP address next to the selected "Manual" radio box in the "Hosts" section (please disregard the 172.17.0.1 address placed there in error). From here, I'm going to skip down to the "Credentials for authenticated check" section and in the dropdown menu next to "SSH" choose the name of the stored credentials that I made in the previous step ("SSH credentials") and also specify the port as 22 (SSH's default port). Having provided all the necessary information about my target, I click the green "create" button.
Initiating The Scan
Now it's time to begin scanning our target host, but before I begin, there are a few details that I need to provide OpenVAS about the scan itself.
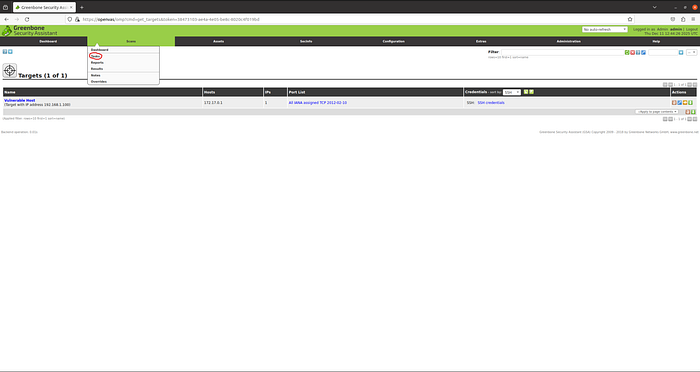
At the top of the screen, I click the "Scans" menu and choose the "Task" option from the dropdown.

Similar to before, I need to click the blue star icon in the leftmost corner of the next screen to bring up a menu. In this menu, I name my scan "First Scan" and provide the following comment: "Conducting a scan on host vulnerable-host." The Scan Target is already preset to "Vulnerable Host," but if I had multiple targets entered into OpenVAS, I would click the adjacent dropdown menu to choose the one I want to perform this scan against. I leave all other options set to default and click the green "create" button.
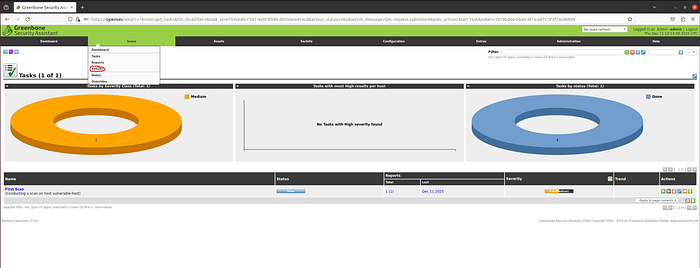
At the bottom of the page, we can see my "First Scan" that I just created, and to initiate it, I click the green play button under the "Actions" column. This scan will take approximately twenty minutes to complete. So, I'm going to skip ahead a bit to the results.
Viewing The Scan Results
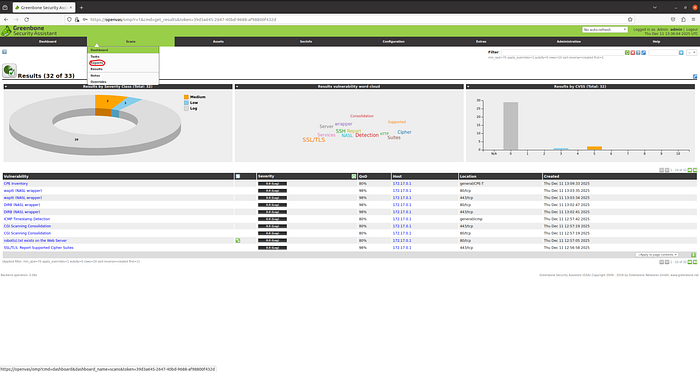
Back in the "Scan" menu, I choose the "Results" option. It looks like we have what appears to be some conflicting results. In the pie chart, which represents vulnerabilities by severity, it states that three vulnerabilities were found (2 medium and 1 low). However, in the bar graph, which represents results by CVSS (Common Vulnerability Scoring System), it states that it found eight vulnerabilities (5 medium and 3 low). This is probably due to CVSS and OpenVAS having different vulnerability classification standards. Perhaps OpenVAS' reports will shed some light on the root cause of these differences. To view the reports, I go back up to the "Scan" menu and choose the "Report" option.

There's only one option here for me to choose, but if there were multiple scans performed, then I would choose the date of the scan relevant to the report.

In this project, I'm not going to go down the rabbit hole of comparing the OpenVAS severity with the CVSS score; however, I provide an example of the details that a report shows. In the example above, we can see the exact nature of the vulnerability along with its severity and even the related ports.
Verifying Scan Results w/ Linpeas
It's always best practice to use multiple scanning tools to compare and contrast results. In this next phase of my project, I'm going to use a tool called Linpeas, which is going to inform me of the likelihood of a privilege escalation vector.
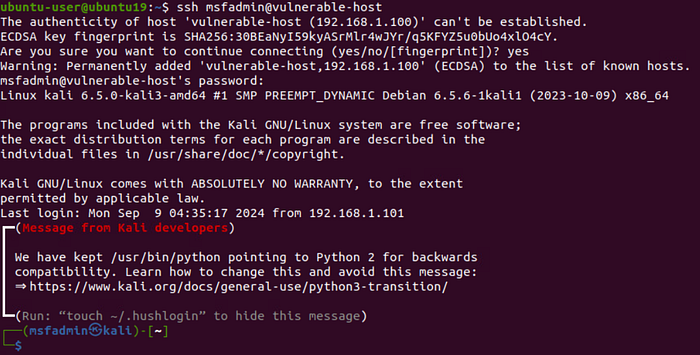
Returning to my Linux command terminal, I log in to our target host via SSH using the same "msfadmin" password that I used during the OpenVAS scanning (ssh msfadmin@vulnerable-host).

Now that I'm logged in to the vulnerable host, I use an "ls" command to see what is being stored in my current local directory. I find the linpeas shell script that I need in order to run the application (linpeas.sh).
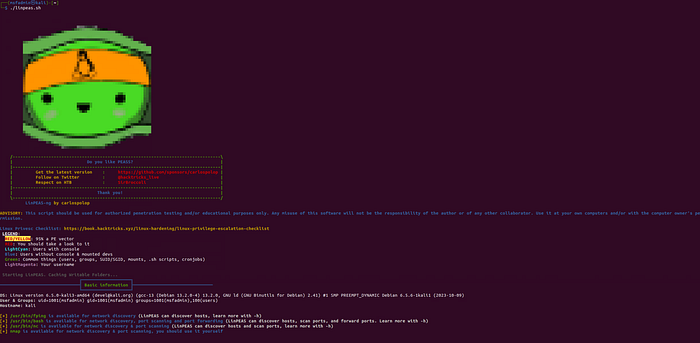
To initiate Linpeas, I simply type and execute the following command: "./linpeas.sh". One of the first things that we can see upon booting up Linpeas is its color-coded legend.
- Red text with a yellow background tells me that there is a 95% chance of the existence of a privilege escalation vector
- Red text tells me that I should look further into the finding
- Light cyan tells me which users have access to a console
- Blue text tells me which users don't have console access
- Green text tells me common things such as usernames, groups, shell scripts, cron jobs, etc., which by themselves wouldn't mean much but, when aggregated with details of the other colored text, could provide better context for potential vulnerabilities
- Light magenta tells me everywhere my username is listed
Unfortunately, I wasn't able to find any details to correlate with my OpenVAS scanning results. I would probably need to use another GUI-based scanning tool (such as Nessus) to compare the results to; however, I don't want to drift too far away from the scope of this project. That sounds like a great idea for a future project though… 🤔
Conclusion
In this project, we were able to see how the open-source tool OpenVAS can be used to conduct credentialed vulnerability scanning of a secure protocol and some of the means of analysis at our disposal. Also, we saw how we could use a command-line-based tool such as Linpeas to verify some of the initial findings in our first scan. You can watch the video walkthrough of this same project by clicking the link below. Until next time, take care of yourself and… SHOW YOUR WORK!!! 😉