
June 6, 2026
Stop Practicing in Production: Build an Ethical Hacking Lab Instead
Documenting my hands-on setup of a secure, virtualized sandbox using VirtualBox, Kali Linux, and Metasploitable2.

Samruddhi Raybhoge
3 min read
Project Overview
Introduction: A "lab" is simply a mini-network on your own laptop where you can safely practice attacks without touching real systems. The goal is to create a fully isolated, private virtual network on a single host machine for practicing penetration testing techniques.
Why I Built This: I needed a safe, legal space to analyze exploits, study malware behavior, and understand network protocols — without affecting production systems or using public networks.
Prerequisites: A laptop or PC with at least 8 GB of RAM, a decent internet connection, and basic familiarity with the command line.
The Setup: I created an isolated, private network inside my host computer. By using a Host-Only Network, the attacker and victim machines can communicate with each other without any interaction with external systems — ensuring 100% safety.
The Essential Toolkit
- Hypervisor- VirtualBox: For managing resources and deploying virtual machines.
- Attacking Machine- Kali Linux: Set up with offensive security tools.
- Target Machine- Metasploitable2: A purposely vulnerable Linux environment.
Steps for Setting Up the Lab
Step 1 — Installation
VirtualBox is open-source software that lets you run several isolated operating systems — called virtual machines — simultaneously on one computer.
sudo apt update
sudo apt upgrade
sudo apt install virtualbox virtualbox-ext-pack -y
sudo apt update
sudo apt upgrade
sudo apt install virtualbox virtualbox-ext-pack -yI configured VirtualBox to split my actual hardware (CPU, RAM, and storage) into multiple, separate "machines." Each acts like its own computer, even though they all share the same physical host.
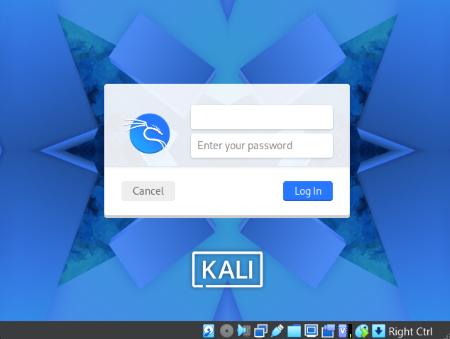
Kali Linux (Offensive Environment) — No manual ISO installation needed. To save time, I grabbed the official Kali Linux VirtualBox appliance (.ova) directly from their official site.
Importing it in VirtualBox via File → Import Appliance meant the hypervisor automatically configured all the CPU extensions and RAM, which made setup significantly easier.
Metasploitable2 (Vulnerable Target Machine) — For the target, I downloaded the Metasploitable2 disk image (.vmdk), created a new VM in VirtualBox, selected Ubuntu 64-bit as the base OS, and attached the .vmdk as the primary storage. This gets the vulnerable machine up and running quickly.
Step 2 — Setting Up the Network
In the settings for both Kali and Metasploitable2, I changed their network adapters from NAT to Host-Only. Both VMs are now on the same virtual switch completely isolated from my physical network and router.
Step 3 — Verification & Connectivity Testing
I started both VMs — Kali Linux and Metasploitable2.
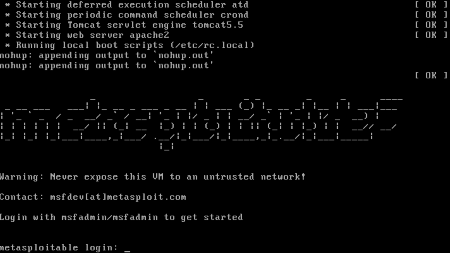
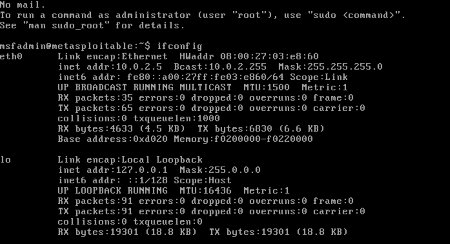
On Metasploitable2, I ran
ifconfigifconfigto check its internal IP address.
Step 4 — Ping Test
On Kali, I ran a simple ping to Metasploitable2's IP address:
ping <Metasploitable2-IP>ping <Metasploitable2-IP>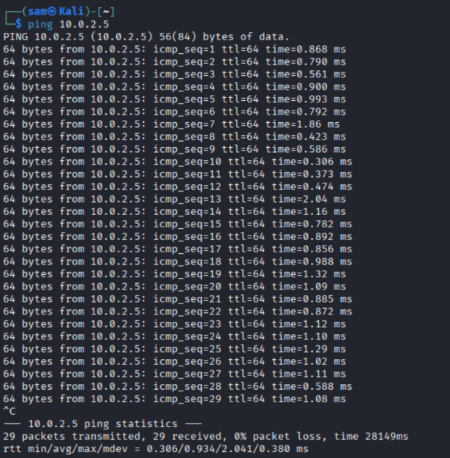
The Result: It worked — 29 packets sent, 29 received, 0% packet loss. The secure attack channel was up and running.
Conclusion
So, building this lab took a few hours, but honestly, that's way better than accidentally breaking something important on someone else's setup. Now I've got a spot where I can try things out, mess up, fix it, and actually learn without worrying.
If you're new to cybersecurity, don't wait for the perfect setup. Simply launch a couple of virtual machines, connect them, and start exploring. You pick things up so much faster hands-on — just make sure you're only practicing on your own systems.
Stay curious. Stick to the ethical path. And have fun with it.