

In this project, I put on my "black hat" and simulate a data breach of a fake company's network by exploiting several vulnerabilities. My goal is to gain entry into the victim's network, move laterally by pivoting to different internal hosts, and eventually access sensitive employee (or customer) information. Let's get started!
Initial Host Discovery and Compromise
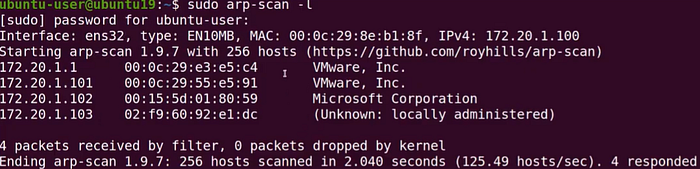
Starting off, I've already gained access to a host that's connected to the company's internal network (IP address: 172.20.1.1), and I want to find other devices to pivot to. I conduct active reconnaissance by running an ARP scan (sudo arp-scan -l). This ARP scan allows me to see the MAC (physical) addresses and IP addresses associated with all running machines on the network. The returned output tells me that three other devices are currently running: 172.20.1.101, 172.20.1.102, and 172.20.1.103. I can see that 172.20.1.101 is running a virtual machine like mine (172.20.1.1), and that 172.20.1.102 is likely running a Windows‑based operating system. However, I cannot determine what's running on 172.20.1.103. The ambiguity of this host piques my interest, so I'll begin my device enumeration there.
Enumerating The Details Of My First Targeted Host
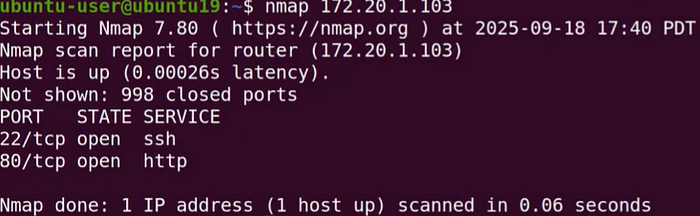
I begin by running an Nmap scan against 172.20.1.103 to determine which ports are open (nmap 172.20.1.103). This gives me insight into the device's purpose. The scan reveals that SSH and HTTP are in use, indicating that this device is likely an insecure web server that also allows SSH logins. Perhaps I can find SSH credentials by visiting the web service at 172.20.1.103.
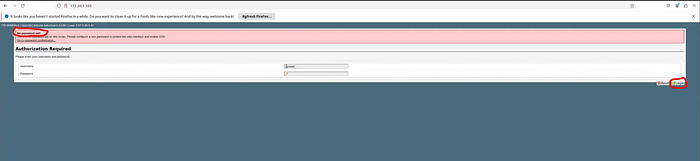
I open a web browser and navigate to the address, which brings me to a login screen. At first glance, several vulnerabilities are apparent. In the upper left-hand corner, there's a red message stating "No password set," and "root" is already pre‑filled as the username. This strongly suggests that all I need to do is click the "Login" button to proceed. So, I click it to test my theory.
Note: Above the "No password set" message is another line that reads "OpenWrt Attitude Adjustment." This indicates the device is running OpenWrt, which uses a writable filesystem with package management.
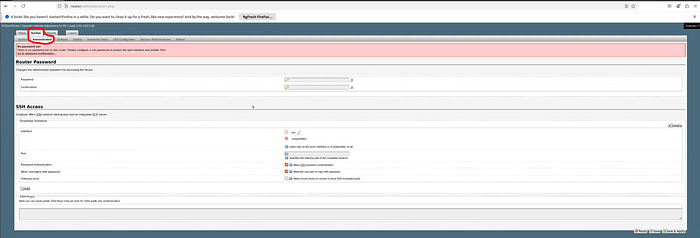
The next screen proves my theory wrong — but in a good way. The device actually appears to be a router! There should be plenty of network information available here. The first tab I visit is "System," followed by "Administration." Giving myself partial credit, I was at least half correct earlier: the router does allow SSH authentication and root user logins, without requiring a password.
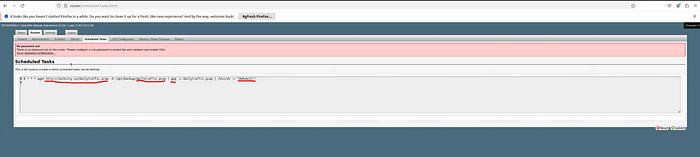
Next, I navigate to the "Scheduled Tasks" tab. It contains a wealth of information. The description mentions "crontab," a Linux-exclusive utility for managing scheduled tasks. This confirms that the router is running some distribution of Linux. Inspecting the task syntax reveals several details:
wget http://techcity.io/dailytraffic.pcap -O /opt/backup/dailytraffic.pcap | gpg -c dailytraffic.pcap | /bin/sh -c *deRxAcF1!*
First, the command references the URL http://techcity.io. This implies I'm inside Techcity's internal network.
There are also two references to a packet capture file called "dailytraffic.pcap." It's reasonable to assume this task runs daily based on the filename. If I gain access to the router's file directory, I could download this capture and inspect it with Wireshark.
Next, I see the use of gpg. GPG (GNU Privacy Guard) is a command-line tool for encrypting and signing data. This suggests the scheduled task downloads a packet capture daily and encrypts it.
At the end of the command, I see a Bourne shell reference (/bin/sh) followed by the string deRxAcF1!. This may be a symmetric encryption key used to decrypt the PCAP file. GPG supports both symmetric and asymmetric encryption, so if symmetric encryption is used, I may have found the "keys to the kingdom." I save the string for future use.
Making A SSH Connection w/ The Target Host
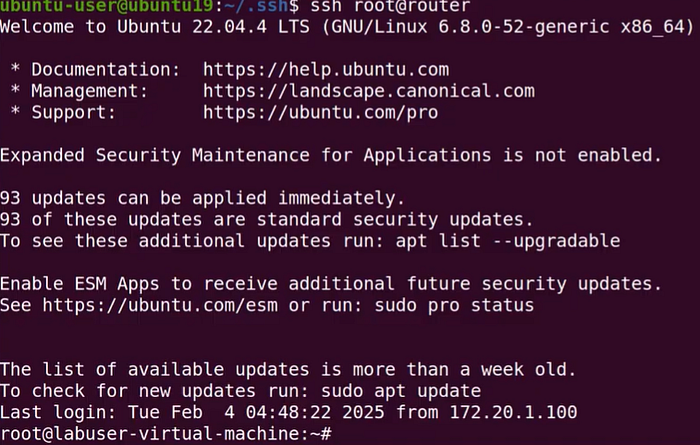
As specified in the router's Administration tab, I execute the following command to authenticate via SSH without a password: ssh root@router.

After successfully connecting to 172.20.1.103, I list the cron job to verify its details (crontab -l). Everything matches what I saw in the interface, including the suspected private key.

The command indicates that "dailytraffic.pcap" is stored in /opt/backup once downloaded, so I switch to that directory (cd /opt/backup).

To download the file to my local machine, I host a simple Python-based HTTP server on the target (python3 -m http.server 8080). This exposes the current directory over HTTP port 8080.
Port 80 is already in use by the router, so I use 8080 instead.
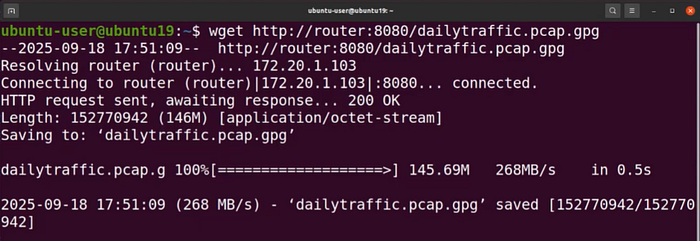
I then open a second terminal and download "dailytraffic.pcap.gpg" to my machine using:
wget http://router:8080/dailytraffic.pcap.gpg
Decrypting The PCAP File

I verify the file's presence using ls. It is indeed stored in my home directory.

I decrypt it using:
gpg -o dailytraffic.pcap -d dailytraffic.pcap.gpg

A prompt appears requesting a passphrase. I enter the suspicious string from earlier (deRxAcF1!).

The prompt disappears, and running ls again shows the decrypted "dailytraffic.pcap" file.
Analyzing The Packet Capture for Vulnerabilities
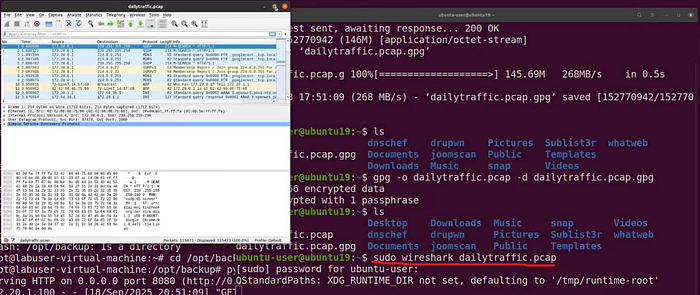
I open the file in Wireshark using:
sudo wireshark dailytraffic.pcap

The capture includes many HTTP packets. Since HTTP is unencrypted, its traffic is human-readable. I wonder whether any cleartext login credentials were transmitted during the capture.
I filter for HTTP packets containing login data using:
http contains "/login"
The results are underwhelming, so I narrow the filter to HTTP POST requests:
http.request.method == "POST"
After finding a POST request, I right‑click it and follow the TCP stream.
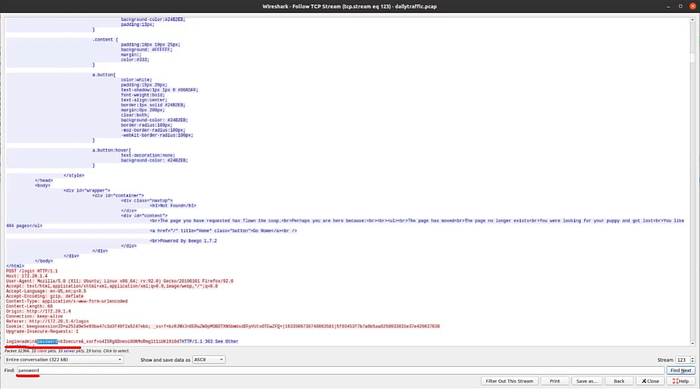
A new window displays the packet's content. Instead of scrolling through the text, I search for the term "password." Immediately, I'm taken to highlighted text showing login=admin and password=b3secure. These appear to be cleartext administrator login credentials—another example of why HTTP should not be used instead of HTTPS.
Authenticating To Another Device w/ The Found Credentials
Now that I have another set of credentials, I attempt to authenticate to the next device in my earlier list: 172.20.1.102.

I skip Nmap this time and navigate to the device via my browser (again using port 8080). I'm brought to an "OpenVPNAdmin" login page, which strongly suggests this is Techcity's VPN server. This increases the likelihood that the "admin" credentials will work.
I enter admin / b3secure and click "Sign In."
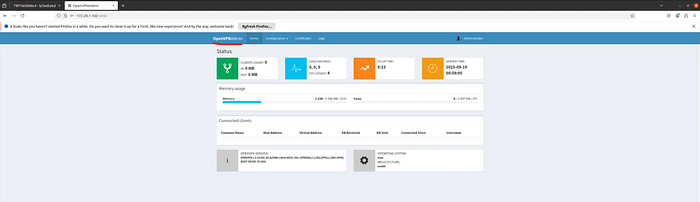
As expected, I successfully authenticate into Techcity's VPN administrator panel. I could establish persistence by allowing remote access from any IP or blacklisting legitimate users, but I won't do that here. Instead, I move on to the last IP address from my ARP scan: 172.20.1.101.
Accessing Techcity Employee Data
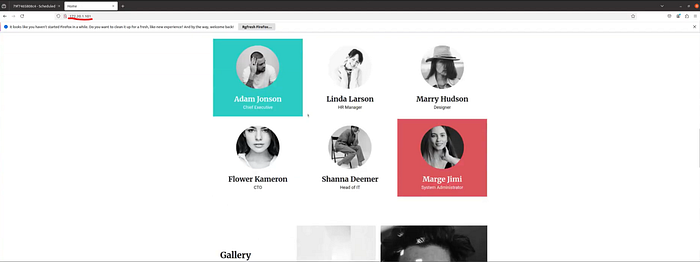
As before, I navigate directly to 172.20.1.101 in my browser. This time, I reach Techcity's webpage. At first, nothing appears valuable, but passive reconnaissance may reveal helpful information. Scrolling through, I find a list of employee names and positions. I take note of them; this may help me identify user accounts to target later.
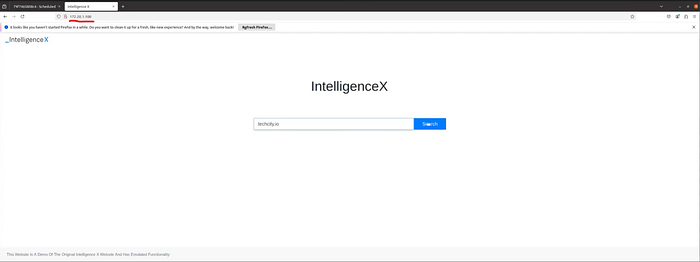
Although I seem to be out of active devices to explore, I decide to try 172.20.1.100. To my surprise, it brings me to Intelligence X, a search engine and data archive used for open‑source intelligence on emails, domains, IPs, URLs, and more.
Note: Intelligence X is normally accessed at https://intelx.io. It was simply assigned IP address 172.20.1.100 for this project.
I enter "techcity.io" into the search bar.

The results include an exfiltrated text file containing email addresses and passwords for Shanna (Head of IT) and Linda (HR Manager):
- shanna@techcity.io; P@ssword
- linda@techcity.io; techcity123
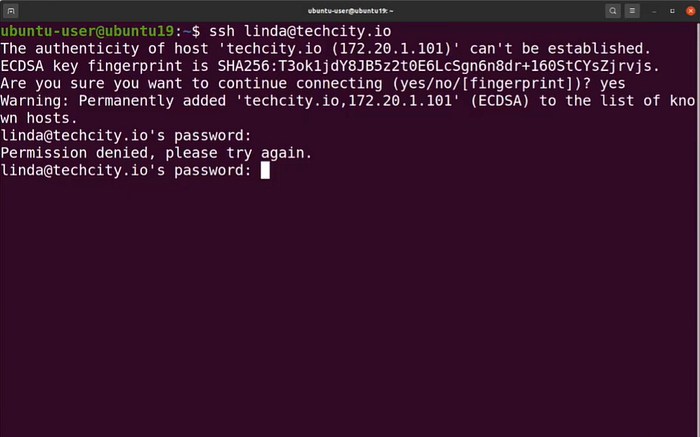
Armed with these credentials, I return to my terminal to attempt SSH connections to 172.20.1.101. I try Linda's credentials first, but the login fails — she has likely updated her password.

Next, I try Shanna's credentials.

BINGO! I'm in! This highlights an important lesson: after a breach, users should immediately change their passwords. A strong password policy requiring regular updates would have prevented reuse of this compromised credential. The simple passwords (P@ssword and techcity123) also reveal that Techcity's password policy lacks complexity requirements.

Once inside, I use ls to view available files and directories. Three stand out: client-payments, HR-sheet, and Payments. As Head of IT, Shanna's account likely has permission to access these directories.

I enter the HR-sheet directory (cd HR-sheet) and list its contents (ls). I find a CSV file: HR-Sheet1.csv.

Running cat HR-Sheet1.csv reveals a treasure trove of information: names, ID numbers, positions, phone numbers, addresses, and salaries of all employees. This would greatly facilitate any follow-up social engineering attack. Sensitive information like this should be protected using file-level encryption or, at minimum, password protection.
Below the employee data, I find a note referencing an update to a software application called "CI" along with a download location.
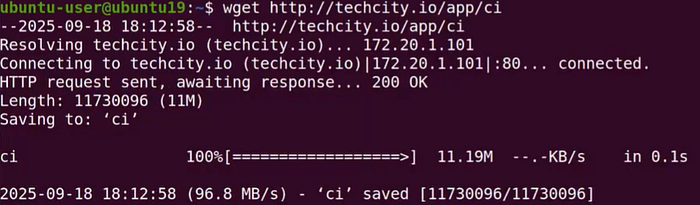
I open a new terminal (using my own account) and download the application with:
wget http://techcity.io/app/ci

I verify its presence using ls.

To run the CI app, I add execution permissions using:
chmod +x ci
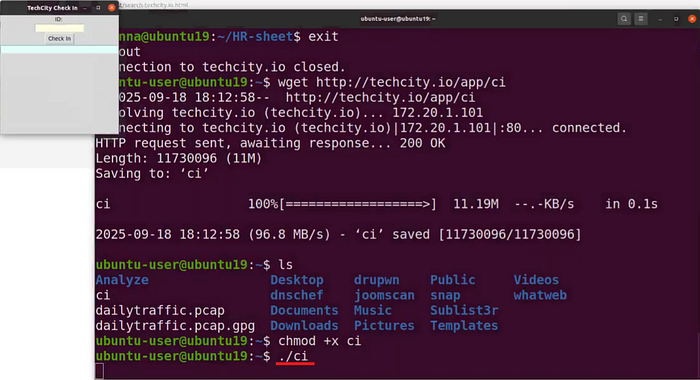
I launch it using ./ci. A small GUI opens requesting an employee ID. Now I wonder, where can I find one of those? 🤔 OH YEAH! I know…

Back in the terminal using Shanna's account, I have a list of employee IDs to my disposal. Which one should I use? The CEO's of course! I copy the CEO's ID, enter it into the CI application, and click "Check In." The program confirms the check-in and welcomes Kailyn (the CEO). Although the CI app doesn't have defined functionality for this project, it's easy to imagine the level of access a CEO might have — possibly including sensitive financial and client data. If employee ID acts as the only form of non‑repudiation, any malicious actions taken with it could be attributed to the actual employee.
Conclusion
The purpose of this project was to demonstrate various attack vectors a malicious user could exploit to move laterally through a network, pivot to different systems, and access sensitive data. Defense-in-depth is critical when protecting corporate environments. Firewalls, strong password policies, and file-level encryption are just a few of the controls Techcity could implement to prevent future breaches.
You can watch the video walkthrough of this project by clicking the link below. Until next time, take care of yourself and… SHOW YOUR WORK! 😉