
Before attackers find them, security professionals use tools to see what's exposed — one of the most popular being Nessus.
In this blog, we'll understand what Nessus is, why it matters, and how to install it on Linux step by step, even if you're completely new.
What Is Nessus?
Nessus is a vulnerability scanning tool that checks systems, servers, and networks for known security weaknesses.
- Developed by Tanable (a cybersecurity company that provides an exposure management platform)
- Used by companies, researchers, and students.
- Helps identify misconfigurations, outdated software, and known vulnerabilities
Why Nessus Matters?
- Helps organizations know what's exposed
- Prevents attacks before damage happens
- Used in audits, compliance, and learning
- A great starting tool for cybersecurity beginners
How to install Nessus on Linux?
In this guide, we'll install Nessus Essentials on Ubuntu/Debian-based Linux systems. The process is simple and beginner-friendly.
Step 1: Download Nessus Essentials
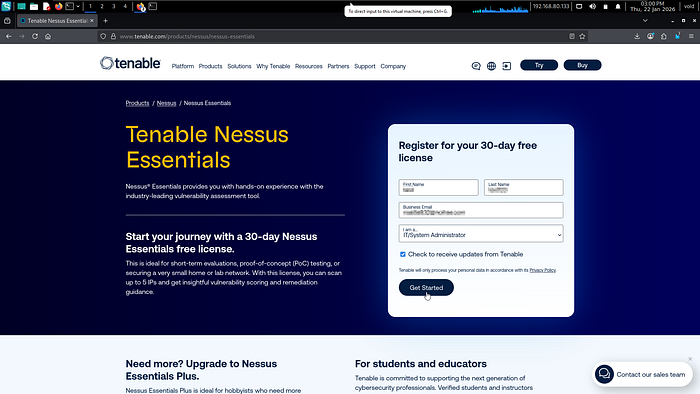
Visit the official Tenable website, Register with an email id and download the Nessus Essentials (.deb) package for Linux.
Download link for Nessus Essentials: https://www.tenable.com/products/nessus/nessus-essentials
After Opening the link, Register yourself.
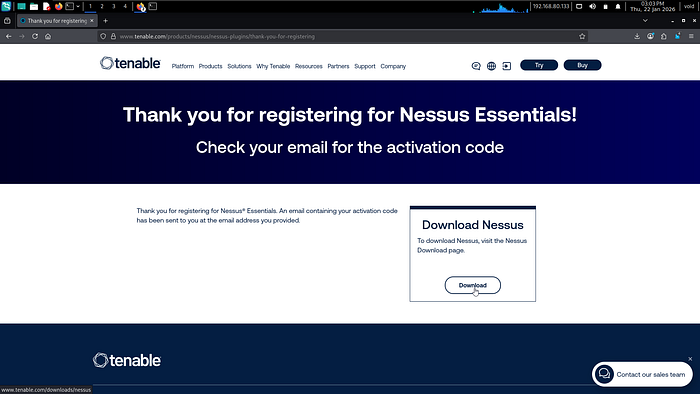
After register, click on "Download" to download nessus.
Select Platform accourding to you Linux Distribution and Download the Nesses.
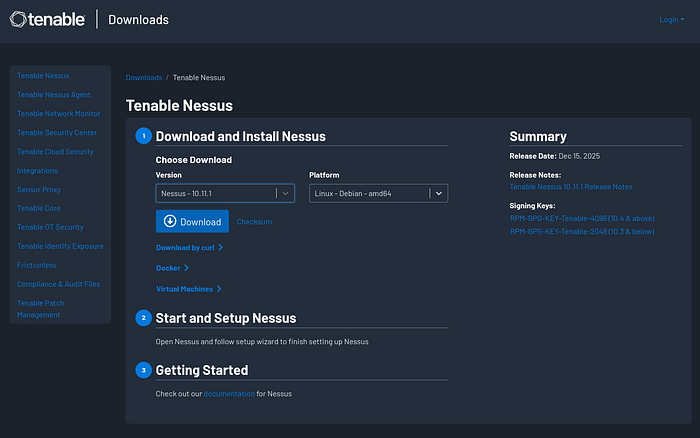
Step 2: Install the nessus .deb file
Now Open Terminal and go to the directory where Nessus is downloaded (Generally ~/Downloads).
cd ~/Downloads
sudo dpkg -i <Nessus-deb-file>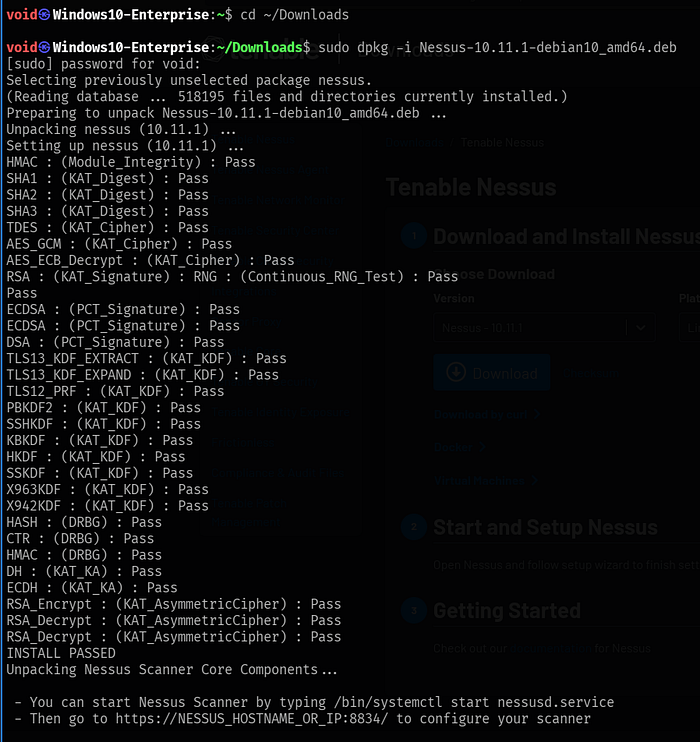
Step 3: Start the nessusd.service
After installation, start the nessus service using below command.
sudo systemctl start nessusd.serviceConfirm whether the service is started or not using below command:
sudo systemctl status nessusd.service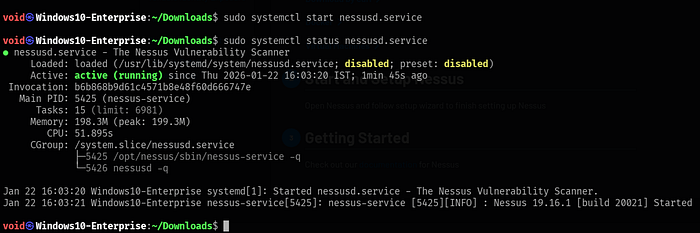
Now, open the browser in the Linux, and go to you localhost on port 8834
Here: https://localhost:8834
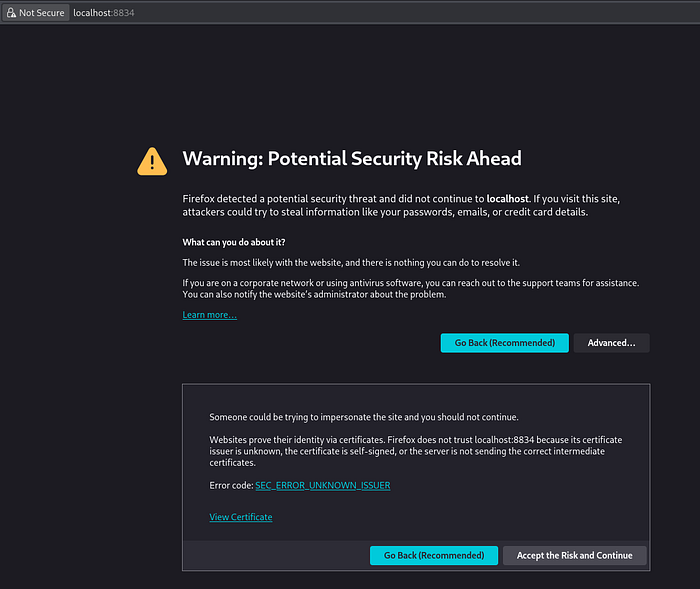
Click on "Advanced" > "Accept the Risk and Continue"
Step 4: Quick Setup for Nessus
After the visiting: https:localhost:8834
You can see a Welcome Screen.
Here, check the box "Register Offline" then click on "Continue"

We are using free version of Nessus Essentials, Therefore select Nessus Expert option and click on "Continue".

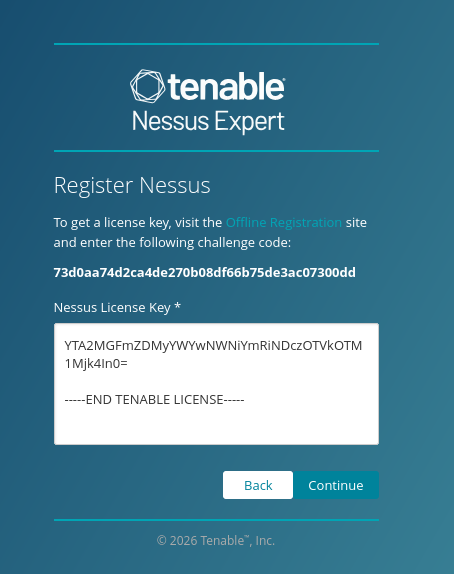
Now, Copy the challenge code and click on "Offline Registration" for Generating license Key.

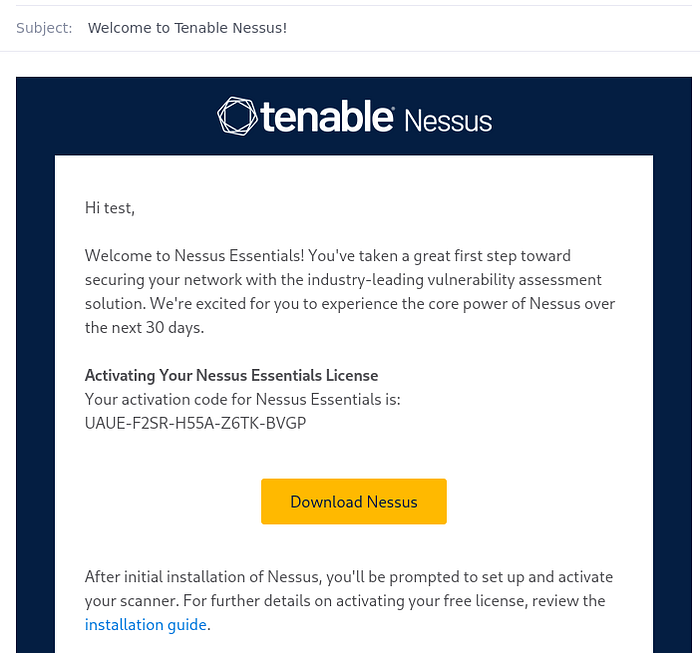
Paste the challenge code and activation code (Check your mail inbox & look for mail with activation code)
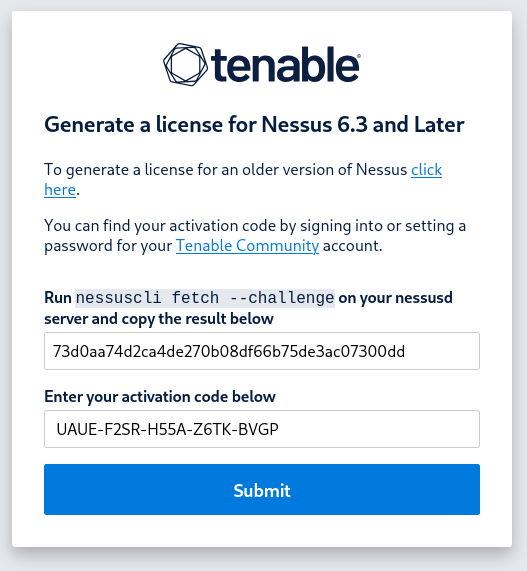
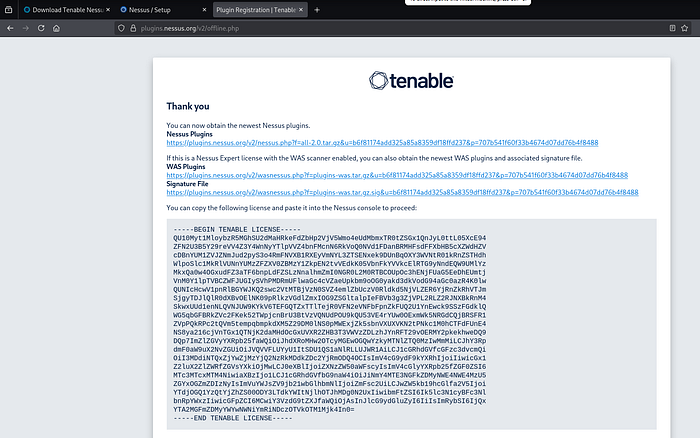
Now, copy the license and paste it on registration page and click "Continue".
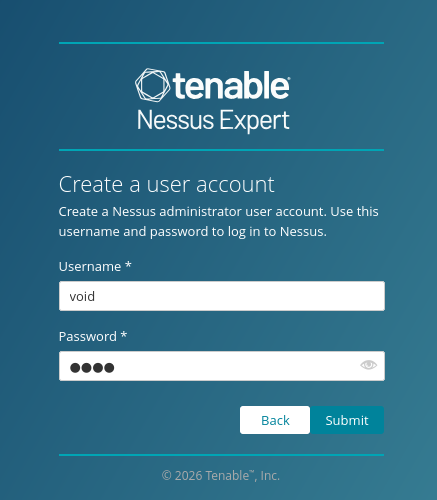
Now, Set the username and password.
Now, wait for a minute and let it setup
Step 5: Configure Plugins
After the Setup, We have our Nessus Dashboard. But if you close look at the dashboard, you can notice scan button is disabled !
Before starting scan, we have to configure our plugins.
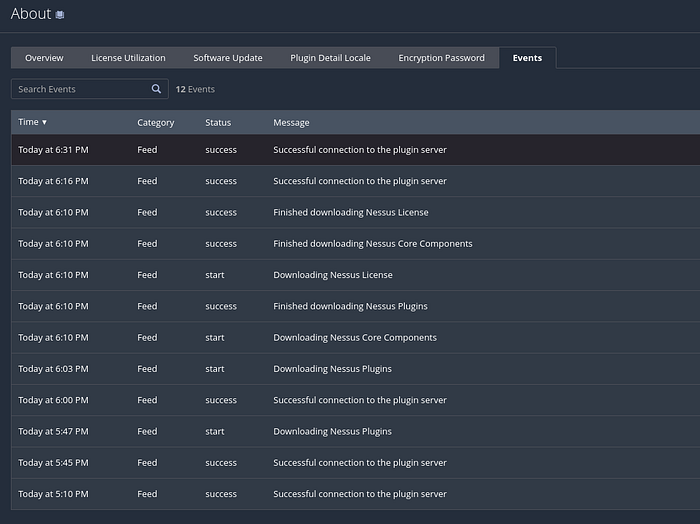
Now, go to: Settings > About > Software Update
Then select "Update all components", and click on "save".
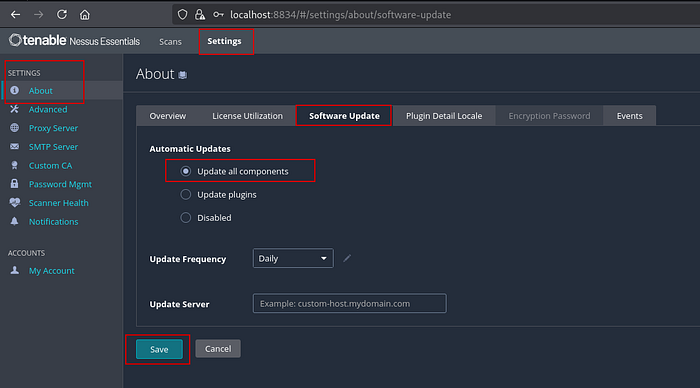
Wait for a moment and you can see, our plugins are started to download.
Go to: Settings > About > Events
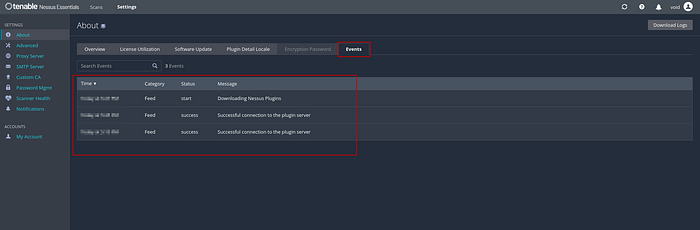
After few minutes, our plugins are downloaded and configured. Now, wait for few minutes and logout, close your tab and re-login with your credentials.
After re-login, you can see, now our scan option is enabled !
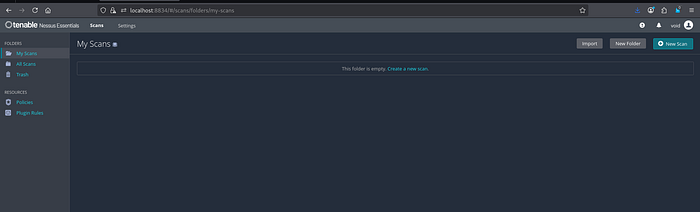
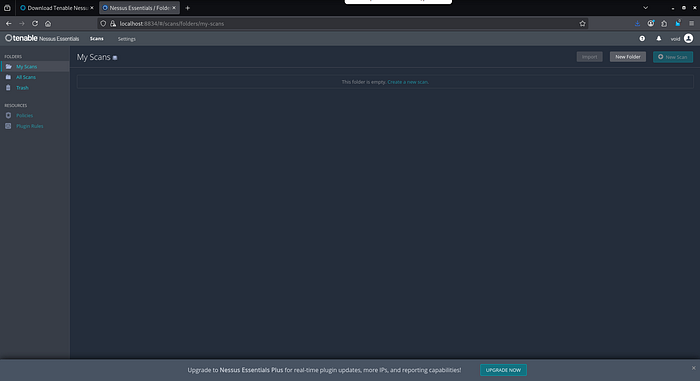
At this point, you're looking at the Nessus dashboard — which means your installation was successful and the scanner is ready to use.
For many beginners, this is the first time they interact with a real-world vulnerability scanning tool used by professionals. From here, you can start exploring scan templates, understand how vulnerabilities are categorized, and learn how security teams identify risks before attackers do.
If this is your first time installing Nessus,
- what was the most confusing or interesting part of the process?
- And if you've used vulnerability scanners before, how would you compare Nessus so far?
- Share your thoughts — your experience might help someone else starting out.
In the next post, we'll run our first scan and understand how to read Nessus results without getting overwhelmed.