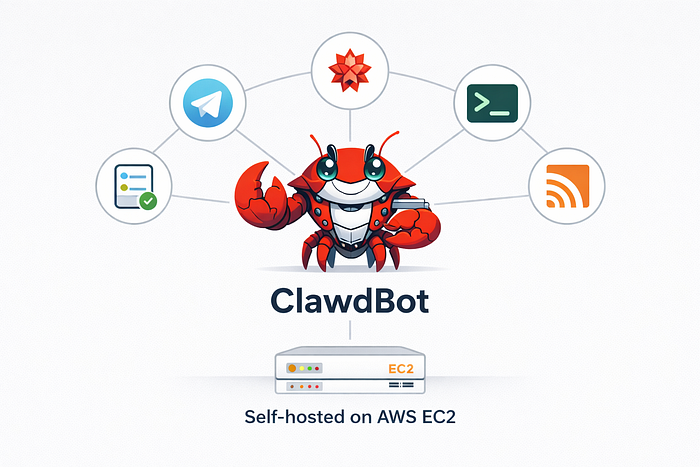


Learn how to securely host ClawdBot on Amazon EC2 with this detailed, step-by-step guide. From EC2 setup and installation to advanced security hardening, this article explains how to run a private, always-on AI assistant safely on AWS. Perfect for professionals who want full control over their personal AI infrastructure
You will:
- Launch an EC2 VM (Ubuntu 22.04 LTS recommended).
- Harden the instance (SSH keys, UFW firewall, fail2ban, limited inbound ports).
- Install Node.js 22+, pnpm (optional), and ClawdBot.
- Run ClawdBot as a systemd service and connect a messaging channel (Telegram recommended for fewer quirks).
- Configure logging/monitoring and implement strong security restrictions (do not expose the Gateway to the public internet — more on this below).
Requirements:
- Use a dedicated AWS account or a dedicated OU/project for personal infra if possible. Don't reuse the account you use for sensitive production workloads.
- Region: choose one close to you for latency (e.g., ap-south-1 for India).
- Use AWS IAM best practices: create an admin user for setup and then operate with least-privilege IAM users/roles for day-to-day tasks.
Step 1: Launch an EC2 instance (Ubuntu 22.04 LTS)
- Sign in to AWS Console → EC2 → Launch Instance.
- Choose AMI: Ubuntu Server 22.04 LTS (or the latest 22.04 image).
- Instance type: t3.small or t3a.small is fine for light usage. For production/24×7 and many skills, choose t3.medium or higher. (CPU/RAM depends on workload and LLM usage.)
- Key pair: create (or reuse) an SSH key pair. Download the .pem file and keep it secure.
- Network: put the instance in a private subnet if you have a VPC with both public and private subnets. If you don't, use the default VPC but restrict inbound security group rules (see firewall section).
- Storage: 20–50 GB EBS (gp3) is usually enough; increase if you expect logs or local datasets.
- Tags: add Name=clawdbot-<yourname>.
- Security group: initially allow only: - SSH (TCP 22) from your IP (not 0.0.0.0/0). - No port 18789 open to the world. I will explain how to access the Gateway safely via SSH tunnel or Tailscale below.
- Launch the instance.
Step 2: First SSH and basic hardening
Replace ec2-user with ubuntu (Ubuntu AMI default), YOUR_KEY.pem and EC2_PUBLIC_IP:
# on your local machine
chmod 400 YOUR_KEY.pem
ssh -i YOUR_KEY.pem ubuntu@EC2_PUBLIC_IP
if your pem key is located in downloads folder the command will be as below:
ssh -i ~downloads/filename.pem ububtu@ec2_public_ip4_ipWhen you connect for the first time, it asks as below:
The authenticity of host 'xxxxxx' can't be established.
ED25519 key fingerprint is SHA256:xxxxxxxxx.
This key is not known by any other names.
Are you sure you want to continue connecting (yes/no/[fingerprint])?
Type yes and you will get connected. once connected run the below commands.
# update OS
sudo apt update && sudo apt upgrade -y
When you run above, the os will get updated. When it finishes, do not reboot yet unless it explicitly asks you to.
# create a non-root user
sudo adduser clawd
When you run above, you will be asked to set a password. set a strong password and few details as below
Changing the user information for clawd
Enter the new value, or press ENTER for the default
 Full Name []:
 Room Number []:
 Work Phone []:
 Home Phone []:
 Other []:
Is the information correct? [Y/n] y
info: Adding new user `clawd' to supplemental / extra groups `users' ...
info: Adding user `clawd' to group `users' ...
ubuntu@ip-1-xx-xx-xx-xx:~$
After you ran the above, your new user will be successfully created. Then run the below commands one after another.
sudo usermod -aG sudo clawd

# set up SSH keys for the new user (paste your public key)
sudo mkdir -p /home/clawd/.ssh
sudo chmod 700 /home/clawd/.ssh
Then open a new terminal keeping the connected terminal to ec2 connected one active and run the below command
ssh-keygen -t ed25519 -C "username@mac"When prompted:
- File location → press Enter (accept default)
- Passphrase → you can press Enter (empty is fine) (or set one if you want extra security)
You should see the below:
Your identification has been saved in /Users/your_user_name/.ssh/id_xxxxx
Your public key has been saved in /Users/your_user_name/.ssh/id_xxxxx.pub
Now run the below command:
cat ~/.ssh/id_edxxxxx.pubyou should see something like below:
ssh-edxxxxx XXXXXXXXXXSSSSSSSSSSDDDDD.. your_user_name@macNow go back to the EC2 connected terminal the below commands. when asked for password, type your full ssh key (ssh-edxxxxx XXXXXXXXXXSSSSSSSSSSDDDDD.. your_user_name@mac) in the below commands.
sudo tee /home/clawd/.ssh/authorized_keys <<'EOF'
ssh-rsa AAAA...your_public_key... user@host
EOF
sudo chown -R clawd:clawd /home/clawd/.ssh
sudo chmod 600 /home/clawd/.ssh/authorized_keys
Next: disable root SSH login and password auth (edit /etc/ssh/sshd_config):
sudo sed -i 's/^PermitRootLogin.*/PermitRootLogin no/' /etc/ssh/sshd_config
sudo sed -i 's/^PasswordAuthentication.*/PasswordAuthentication no/' /etc/ssh/sshd_config
sudo systemctl reload sshd
once you are done with above,
Install basic security tools. Please remember: Never enable UFW until:
- You can SSH successfully as
clawd
ssh clawd@xx.xx.xx.xx
- You know your current public IP — To find run
If you enable UFW without allowing your IP, you will lock yourself out.
# run below commands for ipv4 ip address
# firewall and fail2ban
sudo apt install -y ufw fail2ban

# enable UFW and allow SSH from your IP only
sudo ufw default deny incoming
sudo ufw default allow outgoing
sudo ufw allow OpenSSH
sudo ufw allow from YOUR_IP_ADDRESS to any port 22 proto tcp
sudo ufw enable

# Verify firewall status
sudo ufw status verbose

# basic fail2ban setup (protect SSH)
sudo systemctl enable --now fail2ban
sudo systemctl status fail2ban
# Expected output
# Active: active (running)
IMPORTANT: Many reports show ClawdBot Gateways left open and accessible to the internet; limiting SSH and closing all other ports is the first line of defense.
Step 3: Install Node.js 22+ and pnpm
ClawdBot requires Node 22+ (installer checks for it). Install Node 22 via NodeSource:
# run as the non-root user (clawd)
sudo -i -u clawd bash <<'EOF'
curl -fsSL https://deb.nodesource.com/setup_22.x | sudo -E bash -
sudo apt install -y nodejs build-essential
node --version
npm --version

# optional: install pnpm (recommended by many ClawdBot guides)
npm install -g pnpm
pnpm --version
EOF
Step 4: Install ClawdBot — run as your non-root user
Still as user clawd:
# run official installer (installer will detect OS & install)
sudo -i -u clawd bash <<'EOF'
curl -fsSL https://clawd.bot/install.sh | bash
EOF
The installer usually installs clawdbot CLI globally. If you prefer to clone the repo and run manually:
sudo -i -u clawd bash <<'EOF'
git clone https://github.com/clawdbot/clawdbot.git ~/clawdbot
cd ~/clawdbot
pnpm install   # or npm install
pnpm build     # if required by the repo workflow
EOF
Step 5: Run clawdbot onboard and initial configuration
Start the onboarding:
# as user clawd
clawdbot onboard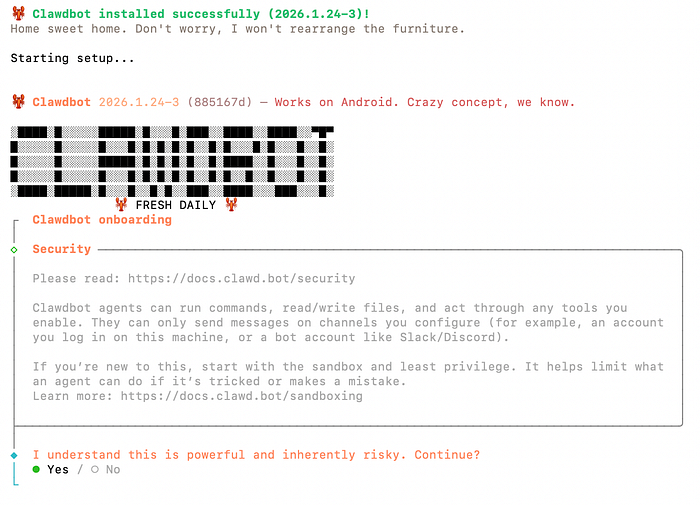
The wizard will ask:
- Workspace path (default ~/clawd).
- Which AI model (Anthropic/Claude or OpenAI/GPT/ Gemini) and API key.
- Which messaging provider (Telegram recommended for simplicity).
- Whether to bind to loopback only (recommended).
Important security choice: Bind the Gateway to loopback (127.0.0.1) only unless you have a secure reverse proxy or VPN. Binding to 0.0.0.0 without authentication exposes the admin Gateway on port 18789, which the community has found widely exposed. Always prefer loopback + SSH tunnel / VPN / Tailscale.
When asked, paste your Anthropic or OpenAI API key (or a dedicated key with minimal permissions). Do not paste production or high-privilege keys; create dedicated keys per service if possible.
Connecting Telegram
On telegram search for @botfather and select the official telegram bot creation channel.
Type /newbot, give a name for your bot (example: clawdbot asssitant) and give a username as per instruction must end with bot (clawd_bot) and then you will be given a token.
Paste the token in your terminal to connect with telegram.
when you message for the first time, you are asking to authorize on telegram. copy the authorization code and run the below command on terminal logged in as clawd user:
clawdbot pairing approve telegram PAIRING_CODERestart the service once connected:
sudo systemctl restart clawdbot.service
sudo journalctl -u clawdbot.service -f
Once you run above commadn, your telegram bot is authorized. now you can start chatting.
Optional Step 6: Start ClawdBot as a systemd service
Create a systemd unit so ClawdBot restarts on reboot. As root or sudo:
sudo tee /etc/systemd/system/clawdbot.service > /dev/null <<'EOF'
[Unit]
Description=Clawdbot service
After=network.target

[Service]
User=clawd
WorkingDirectory=/home/clawd/clawd
ExecStart=/usr/bin/env node /home/clawd/.local/bin/clawdbot gateway --port 18789 --bind 127.0.0.1
Restart=always
RestartSec=5
Environment=NODE_ENV=production

[Install]
WantedBy=multi-user.target
EOF

sudo systemctl daemon-reload
sudo systemctl enable --now clawdbot.service
sudo systemctl status clawdbot.service
Adjust ExecStart path based on where the clawdbot binary is installed (which clawdbot will show the path).
Step 7: Accessing the Gateway securely (do NOT open port 18789 to world)
Do not open the ClawdBot Gateway port to 0.0.0.0 (internet). Instead, use one of the secure access methods below.
Option A: SSH local port forwarding (recommended for initial setup)
On your local machine:
ssh -i YOUR_KEY.pem -L 18789:127.0.0.1:18789 ubuntu@EC2_PUBLIC_IP -N
# then browse to http://127.0.0.1:18789 on your local browser to access the Gateway UI
This tunnels your local port 18789 to the instance's loopback 18789. No Gateway exposure to the public internet.
Option B: Tailscale (recommended for persistent secure access)
Install Tailscale on the EC2 instance and your personal device, then access the instance using the Tailscale IP. This avoids exposing any ports to the internet and provides secure mesh networking.
Option C: Reverse proxy with authentication and TLS (if you must expose)
If you must expose the Gateway to the internet, put an authenticated reverse proxy (e.g., Nginx with client certificate auth or OAuth via OAuth2 Proxy) in front of it, and require strong authentication (not just IP allowlist). But community guidance strongly prefers no public exposure.
Critical security rules
- Do not expose port 18789 to the public internet. Bind to 127.0.0.1 and use SSH tunnel/Tailscale/VPN. (Community reports show many exposed instances; this is high risk.)
- Use least privilege for API keys and skills. Rotate keys and restrict scopes.
- Run as an unprivileged user, enable firewall/fail2ban, and disable password SSH.