

This article aims to provide a setup for MacOS that works as minimally as possible while providing the user with the maximum focus, productivity, and efficiency.
It will cover general settings, applications, shortcuts, and various tips that will help turn MacOS into a distraction-free environment, made for optimal work.
Getting Started
The first step to productivity is always minimizing distractions in order to focus on the tasks ahead. To do this, we will make a couple of drastic changes to the dock, desktop, and finder.
The Dock
Hide the Dock Entirely!
For the most part, the dock is useless. So it would be convenient to see it only when we need to use it.
To do this, we can navigate to System Preferences → Desktop & Dock → Automatically hide and show the dock
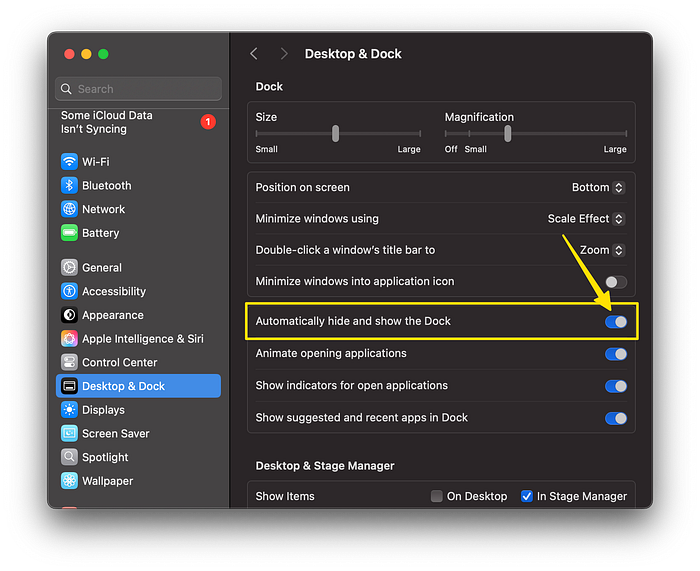
Now the dock will only show up once we hover the cursor near the bottom of the screen.
‼️ PRO TIP
By default, the animation of opening and closing the dock is quite slow, taking about 1.4 seconds. It may not seem like a lot, but it is quite annoying.
Thankfully, this could be fixed using the command line. Here is how:
Open a terminal app of your choice; you can find it either in the applications folder or by searching in Spotlight.
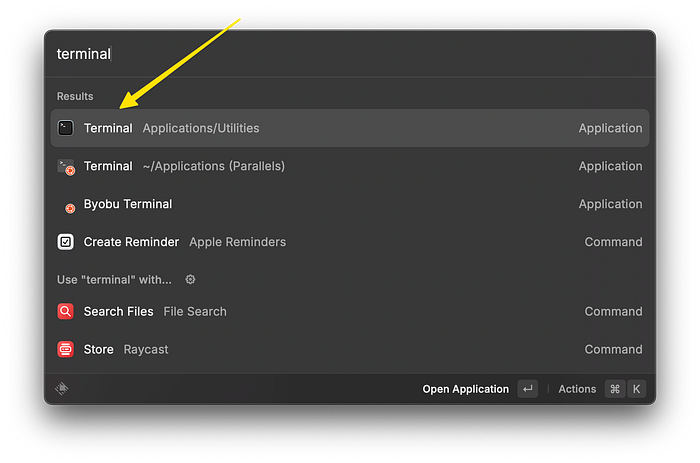
Then paste in the following command and hit enter:
defaults write com.apple.dock autohide-time-modifier -float 0.15;killall Dock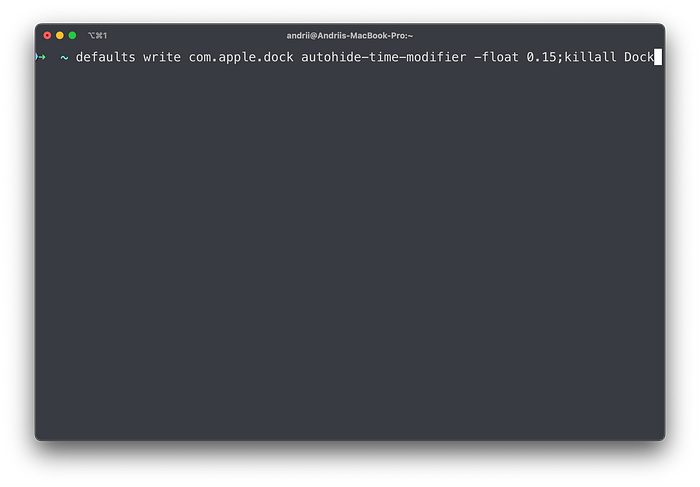
Now we have reduced the animation speed to 0.15 seconds. This is the perfect speed for it to be fast but not have any uncomforable sharpness or aesthetic displeasure.
You can also experiment with your own speed, where in the command it says "-float 0.15", just enter your own number in seconds.
If you prefer the default animation speed, you can always revert back by entering this command:
defaults delete com.apple.dock autohide-time-modifier;killall DockClean up the Dock

Ideally, the dock should have 3–5 applications, those which you use on an daily basis. This is because the dock will quickly get filled up with your opened applications when you work.
Don't make the mistake of keeping applications in the dock for the purpose of opening them. That's what Raycast is for, which we will cover later.
Make sure your dock is very minimal and only consists of the absolute essentials.
The Desktop
The next step is cleaning up the desktop, and by far the most useful feature is using "Stacks."
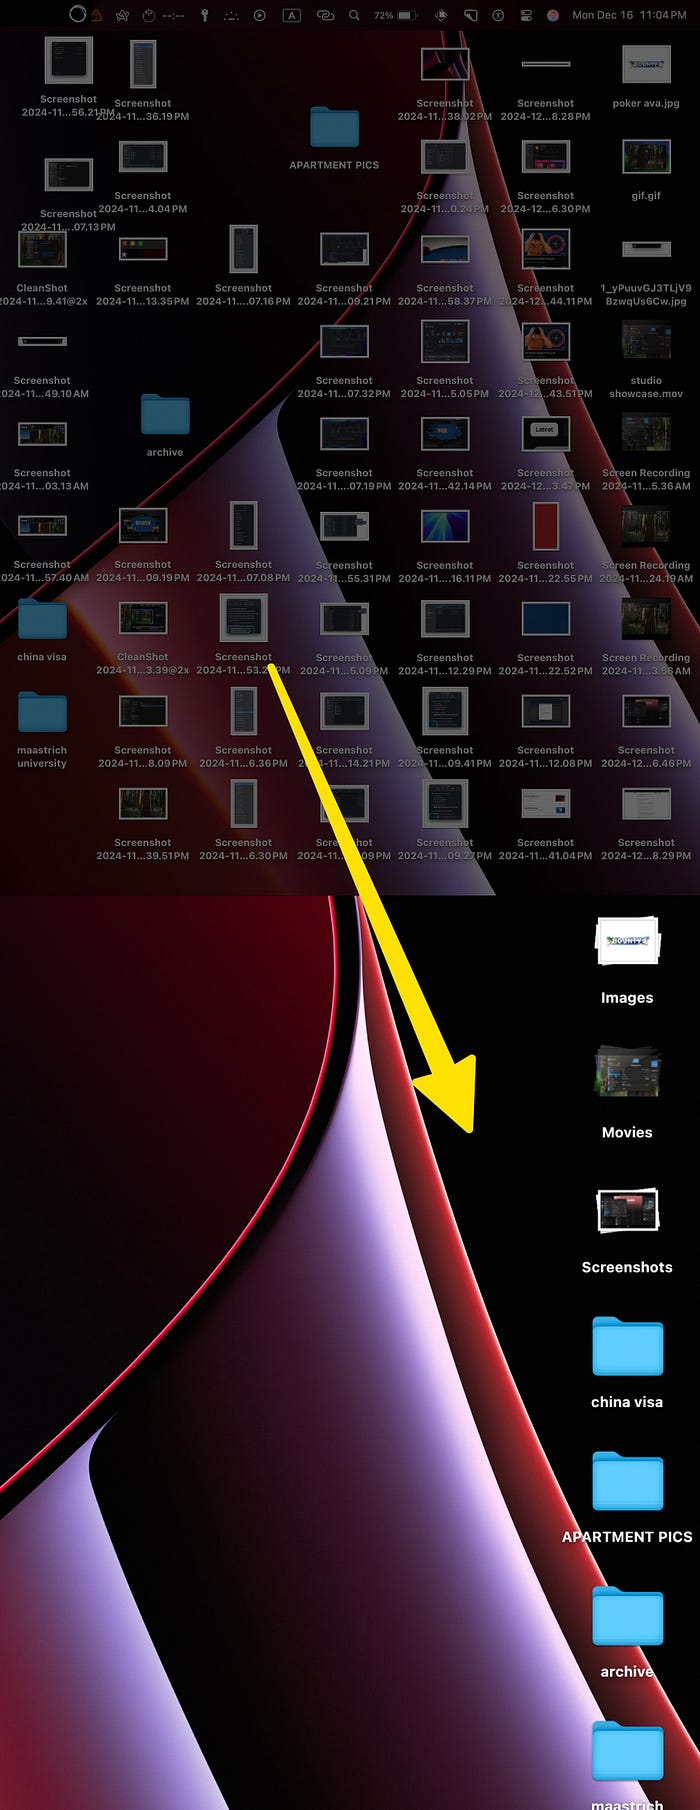
Stacks will organize all the files into their own sections, giving the desktop a clean look and feel.
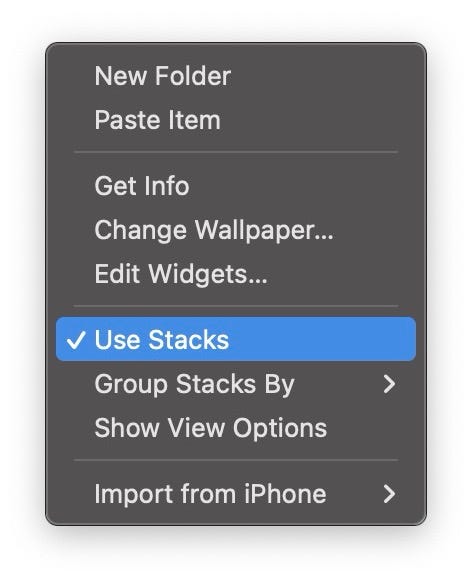
To do this, right-click anywhere on the desktop and select "Use Stacks."
Adding Widgets to the Desktop
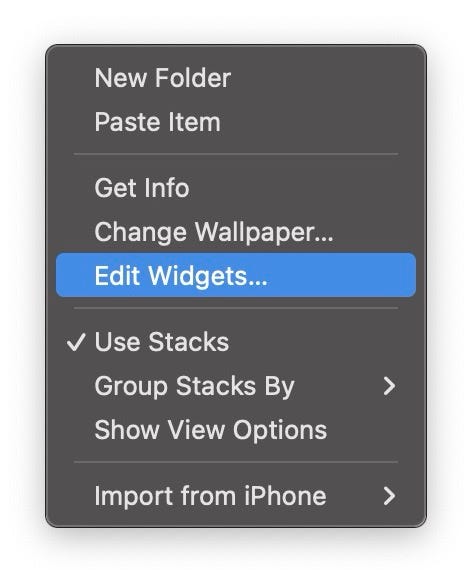
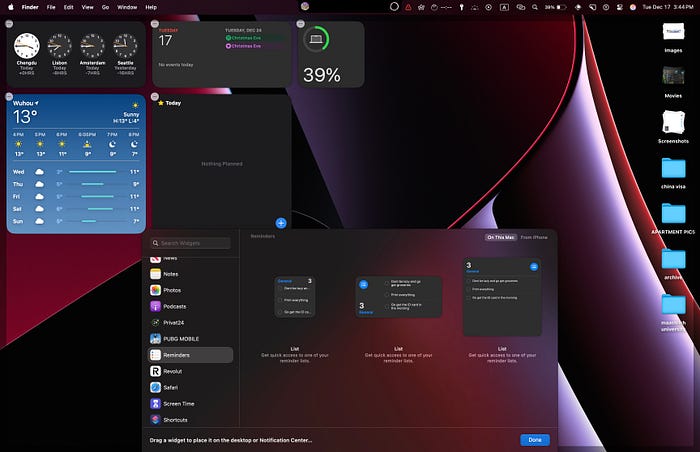
Having widgets on the desktop can both add aesthetics and functionality to MacOS. To add widgets, right-click on the desktop and select "Edit Widgets."
Then in the menu that pops up, drag and drop the widgets you find useful:
‼️ PRO TIP
We could have the desktop entirely empty until we left click to see all the items. This may not be so practical, but if I prefer it this way, there may be people who would like this as well.

This can be achieved in the System preferences, Under Desktop & Dock
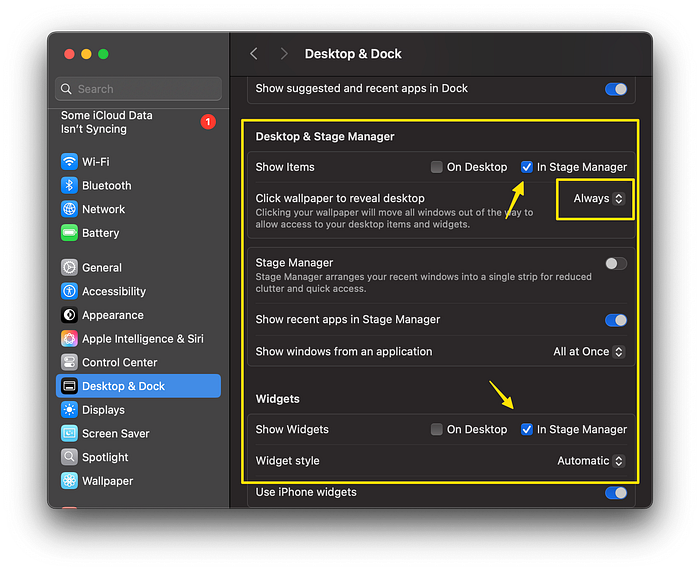
Under the section of Desktop & Stage Manager, copy the settings as they are on the image for both widgets and items.
The Finder
Basics
Firstly, it would be great to have a general idea of how much storage we have, as well as know our location within folders.
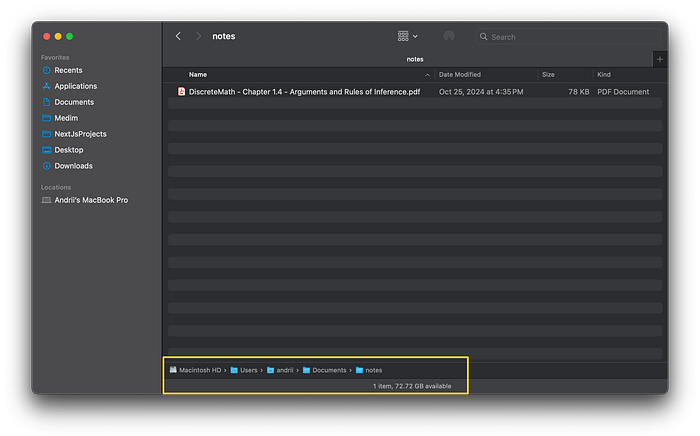
These are called the Path and Status bars, and they could be turned on in the top bar by clicking on View → Show Toolbar & Show Path Bar.
Sidebar
Navigate to the Finder settings by using the shortcut CMD + , (comma) and locate the "Sidebar' tab.
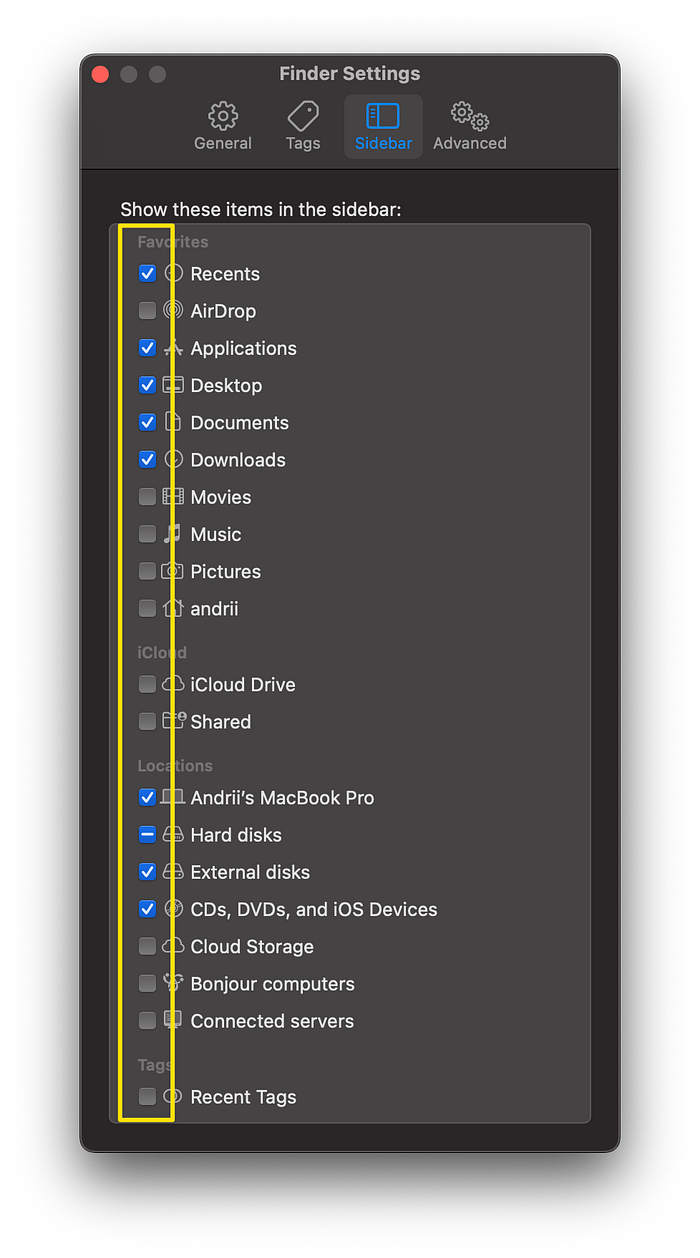
Here we can edit the sidebar to fit our needs, as it has far too many tabs by default.
The setup comes down to personal preferences. As for myself, I like to keep the sidebar very minimal.
Toolbar
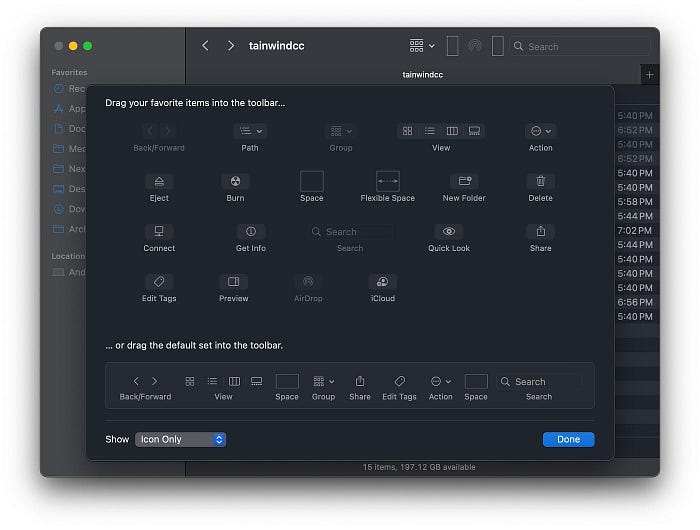
The toolbar could be customized by right-clicking in the finder and selecting "Customize Toolbar." From here, its dragging and dropping the tools we like and removing the ones we don't.
Install Raycast
Now that we have setup our Mac to be minimal and productive, we can start looking at some applications. My favourite by far is Raycast.
Raycast is a miracle replacement for Spotlight, which completely reimages the way macOS is used. It's free and could be downloaded here.
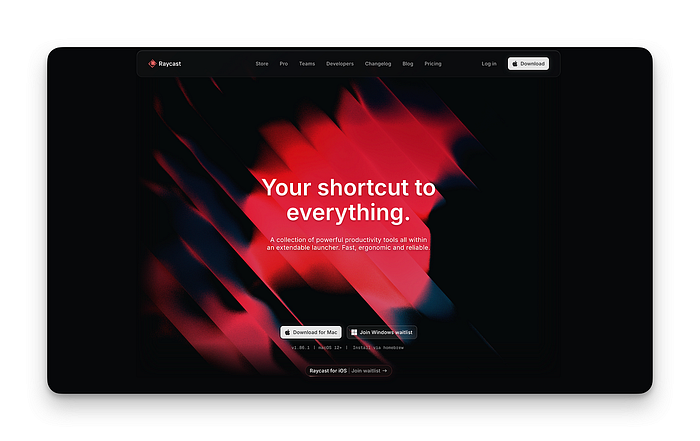
We will now be able to open apps, search for files, manage windows, use a calculator, or even interact with third-party software all from a single prompt window.
Once you get used to it, MacOS becomes a matter of shortcuts and commands, enhancing productivity and streamlining workflows.
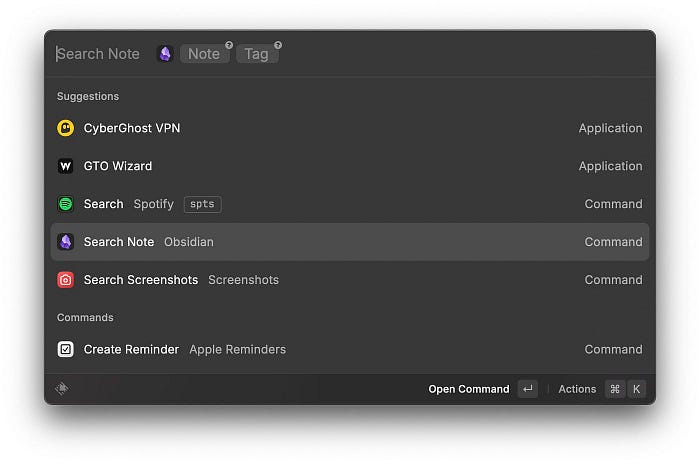
Raycast also has built-in window management and a bunch of other features.
It is by far my most used application, and I could wholeheartedly say that downloading Raycast has been one of the best digital decisions I've ever made.
I've also made a comprehensive review of Raycast; for those interested, it could be read here.
Set Up Custom Workflows using the Shortcuts App
MacOS Shortcuts app an amazing automation tool. My favourite method is to setup custom workflows for different activities.
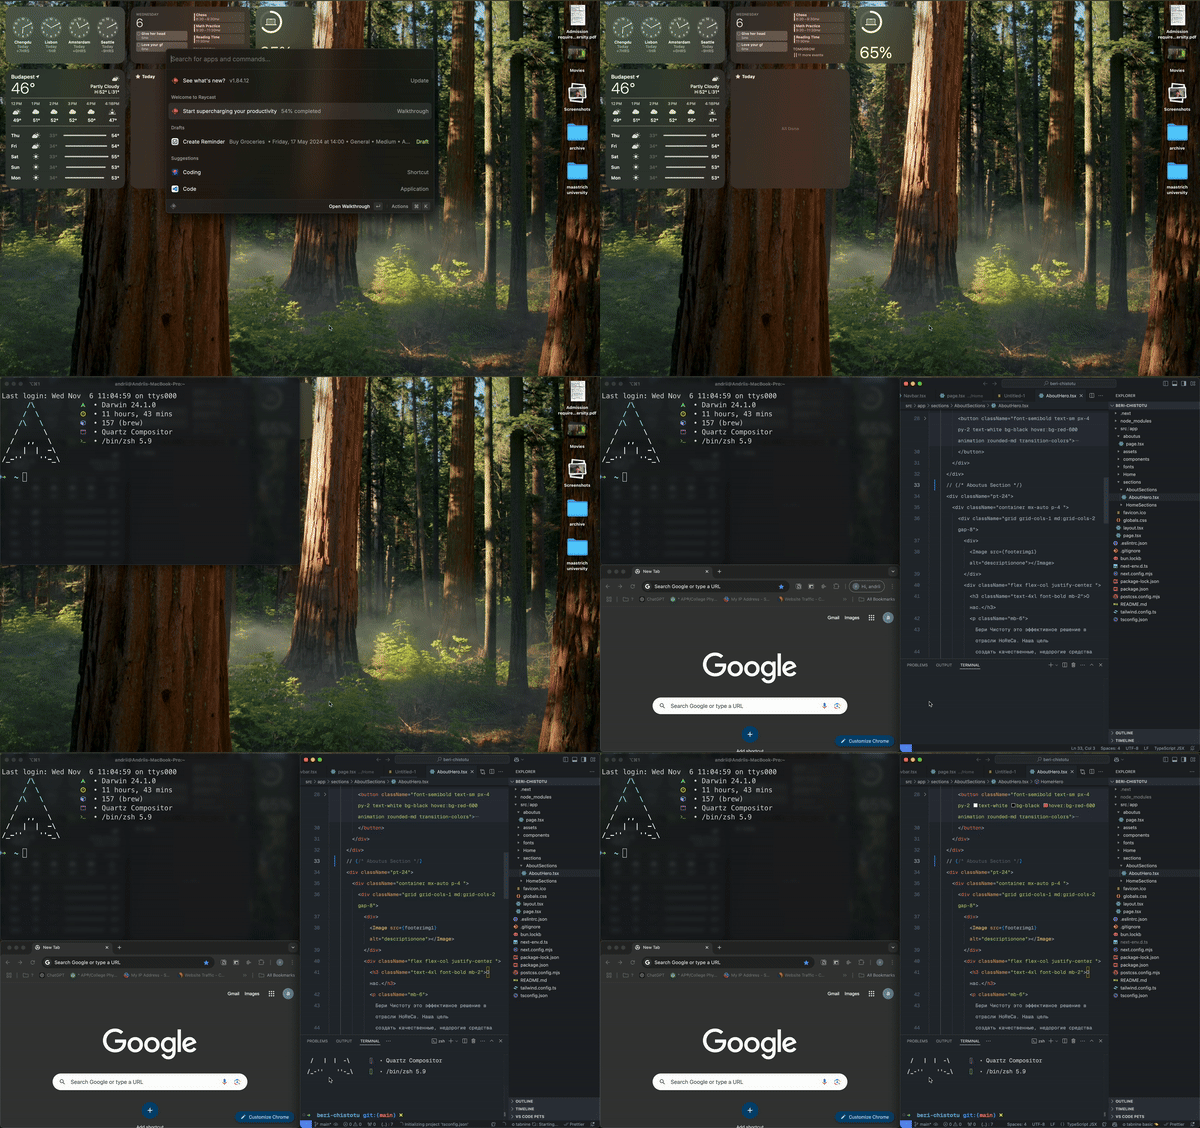
As you can see, I'm using Raycast to activate these shortcuts, which is very convenient.
Setting up Workflows:
To get started, Open the Shortcuts app
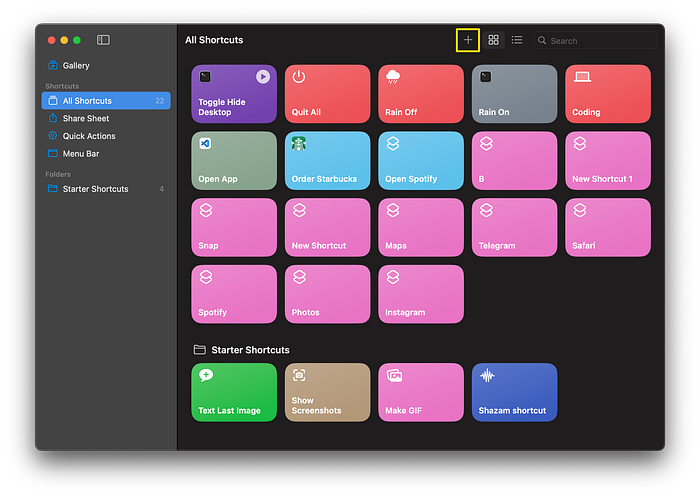
Click on the plus icon and create a new shortcut. Call it "Work Mode" or something similar.
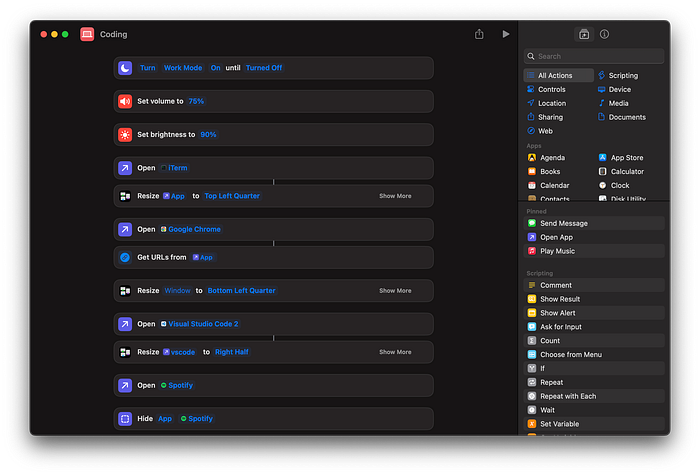
Shortcuts work in a straightforward way. On the right we have actions. We can drag and drop different actions to chain them together in a single event.
In order to set up a workflow, all you need is the action to open an application called "Open App" and the resize app action called "Resize Window."
Depending on what you do for work, decide which applications need to be opened and where to place them.
Make sure you place the resize action under each app, and you will see a small white line in the center, which means that the actions are linked.
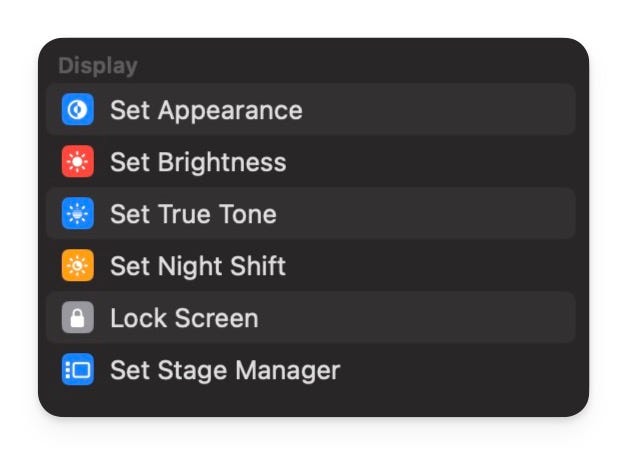
There are many additional actions, such as brightness, volume, appearance, and essentially every macOS control there is. Some people take shortcuts to the next level by automating everything.
Experiment and find your balance.
If you are interested in learning more, here is a great video by Jeff Su explaining it in video format:
Raycast the shortcuts
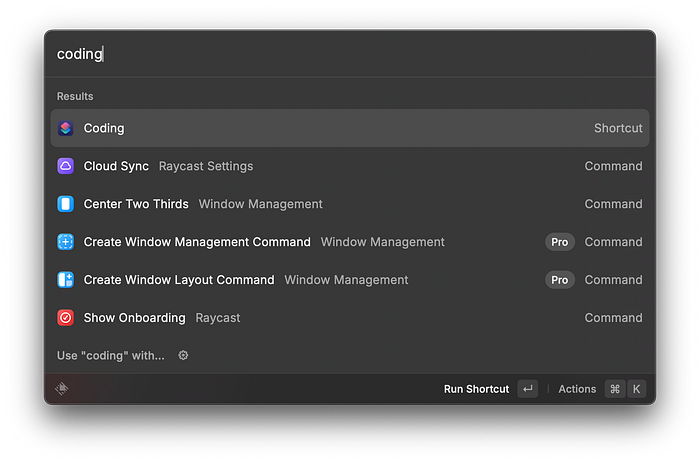
Now we can use Raycast to use the shortcuts by typing in the name.
Create as many workflows as you need; it greatly saves time and adds efficiency.
Master Keyboard Shortcuts on MacOS
The most basic of all advice usually separates masters from amateurs.
Learning keyboard shortcuts is hard, but it rewards you endlessly once you master them.
There are a couple of apps that could help you learn shortcuts. These apps open a menu of shortcuts that help with referencing back whenever it's needed.
KeyClu (Free)
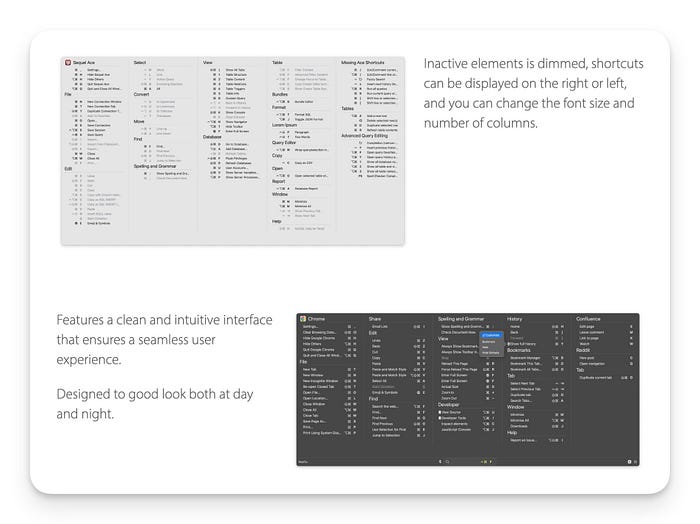
Keyclue is a great app that will pop up a menu of all the shortcuts available in any particular application. It features a clean minimal interface and a great user experience.
KeyCue (Paid)
KeyCue does essentially the same thing as KeyClu, but with additional support for emojis and a more customizable interface.
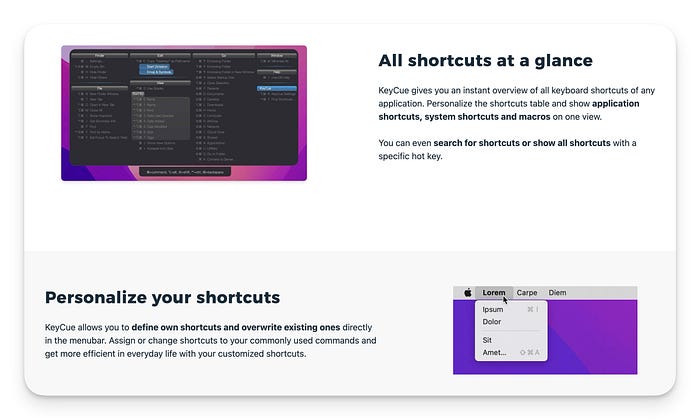
Lets now look at some of the shortcuts that will greatly improve your speed across MacOS.
Essential Keyboard Shortcuts
- Command + Return — Open Raycast.
- Command + Q—Quit an application.
- Command + Tab — Switch between the last application.
- Command (Hold) + Tab, Tab, Tab, — Switch between any opened applications.
- Command + H — Hide the current app.
- Command + Option + Q — Force quit an app (when something is lagging).
- Command + , (coma) — Open settings in most apps.
Screenshot Shortcuts
- Command + Shift + 5 — Newer menu for screenshots with drop shadows, screen recording, etc.
- Command + Shift + 4 — Select an Area to screenshot.
- Command + Shift + 3 — Screenshot the whole screen.
Browser Shortcuts
- Command + T — Opens a new tab ready to type.
- Command + L — Opens the link window of a current tab to search x`for something new
- Command + Shift + T — Open the last closed tab
- Command + W — Closes the current tab
- Command + 1 / 2 / 3 / 4 — Switches between different tabs
- Command + Arrow keys (right and left) — Go back / forward
Text Shortcuts
- Command + c / command + v — Copy / paste
- Command + a — Select all text
- Command + Delete— Delete current line
- Option + Delete — delete the current word.
- Shift + Arrow keys (right and left) — Select text letter by letter
- Shift + Option + Arrow keys (right and left) — Select text word by word.
- Shift + Command + Arrow keys (right and left) — Select the whole line
- Shift + Arrow keys (up and down) — Select text line by line.
Setup a PKM System
If your line of work requires a lot of knowledge-keeping, notes, research, and overall information, you absolutely need to setup a Personal Knowledge System.
Also called a second brain, a PKM is a storage of documents, personal notes, and other data linked together in a single database, designed to last a lifetime.
In order to achieve such a system, we need two things.
- An application to comfortably write and manage this data.
- A secure storage insuring protection incase of a loss.
The free app Obsidian is my top choice for this.
Obsidian.
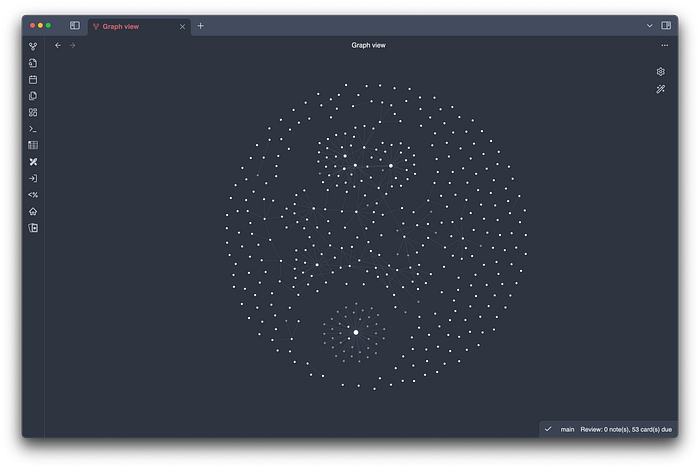
I have been a PKM enthusiast for many years, tried many applications, and after testing, I have settled on Obsidian.
Why Obsidian?
Because its highly customizable, exceptionally rich with plugins, a massive community, themes, and other comforts. It provides more than nessesary to setup a fully functioning second brain, particularly because of it's document linking system. Finally, because the output is in the universal MD format.
But Obsidian could also be tweaked to the extreme. I used to take university notes for Calculus using a KaTeX plugin.
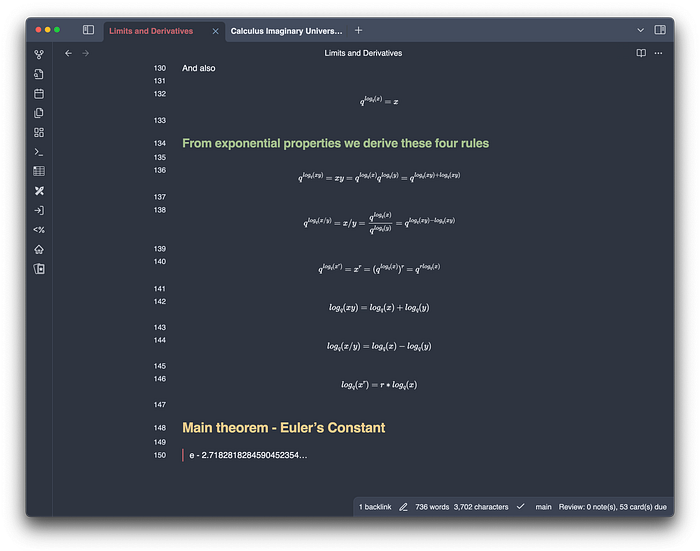
Then, using the pandoc plugin, I could export this note into a PDF in a single click.
Local
All of the notes are stored locally on your device, which means that it is easy to setup an automated backup to services such as Github, iCloud, Drive, and others.
Or in case something happens to Obsidian, I will always be able to transfer my data onto a similar MD Reader. MD is key, because its just raw text, with some additional syntax. It's very secure because it doesnt depend on any particular software.
Conclusion
MacOS productivity is simple but also complex. Its all about balancing minimalism with functionality, mastering the basics and creating the perfect environment depending on what the user is looking for.
In this article we have optimized the look and feel of MacOS, found a new way to communicate with the device through Raycast, and automated workflows through Shortcuts. We have also mastered essential keyboard shortcuts and set up a PKM.
Remember, the basics of all things separate masters from amateurs.
I hope you learned something new, and found this article useful.
Until next time!
Let me know in the comments if there are any tips that I am still missing!
If you want to read more articles related to productivity and MacOS, consider dropping a follow! It helps me grow and produce more content!