
You know that feeling, right? You're watching some super experienced developer — a real senior pro — just fly through their terminal. Commands are zipping by, they're navigating files like they've got some kind of mental map, and everything just looks so… effortless. It's almost like magic, isn't it? Well, guess what? It's totally not magic! It's actually a really well-thought-out, meticulously put-together environment. Their terminal isn't just, like, a place to type commands; nope, it's a finely tuned instrument. It's an extension of their brain, designed to get stuff done super efficiently and honestly, just make coding a joy.
So, if your current terminal situation feels a bit like you're trying to write a novel on an old, clunky typewriter, then you, my friend, are in for a serious upgrade. Today, we're not just going to install a bunch of tools, okay? We're gonna build a whole workflow. We're talking about transforming your command line interface (CLI) into this absolute powerhouse. It's gonna make you faster, way more effective, and yeah, definitely a little bit cooler. Whether you're knee-deep in Rust code, pushing out new services, or just trying to manage your files, a proper senior-level terminal setup will fundamentally change how you interact with your computer. Seriously. Get ready to seriously level up your development game. Let's jump in and unlock that sweet, sweet senior dev flow! 🌟
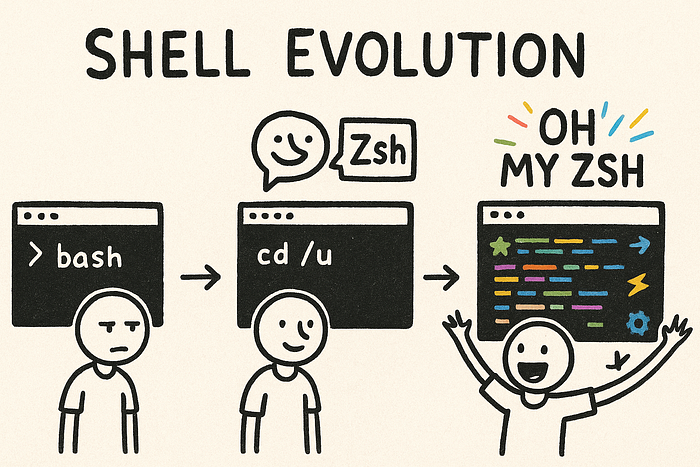
Step 1: Picking Your Shell — Moving Beyond Bash's Basic Beats 🐚
Alright, so the shell, you know, that's kinda like the brain of your terminal. It's what takes your commands and figures out what the heck you want to do. Most of us start with Bash because, well, it's usually the default. But let me tell you, Zsh (that's Z Shell for short) offers a much richer, super customizable experience that, frankly, many senior devs just can't live without. It's got awesome tab completion, way better globbing (don't worry if that's a new word!), and this cool plugin system.
Why Zsh is just better, in my humble opinion:
- Seriously Smart Autocompletion: No kidding, this alone is a total game-changer. It learns what you type!
- Command History Magic: You can navigate and search through all your past commands with such ease. It's like having a perfect memory.
- A Whole Plugin Universe: There's just this huge world of enhancements waiting for you. It's wild.
Getting Zsh set up is pretty simple, actually. For most Linux folks, it's usually sudo apt install zsh if you're on Debian/Ubuntu, or sudo pacman -S zsh for Arch Linux users. If you're on macOS, you might even have it already, or you can grab it with Homebrew: brew install zsh. Once it's installed, you'll want to make it your default shell. Just run this little command:
chsh -s $(which zsh)After that, you'll need to, like, restart your terminal or even log out and back in for it to really kick in. Easy peasy.
Step 2: Making Zsh Even More Awesome with Oh My Zsh! ⚡️
Okay, so Zsh on its own? Pretty good. But Oh My Zsh? That takes it to a whole new level of awesome. It's this fantastic, open-source, community-driven framework that makes managing your Zsh setup incredibly easy. Think of it like your personal command center for all your Zsh themes, plugins, and custom little functions. It just makes everything so much more powerful and, honestly, kinda fun.
To get Oh My Zsh going, just paste this command into your terminal:
sh -c "$(curl -fsSL https://raw.githubusercontent.com/ohmyzsh/ohmyzsh/master/tools/install.sh)"Once that's done, you'll want to poke around in the .zshrc file in your home directory. This is where, well, all the real magic happens. You'll spot a line that looks something like plugins=(git). This is where you'll start adding all those cool plugins.
My Personal Picks for Must-Have Plugins (seriously, try these!):
git: This one seriously jazzes up your Git commands and gives you some super handy shortcuts.zsh-syntax-highlighting: You type a command, and it highlights it right away. Makes catching typos SO much easier.zsh-autosuggestions: It actually suggests commands based on what you've typed before. It's like it reads your mind!fzf: This one is a gem. It hooks into a bunch of other commands for super quick, fuzzy searching. We'll chat more aboutfzfin a sec!
Now, just a heads-up, you'll usually need to install zsh-syntax-highlighting and zsh-autosuggestions separately. They typically get cloned right into Oh My Zsh's custom plugins folder.
# For zsh-syntax-highlighting - trust me, it's worth it!
git clone https://github.com/zsh-users/zsh-syntax-highlighting.git ${ZSH_CUSTOM:-~/.oh-my-zsh/custom}/plugins/zsh-syntax-highlighting# For zsh-autosuggestions - a total lifesaver for remembering commands
git clone https://github.com/zsh-users/zsh-autosuggestions ${ZSH_CUSTOM:-~/.oh-my-zsh/custom}/plugins/zsh-autosuggestions
After that, just open up your .zshrc file and update that plugins line to include them all:
# ~/.zshrc - my current favorite plugin lineup!
plugins=(git zsh-syntax-highlighting zsh-autosuggestions fzf)
Then, just reload your shell with source ~/.zshrc, and boom! You're in business.
Step 3: Picking a Blazing Fast Terminal Emulator 🖥️
So, your shell is running, right? But it's running inside something called a terminal emulator. Most operating systems come with a default one, and honestly, they're fine for casual use. But senior devs, they often go for something faster, something that uses your graphics card (GPU) to make everything super smooth — especially with cool fonts, colors, and graphics. It just feels snappier.
My Top Picks for a Zippy Terminal Emulator (as of late 2025):
- Alacritty: Okay, this one is pretty cool because it's actually written in Rust! 🦀 It's unbelievably fast, GPU-accelerated, and super minimal. Configuring it is all done through a neat
yamlfile. - Kitty: Another really fast, GPU-powered emulator. It's got some neat advanced features, even these little "kittens" (which are basically small scripts that run right inside Kitty). Pretty wild.
- iTerm2 (macOS only): If you're on a Mac, this is a classic for a reason. It's jam-packed with features, integrations, and tons of ways to customize it to your heart's content.
- Windows Terminal (Windows only): For all my Windows folks, Microsoft's really stepped up their game here. This is a modern, tabbed terminal that's got awesome customization and great performance. For the best experience and to keep it updated, seriously, grab it from the Microsoft Store or use
wingetto install it. That way, it just updates itself.
Just pick one, install it (you might use cargo install alacritty if you're deep into Rust, or just your system's package manager/Homebrew), and just make it your go-to. I bet you'll notice how much more responsive it feels right away. It's a subtle change but really adds up!
Step 4: Essential CLI Tools — Your Developer Utility Belt 🛠️
Now, let's get you some proper tools for your terminal. These are the kinds of utilities that just make navigating, finding things, and peeking at files a total breeze. Seriously, once you try them, you'll wonder how you ever lived without them.
lsdorexa: These are likels(you know, the list files command) but on steroids. They're modern, visually stunning replacements that add all these cool colors, icons, and just way better information when you list your files. It makes everything so much more readable.- Installation is usually
cargo install lsdorcargo install exa. Super simple if you have Rust set up. bat: Think of this ascatbut, like, with superpowers. It does syntax highlighting for code, plays nicely with Git, and even pages automatically. It's perfect for quickly glancing at code files. Just a quick note: on some Debian/Ubuntu systems, the actual command might bebatcatto avoid conflicts. No biggie, you can just alias it in your.zshrclikealias cat='bat'oralias bat='batcat'if that happens.- Installation:
cargo install batorsudo apt install bat. fzf: Oh man, the "fuzzy finder" is revolutionary. Seriously. It lets you search through lists-files, your command history, running processes-with incredible speed. And the best part? A ton of other tools just automatically integratefzfto make their searching better too.- Installation:
sudo apt install fzf,brew install fzf, or you can clone it directly:git clone --depth 1 https://github.com/junegunn/fzf.git ~/.fzf && ~/.fzf/install. ripgrep(rg): This is a super-fast, Rust-powered alternative to the oldgrepcommand for finding patterns in files. It's smart, too-it ignores stuff in your.gitignoreby default and it's just wicked fast. For thosecargo install ripgrepusers, just keep in mind that as of late 2025, it generally needs at least Rust version 1.85.0 to build without a hitch.- Installation:
cargo install ripgrepor check your system's package manager likesudo apt install ripgrep. bottom(btm) orhtop: These are for keeping an eye on your system.bottomis a really neat, cross-platform graphical system monitor written in Rust. It's a modern, more customizable alternative tohtopand looks pretty slick in your terminal.- Installation:
cargo install bottomorsudo apt install bottom.
And seriously, don't forget to add some aliases for these in your .zshrc so you can call them up super fast. Stuff like alias ls='lsd' or alias cat='bat' just makes sense, right?
Step 5: Master Multitasking with Tmux — Your Terminal Multiplexer 🖼️
A terminal multiplexer, like Tmux (or its older cousin, GNU Screen), is an absolute must-have. It's indispensable for juggling multiple shell sessions all within a single terminal window. Imagine this: you've got several tabs and split panes going, right? Even if you close your terminal emulator or your SSH connection drops-poof! Your sessions are still there, waiting for you! It's like magic, but, you know, it's just code.
Why I think Tmux is an absolute game-changer:
- Persistent Sessions: This is HUGE. You can detach from your session, go grab a coffee, come back later, and reattach. Or even reconnect from a totally different machine. Your work is just… there.
- Panes & Windows Galore: You can easily split your terminal screen horizontally or vertically. And you can manage multiple "windows" (think of them like browser tabs) within that single terminal session. It's great for keeping your compiler, code editor, and tests all visible.
- Customization Heaven: Oh, the options! So many ways to tweak keybindings, the look of your status bar, and basically everything else to fit your personal workflow.
Installation is usually sudo apt install tmux or brew install tmux. To start a new Tmux session, just type tmux. You'll want to learn the keybindings; it's a small learning curve but totally worth it. Things like Ctrl-b c for a new window, Ctrl-b % for a vertical split, or Ctrl-b " for a horizontal split. Having a good .tmux.conf file is key to getting it just how you like it. Here's a tiny starting point:
# ~/.tmux.conf - Just a minimal starting point, feel free to customize!
set -g prefix C-a         # I prefer Ctrl-a as my prefix key
unbind C-b                # Unbind the default Ctrl-b
bind C-a send-prefix      # Make Ctrl-a actually send the prefix
set -g status-position top # I like my status bar at the top, just a preference
Step 6: Crafting Your Perfect Prompt with Powerlevel10k 🌟
Your prompt-that little bit of text right before you start typing a command-it's more than just a placeholder, trust me. A well-configured prompt gives you immediate, crucial context. We're talking about your current directory, your Git status, what Rust toolchain you're using, and so much more. Powerlevel10k is this ridiculously fast, super flexible, and honestly, just gorgeous theme for Zsh.
It's insanely customizable. You get to decide exactly what information you want to see, when you want to see it, and how it all looks. Plus, it has this fantastic interactive configuration wizard (p10k configure) that pretty much holds your hand through setting up its appearance. It's actually a pretty fun experience!
Installation usually means cloning it into your Oh My Zsh custom themes directory:
git clone --depth=1 https://github.com/romkatv/powerlevel10k.git ${ZSH_CUSTOM:-$HOME/.oh-my-zsh/custom}/themes/powerlevel10kThen, just set ZSH_THEME="powerlevel10k/powerlevel10k" in your .zshrc. Restart your terminal, type p10k configure, and seriously, prepare to be amazed by the interactive setup! Just a quick heads-up, for Powerlevel10k to really show off all its cool icons and symbols, you'll need to install a special font called a Nerd Font (like MesloLGS NF is a popular one) and tell your terminal emulator to use it. Most Powerlevel10k installation guides will walk you through that part, too. It's worth the extra step, I promise!
Step 7: Dotfiles — The Secret to a Portable Setup 📦
Okay, so all these little configuration files we've been talking about-your .zshrc, your .tmux.conf, alacritty.yml, that p10k.zsh file (the one Powerlevel10k generates for you), and a bunch of others-these are what we call your dotfiles. They're those hidden files (the ones that start with a . in your home directory) that essentially define your whole environment.
Here's a pro tip from senior developers: they manage their dotfiles. A lot of them even put them under version control, like Git, in a public or private repository. Why? Because it makes your entire setup incredibly portable. Imagine this: you get a shiny new machine (yay!). Instead of spending hours reconfiguring everything, you just clone your dotfiles repo, run a quick install script, and boom-your perfect, customized terminal environment is back, just like that. It's such a time-saver!
Common Ways Senior Devs Manage Their Dotfiles:
- Symlinks: This is pretty popular. You create special "symlinks" (symbolic links) from your dotfiles repository to their actual spots in your home directory.
- Bare Git Repository: This is a bit more advanced, where you actually treat your home directory itself as a Git repository, but with some clever aliases to make it work.
For a simpler start, I usually recommend this: make a ~/dotfiles directory, move your important config files there, and then create symlinks back to your home directory:
mkdir ~/dotfiles
mv ~/.zshrc ~/dotfiles/
ln -s ~/dotfiles/.zshrc ~/.zshrc
You just repeat that process for all your important config files. Then, you can git init and git add . inside your ~/dotfiles directory, make your first commit, and push it up to GitHub! It's such a good feeling, you know? Like you've got your digital home backed up.
Wrapping Up Your Terminal Journey ✨
Wow, you made it! You've just walked through what I consider the blueprint for a terminal setup that will honestly, truly enhance your developer workflow. Especially if you're wrestling with demanding languages like Rust, this stuff makes a huge difference. We've covered everything from a lightning-fast shell and powerful CLI utilities to super-efficient multitasking with Tmux, and even how to make your whole setup portable. You're now equipped with the tools and, more importantly, the mindset of a seasoned pro. This isn't just about raw speed, you know? It's about taking away those little frustrating moments, reducing what we call "cognitive load," helping you stay in that wonderful coding flow, and making every single interaction with your machine feel like a seamless extension of your thoughts.
The world of terminal customization is, like, massive and super exciting. There's always another plugin to discover, a new theme to try, or some clever alias someone's shared. But with this solid foundation, you're so, so well on your way to creating a truly exceptional development environment. And honestly, it feels good.