

In today's world, where technology is evolving faster than ever before, Web application development is becoming increasingly popular. React is one of the most popular frameworks for building web applications, because of its flexibility, scalability, and high performance. Once you've built your React app, the next step is to host it so that it can be accessed by your users. In this blog post, I'll guide you through the easiest process of hosting a React app with AWS Amplify.
In this blog post, I am going to host a basic React application with AWS Amplify. Before we dive into the details of hosting a React app with AWS Amplify, it's important to ensure that you have the necessary prerequisites.
Prerequisites
Firstly, you will need to have Node.js and npm installed on your local machine. If you don't have these tools installed, you can download them from the official Node.js website.
And also, you will need an AWS account. If you don't already have an AWS account, you can sign up for one. (https://aws.amazon.com/). Once you have these prerequisites in place, you'll be ready to proceed with hosting your React app in AWS Amplify.
Create and Build React App
As the first step, you need to create a React app. Open a terminal or command prompt and navigate to the directory where you want to create your project. Then, run the following command:
npx create-react-app my-appThis will create a new React project called "my-app" in the current directory. after creating a new React project. Navigate to the project directory by running the following command:
cd my-app
npm start
This will start the development server and open your React app in a web browser at http://localhost:3000. Then you can see the initial view of your React app like this.
You can make any changes to the React application. Once you're happy with your React app, Let's move on to deploying your React app in AWS Amplify.
Create IAM User
when you are going to host your application in AWS Amplify. You should keep in mind not to create your cloud resources with the main AWS account. Why do we do that? when you work with different production levels or individual projects. You are creating the resources associated with your main AWS account. At that time, you can mistakenly delete a resource or database. That may be a huge disaster. So avoid that and always work with IAM users and create resources associated with those roles.
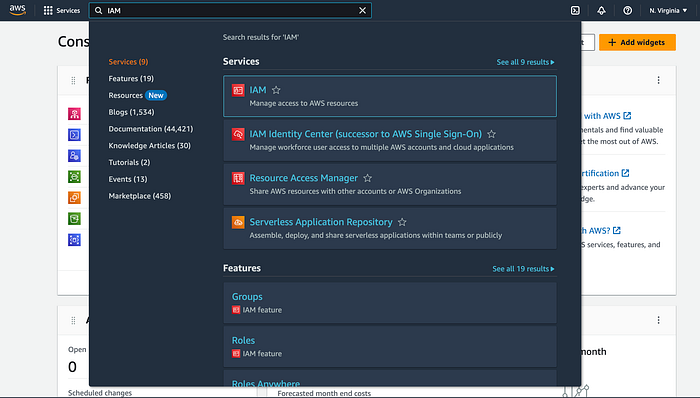
To create an IAM user, go to your cloud console, search for IAM in the search bar, and click on that.
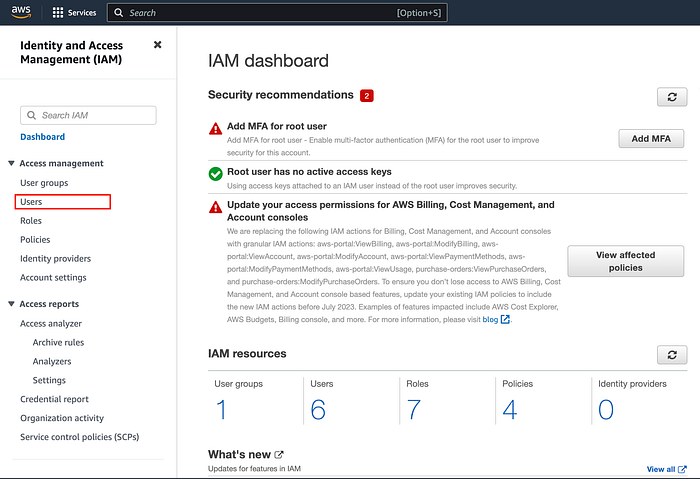
Next, you will be able to see the following type of window: From there, go to the "User" section from the sidebar.
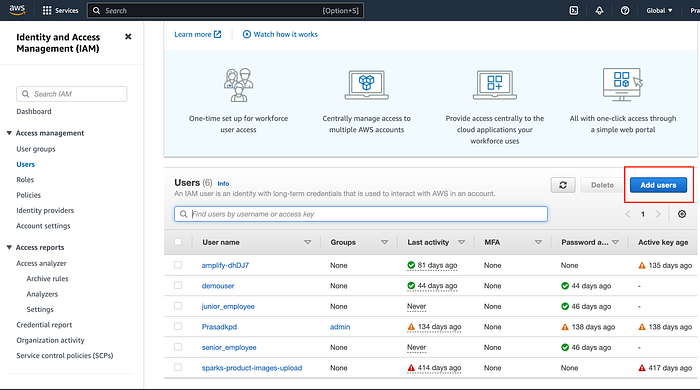
Next, you will be able to see the following type of window: From there, click on the "Add User" button from above the table.
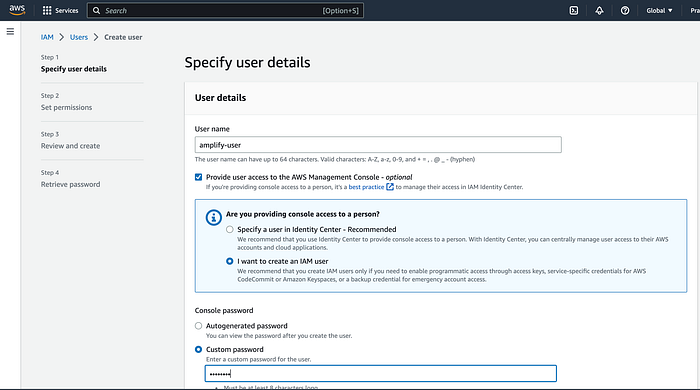
Next, you will be able to see the following type of form: Fill out that form with the necessary details. I am naming my IAM user username as amplify-user and marking the "Provide user access to the AWS Management Console" check box. And create an IAM user associated with this, and add a password to your requirement. Next, click on the next button.
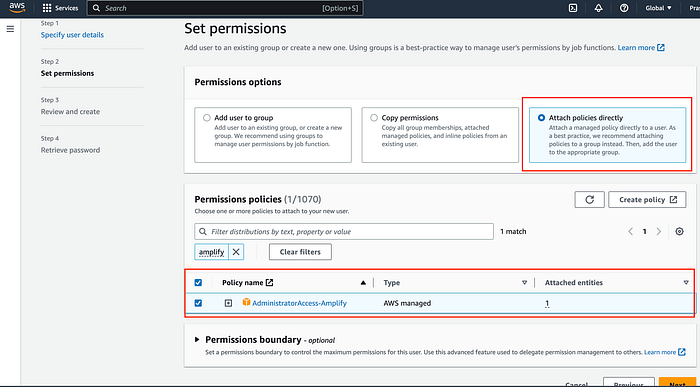
Next, you will be able to see the following type of window: This window gives you the ability to attach permissions to your IAM user. because I am going to use only Amplify. I am only attaching the permission related to that service. For that, select "Attach policies directly" and search amplify from the table search bar. It will show "AdminstartorAccess-Amplify". Then mark the check box for that "AdminstartorAccess-Amplify" policy.
Then click on "next." It will show review and create, then click "Create". After that, AWS will create an IAM user for you.
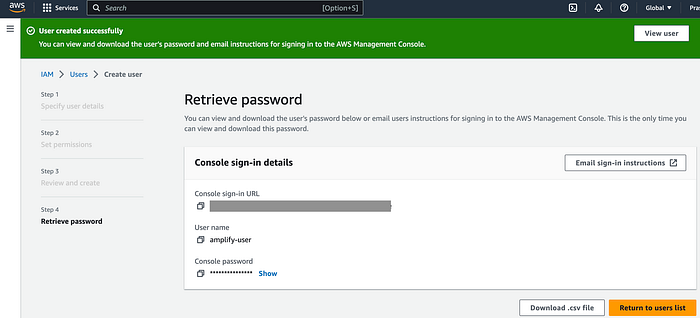
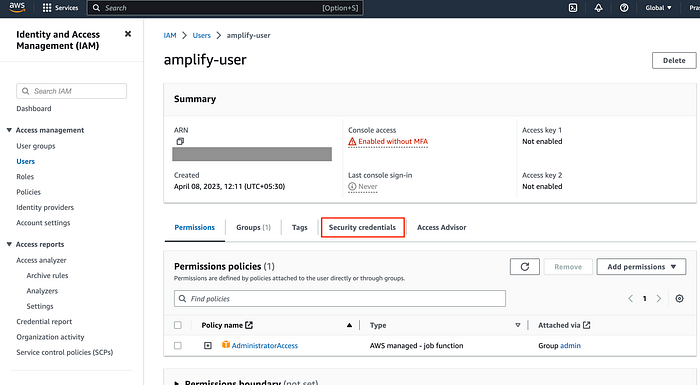
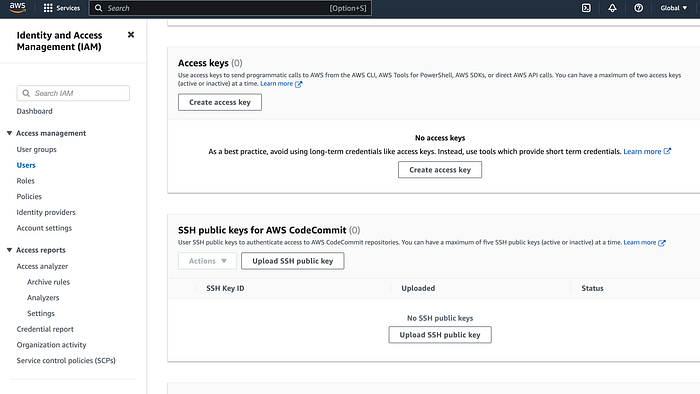
Then click on "Download.csv file" and get your credentials. And then click on "Return to users list." It will show all the IAM users related to your account. Then click on "amplify-user". Then it will show the user profile. From there, go to the "Security Credentials" section.
It will show the following type of window. And let's create an access key for the "amplify-user" by clicking on the "Create access key" button.
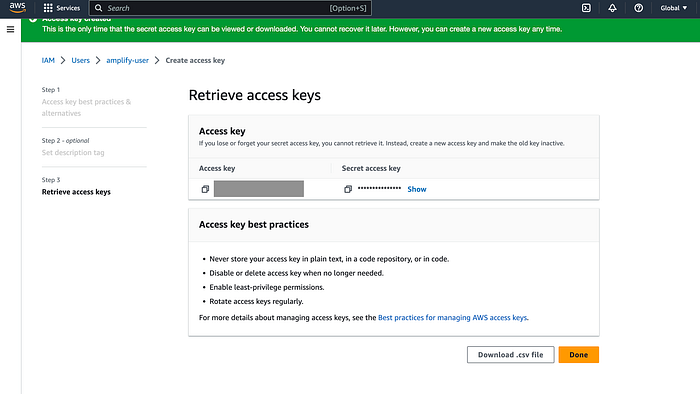
Then it will show the following type of window, from which you can select the "Command Line Interface (CLI)" options. We only use this access key for access with command-line tools. Then, in that order, click "next" and then "Create access key."

Then it will show the following type of window: Please download your access key CSV file. It contains your access key and the secret access key to access the user with the command-line tool.
Then let's move on to configure AWS Amplify on your local machine.
Configure AWS Amplify in your Local Machine
The first step is to configure AWS Amplify on your local machine. You should install "@aws-amplify/cli" on your local machine. for that open your terminal and run the following command.
npm install -g @aws-amplify/cliIt will take some time to download and get the installation done. After that, you can verify that installation by typing the following command on the terminal.
amplify --versionIf that is successfully installed, it will show the current installed amplify version in your terminal like below.

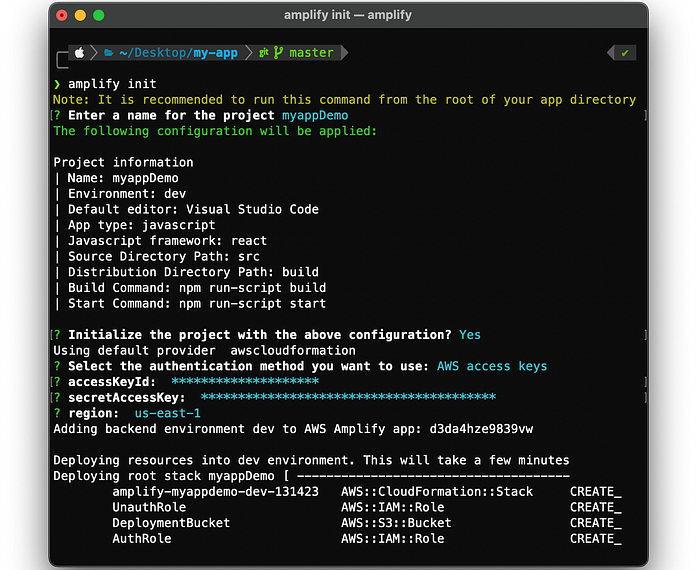
Next, go to your react app directory with the terminal. Next, type the amplify init command on the terminal. Next, it prompted some details like the following. It will ask for a name for the project I have added it as a "myappDemo". And it will ask you to select the authentication method you want to use I have selected "AWS access keys". Then it will ask to enter accessKeyId and secretAccessKey. you have to enter the accessKeyId and secretAccessKey get in the previous process. Next, it will ask a region to allocate its Amplify resources. I have set it in "us-east-1". It will take some time to configure.
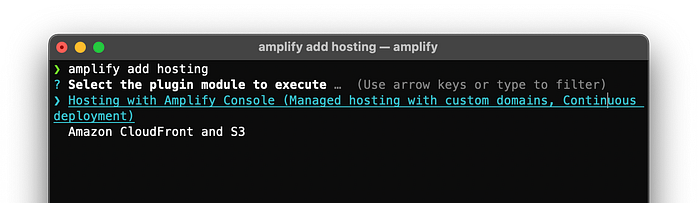
Next, We have to add the hosting to the React app. So I run the following command in the terminal:
amplify add hostingBy running this command, The terminal will ask you to select the plugin module to execute. There are two options "Hosting with Amplify Console" and "Amazon CloudFront and S3". You can select one from your requirement. But In this, I select "Hosting with Amplify Console"
In simple terms, the main difference between hosting with AWS Amplify Console and Amazon CloudFront and S3 is that Amplify Console is a higher-level, managed service that includes CI/CD capabilities and automatic SSL certificates, while CloudFront and S3 offer more flexibility and customization options for hosting static websites and assets with features like caching and distribution. Amplify Console is ideal for fast and easy deployment of serverless web apps and backend APIs, while CloudFront and S3 are better suited for more complex, high-traffic web applications with specific performance and security requirements.
Next, it will ask you to choose a type from "Continuous deployment(Git-based deployments)" or "Manual deployment". I have selected the manual deployment.

What is the difference between Continuous deployment(Git-based deployments) and Manual deployments? Let's look at this, Continuous deployment is an automated Git-based approach to deploying code changes to production as soon as they are committed and passes all tests. Manual deployment involves a human intervention to deploy code changes and is used in more traditional development environments. The main difference is the level of automation involved. Continuous deployment is ideal for agile development environments, while manual deployment is suited for environments where stability and reliability are prioritized over speed. Because this tutorial is for learning purposes I have selected manual deployment.
Now we have created our Amplify resources and added the hosting to the Amplify app. Now we have to publish the resources. For that, we use the following command
amplify publish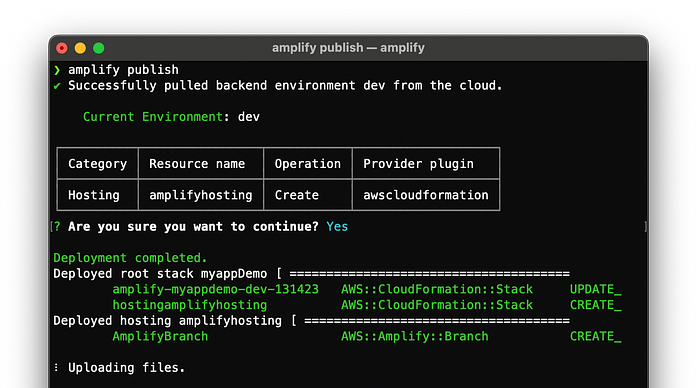
After that, it will publish on the internet with a URL. It will take some time. After that, you will able to see the deployed URL at the end of your terminal like the following:
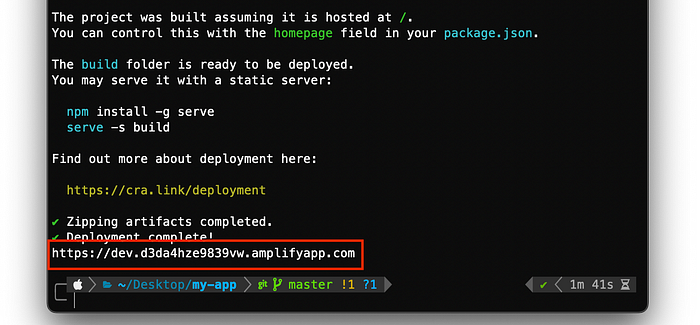
To view the React app that has been hosted, simply go to the URL provided at the end of the terminal. You will able to see the deployed React app like the following.

If you want to make a change to deployed React app you only want to make the change on your React app and after that run the amplify publish command in your terminal. The changes will be published.
Conclusion
Deploying your React app with AWS Amplify can be a straightforward and efficient process. With its ease of use and powerful features, AWS Amplify can help streamline your deployment process and provide you with a secure and scalable hosting environment. By following the steps outlined in this blog post, you can get your React app up and running in no time, and start reaping the benefits of cloud-based hosting. Whether you are a seasoned developer or just starting, AWS Amplify is a valuable tool to have in your toolkit.
References
https://aws.amazon.com/iam/getting-started/
https://docs.amplify.aws/cli/start/install/
https://docs.amplify.aws/cli/hosting/hosting/
Level Up Coding
Thanks for being a part of our community! Before you go:
- 👏 Clap for the story and follow the author 👉
- 📰 View more content in the Level Up Coding publication
- 💰 Free coding interview course ⇒ View Course
- 🔔 Follow us: Twitter | LinkedIn | Newsletter
🚀👉 Join the Level Up talent collective and find an amazing job