
In this article, I am going to teach how to do basic Jwt session-based authentication in Next.js without any additional libraries. In addition to that, I'll also teach some other options you can use, if you don't want to roll your own auth.
So, let's start…
Step 1: Create a new Next js project and install the required packages
To create a new next js project you can visit Getting Started: Installation | Next.js (nextjs.org) or just type the following command.
npx create-next-app@latestThen we are going to install "jose" package to create and verify JWT tokens.
npm install joseStep 2: Setup the initial project
Now we have successfully created our new Next js application. So, we have a root layout, and then we have our index route. Index page.tsx is a server component we have added it as an async function.

layout.tsx file and the page.tsx file
In page.tsx file there are few methods such as getSession(), login(), logout() which we are going to talk about later. For now, if there's a logged in user, we're going to print out user information, otherwise we are printing null.
In addition to that, we have two forms. First one allows the user to log in, and it calls the server action (login function). Other form allows the user to do the logout function.
There's of course a lot more that we can do here, but the real meat of understanding the basics of authentication is going to be in the log in and log out functions.
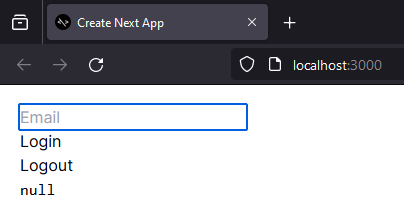
Initial web page
Step 3: Implement the login function and save the session token in cookies
In our project we have create a new file called "lib.ts" and we have moved everything related to authentication into that file.
First, we need a method to create the session token using "SignJwt" which we installed using "jose" package.
import { SignJWT } from "jose";
const secretKey = "secret";
const key = new TextEncoder().encode(secretKey);
export async function encrypt(payload: any) {
  return await new SignJWT(payload)
    .setProtectedHeader({ alg: "HS256" })
    .setIssuedAt()
    .setExpirationTime("10 sec from now")
    .sign(key);
}
In this "encrypt" method we set out hash algorithms and other required parameters to create our encrypted session token. Now we can use this method inside our login function. This login function will trigger when the user enters an email and press the login button.
export async function login(formData: FormData) {
  // Verify credentials && get the user
  const user = { email: formData.get("email"), name: "John" };
  // Create the session
  const expires = new Date(Date.now() + 10 * 1000);
  const session = await encrypt({ user, expires });
  // Save the session in a cookie
  cookies().set("session", session, { expires, httpOnly: true });
}
In this login function, first we read information from the form like the email. And once we get that information back, then we create our session token. So, we're going to find when we want it to expire through a date. We're going to make this session option or session object, which is going to be encrypted.
Then we set this as a cookie. Name of the cookies is "session" and in addition to that, we say what it expires and critically HTTP only cookie. So, we can only read this on the server.
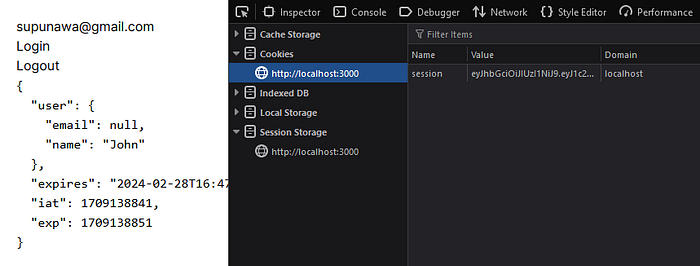
Session token saved in cookies
If we go to jwt.io and paste our session token, we can get the decoded values.
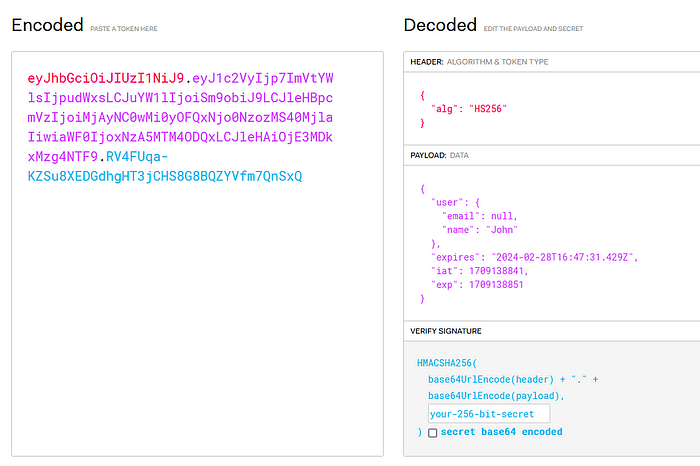
Decoded values from the session token
Step 4: Update the session token after the expire time
In basic token-based authentication, we need to refresh or the update our session tokens after the expire time. In our application, we have set the expire time as 10 seconds. So, if we login to the application and refresh the page after 10 seconds, then the session will be expired and we'll loss our session data. Then we need to login again to the application.
But if user refresh the page before 10 seconds, then we need to update our session token using out existing session token. For that we are using the Next js middleware file. First, we should create a new file called "middleware.ts" inside the "src" folder and add the following code lines.
import { NextRequest } from "next/server";
import { updateSession } from "./lib";
export async function middleware(request: NextRequest) {
  return await updateSession(request);
}
This file is going to run in front of every request in our application and it's calling this function. It's taking in the web request and it's calling update session with that web request.
Again, go back to our "lib.ts" file and implement the "updateSession" function.
import { SignJWT, jwtVerify } from "jose";
import { cookies } from "next/headers";
import { NextRequest, NextResponse } from "next/server";
export async function decrypt(input: string): Promise<any> {
  const { payload } = await jwtVerify(input, key, {
    algorithms: ["HS256"],
  });
  return payload;
}
export async function updateSession(request: NextRequest) {
  const session = request.cookies.get("session")?.value;
  if (!session) return;
  // Refresh the session so it doesn't expire
  const parsed = await decrypt(session);
  parsed.expires = new Date(Date.now() + 10 * 1000);
  const res = NextResponse.next();
  res.cookies.set({
    name: "session",
    value: await encrypt(parsed),
    httpOnly: true,
    expires: parsed.expires,
  });
  return res;
}
In this "updateSession" method, first we get the existing session from the cookie and then decrypt it using the "decrypt" function. Then we extend the expire time and save a new session token in cookies.
Step 5: Implement a method to retrieve session information
After we save session token inside the cookies, we need a method to read that information to use it in our application. For that we are going to implement a new method called "getSession". We can use this function inside the page.tsx file to get the session username.
export async function getSession() {
  const session = cookies().get("session")?.value;
  if (!session) return null;
  return await decrypt(session);
}
Step 6: Implement the logout function
As the final process we need a new method to logout the user. So, we can create a new method called "logout" and we can use it in the form which we have in the page.tsx.
export async function logout() {
  // Destroy the session
  cookies().set("session", "", { expires: new Date(0) });
}
lib.ts (complete file)
import { SignJWT, jwtVerify } from "jose";
import { cookies } from "next/headers";
import { NextRequest, NextResponse } from "next/server";
const secretKey = "secret";
const key = new TextEncoder().encode(secretKey);
export async function encrypt(payload: any) {
  return await new SignJWT(payload)
    .setProtectedHeader({ alg: "HS256" })
    .setIssuedAt()
    .setExpirationTime("10 sec from now")
    .sign(key);
}
export async function decrypt(input: string): Promise<any> {
  const { payload } = await jwtVerify(input, key, {
    algorithms: ["HS256"],
  });
  return payload;
}
export async function login(formData: FormData) {
  // Verify credentials && get the user
  const user = { email: formData.get("email"), name: "John" };
  // Create the session
  const expires = new Date(Date.now() + 10 * 1000);
  const session = await encrypt({ user, expires });
  // Save the session in a cookie
  cookies().set("session", session, { expires, httpOnly: true });
}
export async function logout() {
  // Destroy the session
  cookies().set("session", "", { expires: new Date(0) });
}
export async function getSession() {
  const session = cookies().get("session")?.value;
  if (!session) return null;
  return await decrypt(session);
}
export async function updateSession(request: NextRequest) {
  const session = request.cookies.get("session")?.value;
  if (!session) return;
  // Refresh the session so it doesn't expire
  const parsed = await decrypt(session);
  parsed.expires = new Date(Date.now() + 10 * 1000);
  const res = NextResponse.next();
  res.cookies.set({
    name: "session",
    value: await encrypt(parsed),
    httpOnly: true,
    expires: parsed.expires,
  });
  return res;
}
So, this file is really all it takes for the most minimal and simple session-based authentication inside of a Next js application. And this basic model has been used to implement some complex authentication flows such as "Next-auth". If you want to explore more on the complex authentication, then you can use "next-auth" with the next js application.
Happy Face, Happy Reader @whysumancode