

Heads-up! The built-in Data Labeling Service in OCI is now officially retired — it was deprecated on August 30, 2024, and will reach its end of life on August 30, 2025.
Refrence Doc
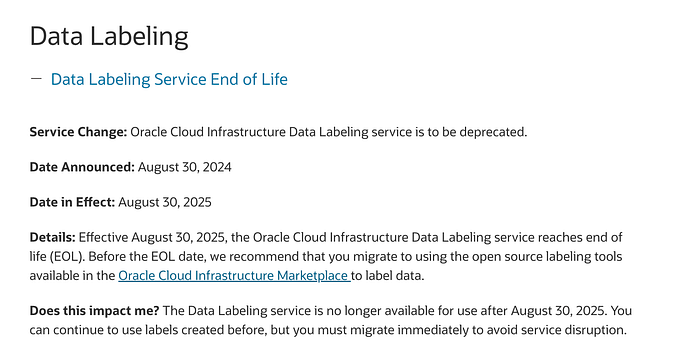
What This Means
The OCI Data Labeling Service is going away, but that doesn't mean your model training stops! We now move to Label Studio, an open-source data labeling tool, to annotate, prepare, and train datasets for your OCI Vision Custom Models — especially for Object Detection (OD) tasks.
In this document
In this document, we'll walk through:
- How to set up Label Studio locally
- How to annotate your dataset (images, bounding boxes, etc.)
- How to export and upload your annotations to an OCI Object Storage bucket
- How to train a Custom Vision model using your labeled data and a generated
od.jsonlfile
By the end, you'll have a fully functional custom Vision Object Detection model, powered by your own annotations
Step 1 : Setup Label Studio In Your Local
Refrence Doc
Note : This setup require python version > 3.8
Create a python project and run the following commad
- Create a virtual enviorment
python3 -m venv env
source env/bin/activate
2. Install Label Studio
python -m pip install label-studio3. Run Label Studio
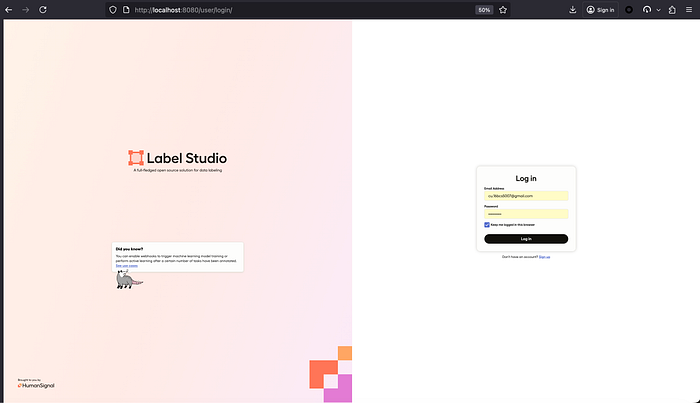
label-studioOnce it starts, open the provided local URL (typically `http://localhost:8080`) in your browser.
Step 2 : Login and Annotate your dataset
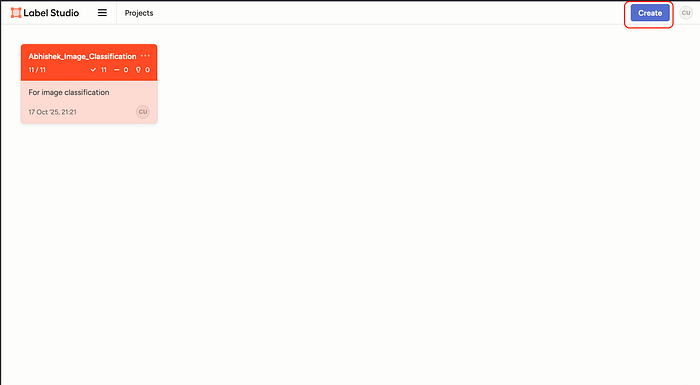
- Once login to label studio, click on create to create a new project
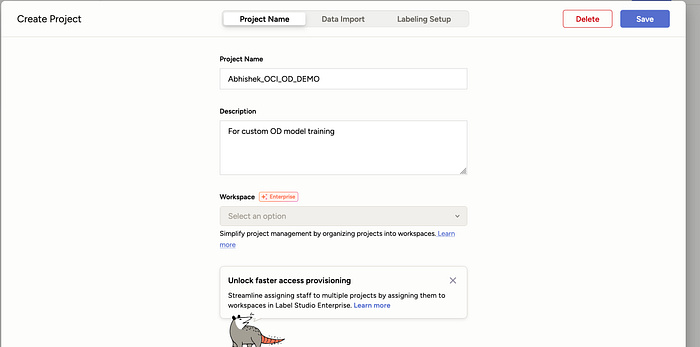
2. Add the details (name and description to the project)
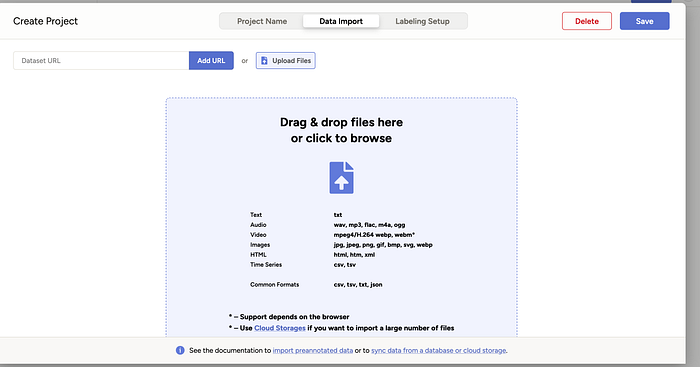
3. Click on Data Import and upload all the files you need to annotate
4. Click on labeling setup and use Object Detection with Bounding Boxes
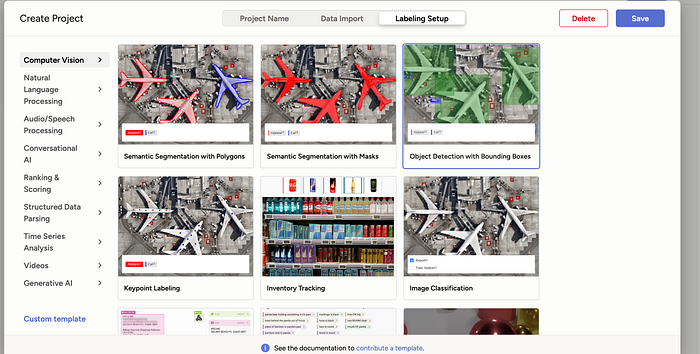
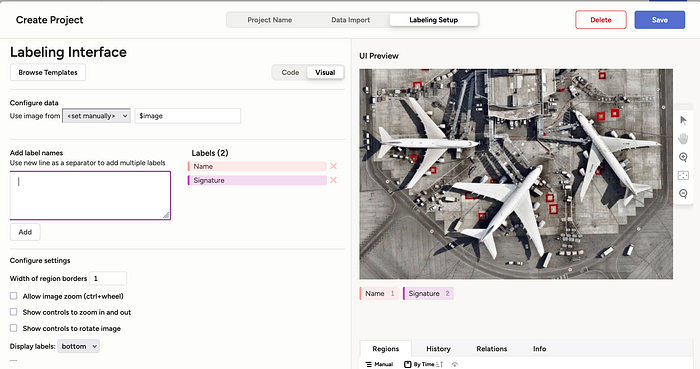
5. Once selected, create all the label name you need to use for annotation. Remove the pre-selected label by clicking on X.
Click on Save button at top to continue
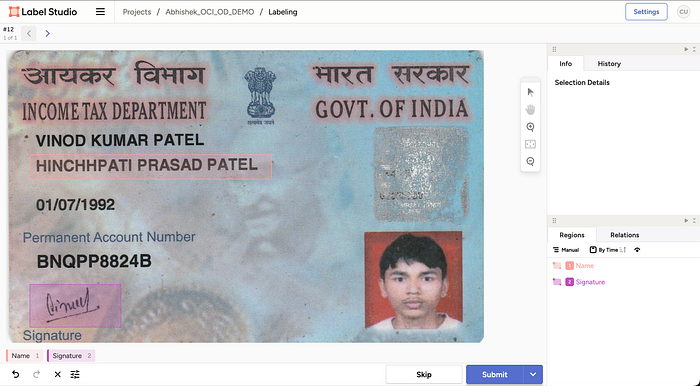
6. Once saved, you will see screen like this, select all and click on Label All tasks
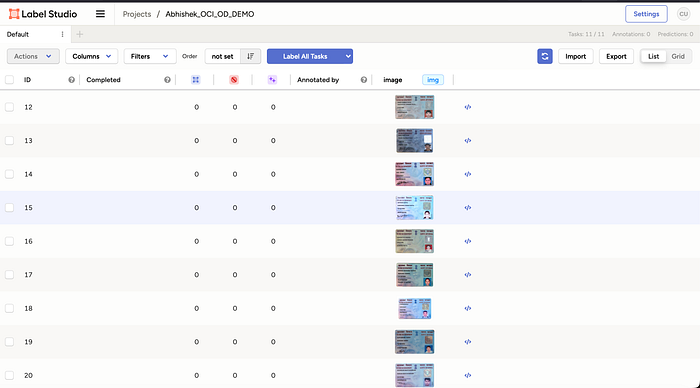
7. Annotate all the files, and click on submit to continue.
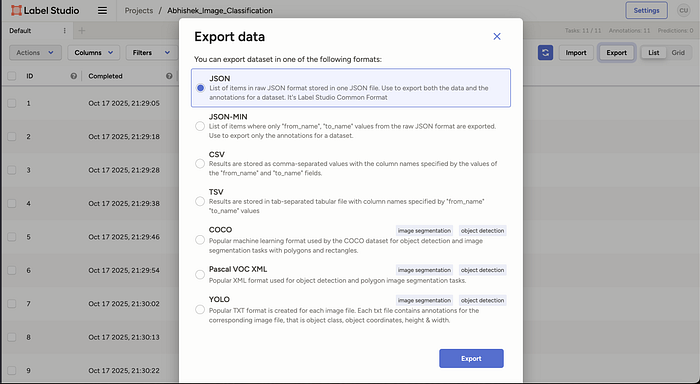
8. Once annotated, click on export and export data as JSON
Sample annotation exported file :
Step 3 : Covert the JSON into OCI vision supported JSONL file
We have written a python script, which you can use directly to convert the generated label studio json file to OCI vision OD model supported JSONL format.
Script Link :
Download this file, and run the python script using below command
python3 OD_PY.py \
  --input LabelStudioLabel_OD.json  --output oci_od_vision_dataset.jsonl \
  --compartment-ocid ocid1.tenancy.oc1..aaaaaaaa3h4niwvbyrq7biw72jtb72lqjaataymvsnghepezdctm4e2d2b3a \
  --namespace axwlrwe7tbir \
  --bucket Abhishek_OD \
  --display-name od \
  --image-prefix pan_images/

Note : Change parameters according to your input.
Input Parameter
- — input : This is the location where you have stored the generated label studio input JSON file.
- — output : The location where you want your OCI vision supported JSONL file to be placed.
- — compartment-ocid : Compartment location where your bucket is present in your tenancy
- — namespace : Namespace of the tenancy
- — bucket : Name of your bucket
- — display-name : always be od
- — image-prefix : if you want to add any prefix before your images, put empty if no.
This will generate a JSONL file. Sample JSONL file generated :
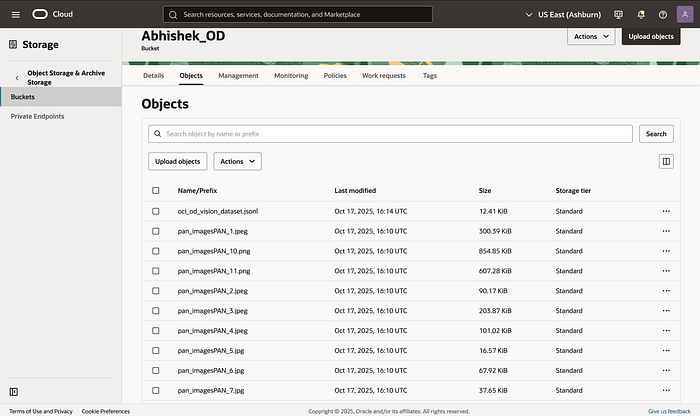
Step 4: Upload everything to the bucket
Login to your tenancy, and upload all the images (used for annotation in step 2) and the JSONL file generated using script mentioned in last step to the bucket.
Step : Go to object storage, select your bucket and go to objects and upload.
Note : Make sure you have object storage policy setup done, if not you can make bucket public and try
Policy Required
- allow group <group_in_tenancy> to use object-family in tenancy
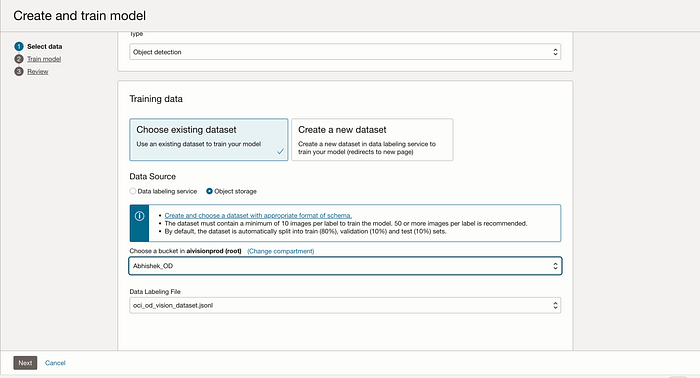
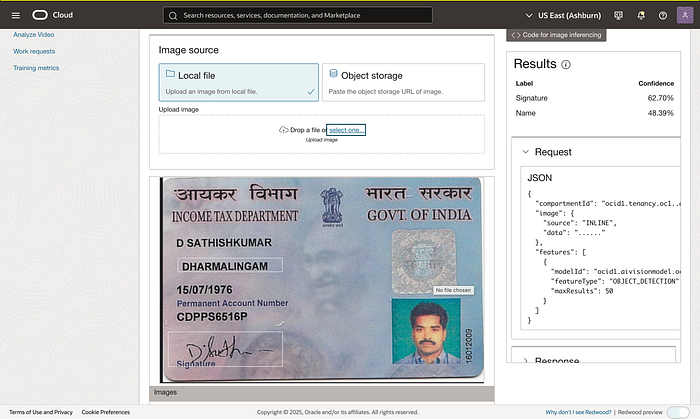
Step 5: Go to OCI vision and deploy your custom model
Go to OCI Vision Service, select project section under custom model and open your project and click on create model.
Select type as Object Detection and Data Source as Object Storage and select your bucket and respective JSONL file you uploaded which was generated as part of Step 3.
Click on next, give name and description to the model, review and then click on create and train model to start training.
Wait for the training to be completed.
Step 6: Training completed, test inferencing
Finally, after some time, once training is completed, go inside the model and test your inferencing.
Github Link
A message from our Founder
Hey, Sunil here. I wanted to take a moment to thank you for reading until the end and for being a part of this community.
Did you know that our team run these publications as a volunteer effort to over 3.5m monthly readers? We don't receive any funding, we do this to support the community. ❤️
If you want to show some love, please take a moment to follow me on LinkedIn, TikTok, Instagram. You can also subscribe to our weekly newsletter.
And before you go, don't forget to clap and follow the writer️!