
In this article, I'll guide you through the process of running external QGIS plugins within a standalone Python script. Specifically, we'll delve into the integration of 'Shape Tools' and 'KML Tools,' while also exploring guiding principles that not only aided me in this journey but can potentially be applied to various tasks as well.
To provide some context regarding the problem I aimed to solve, I was tasked with delivering a project for a customer in the Telecom field. The customer required Google Earth files that contained information about all their network sites and cells for a specific country. Although terms like 'network sites' and 'cells' are common in the cellular telecom field, for the purpose of geospatial analysis, we can consider them simply as vector layers. Due to the frequent need for updates and insights into the evolution of the customer network, I decided to automate the file generation process. I accomplished this by creating a standalone Python script using PyQGIS (I have also detailed this process in a separate article where I explain how to automate tasks using PyQGIS and Windows Task Scheduler). The input information comprised CSV files, and the desired outputs were Google Earth Files (.KML or .KMZ) representing vector layers, specifically a point layer and a polygon layer.
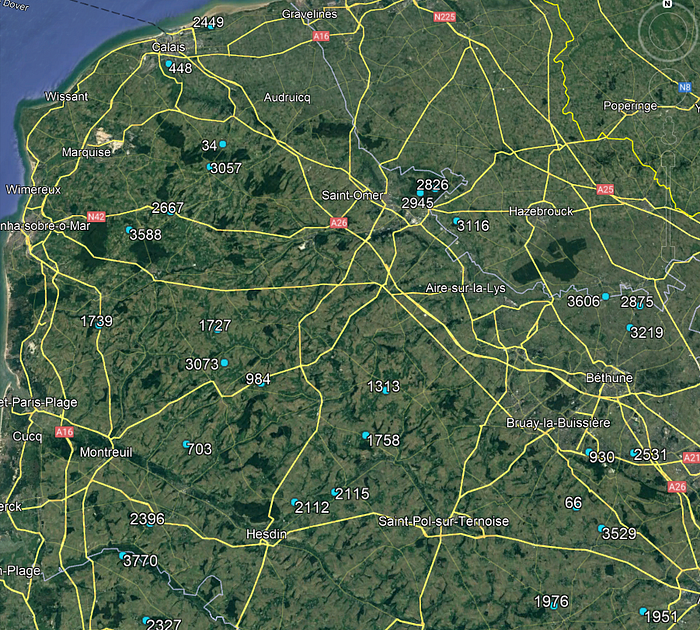
The following images represent how the expected outputs looked like:

Why I Chose External Plugins Over QGIS Native Plugins
My initial approach to tackling this challenge was rather straightforward, as I intended to use only native QGIS methods and processing algorithms. When writing Python code for the standalone script, I followed these steps:
- Loaded vector layers (from CSV files) into the project.
- Generated the 'cells' (wedges) polygon layer using the 'Create Wedge Buffers' algorithm.
- Applied pre-saved styles to both the 'sites' and 'cells' layers.
- Generated GeoPackage files with the outputs using the 'Package layers' algorithm.
- Created KML files using the 'Save Vector Layer as…'
However, I encountered my first issue after the initial test: I couldn't properly export the styling of the polygon vector layer, a crucial feature for displaying relevant information. Aware of the 'KML Tools' plugin and its capability to correctly export most types of QGIS styling, I deemed it the ideal solution. The challenge was that I couldn't find any guide on how to run external plugins via PyQGIS, and they weren't as straightforward as the 'processing.run()' method for executing native processing algorithms.
Regarding the 'Shape Tools' plugin, my decision to use it over the native 'Create Wedge Buffers' algorithm stemmed from the observation that the latter resulted in significantly larger file sizes (approximately double) for this specific project. This size difference was negatively impacting the experience when using the outputs on Google Earth. Unable to find a way to reduce file size with the 'Create Wedge Buffers' algorithm, and considering the advantageous parameters available in 'Shape Tools,' such as the number of drawing segments and the ability to specify the unit (Meters, Kilometers, etc.), I concluded that using it would be more beneficial.
After extensive research and numerous frustrated attempts, I successfully integrated both plugins into my standalone Python script. In the next section, I will explain the 'principles' that enabled me to do so.
Principles for Running External Plugins
As a disclaimer, it is important to note that both the "Shape Tools" and "KML Tools" plugins were developed by the US National Security Agency. Therefore, it is possible that other plugins may have different structures and use completely different methods. I found that one of the reasons why it's challenging to find information online about running external plugins using PyQGIS is because it is a unique approach for each plugin. This requires you to inspect and understand how the source code is organized, identify which objects need to be instantiated, determine which variables need to be set and which methods you can call. So there isn't an universal guideline that will work for each and every plugin, but these were my main findings during the development of this project:
Add the Plugins Directory to the Python Path
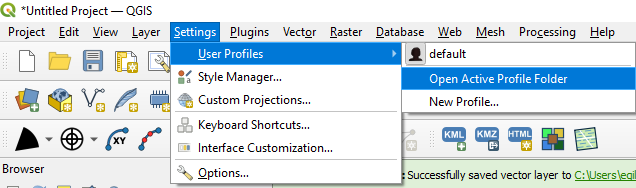
When defining the batch file (covered in more detail in my previous article), it is necessary to include the Plugins directory in the Python path. This allows the standalone Python script to access the plugin packages. To discover your current plugin directory path, navigate to your QGIS application. Under "Settings," go to "User Profiles," and then select "Open Active Profile Folder.
From there you can access the "python" and then the "plugins" folder. That's the path we want! In my case this is the path to be used:
C:\Users\user\AppData\Roaming\QGIS\QGIS3\profiles\default\python\plugins
Main Classes, Methods and Parameters
Typically, the classes inherited to run processing algorithms are either 'QgsProcessingAlgorithm' or 'QgsProcessingFeatureBasedAlgorithm' (derived from "QgsProcessingAlgorithm" for algorithms that operate feature-by-feature). I recommend referring to the QGIS Classes documentation to understand the available methods and parameters. Additionally, examining the plugin source code is essential to comprehend the steps taken before the processing algorithm is executed.
One of the most important methods is 'processAlgorithm', which essentially contains the steps required to transform the original features and generate the final outputs. The 'QgsProcessingAlgorithm' Class documentation outlines the following required parameters:

So, in addition to the actual parameters passed to the algorithm in the form of a dictionary, a context and feedback are also required. For running a standalone Python script, I encountered no issues simply by instantiating both QgsProcessingContext and QgsProcessingFeedback objects. I then set the current 'project' and the created 'feedback' to the context object. The following are the actual steps I took to run both the 'Shape Tools' and 'KML Tools' algorithms:
Shape Tools
- Import necessary packages and methods.
- Instantiate a processing algorithm object.
- define parameter dictionary.
- Instantiate a context and feedback.
- Initialize the parameters and the algorithm.
- Prepare the algorithm.
- Run the algorithm.
Here's part the python code used to perform these steps (the complete project code is provided at the end of this article):
# Create a project instance
project = QgsProject.instance()

# Import ShapeTools packages
from shapetools import createPie as pieWedge

# Instance of shapeTools algorithm
pieAlgo = pieWedge.CreatePieAlgorithm()

# Define the config parameters
params = {'INPUT': layer_str,
          'Azimuth1': QgsProperty.fromExpression('"Azimuth"'),
          'Azimuth2': 60,
          'Radius':200,
          'UnitsOfMeasure': 1,  # For using Meters as the unit
          'DrawingSegments': 20,
          'OUTPUT': petals_output_path
          }

# Initialize a context
context = QgsProcessingContext()
context.setProject(project)
feedback = QgsProcessingFeedback()
context.setFeedback(feedback)

# Initialize parameters and algorithm
pieAlgo.initParameters()
pieAlgo.initAlgorithm()

# Prepare and run algorithm
pieAlgo.prepareAlgorithm( params, context, feedback)
pieAlgo.processAlgorithm( params, context, feedback)
KML Tools
- Import necessary packages and methods.
- Define a canvas object (QgsMapCanvas) and set it to the canvas parameter in the settings to avoid errors.
- Instantiate a processing algorithm object.
- define parameter dictionary.
- Instantiate a context and feedback.
- Initialize the algorithm.
- Run the algorithm.
# Create a canvas instance and project instances
canvas = QgsMapCanvas()
project = QgsProject.instance()

# Import KmlTools packages
from kmltools import exportKmz
from kmltools.settings import settings

###### Part 3 - Export KMZ files  ######
# Adjust canvas parameter to avoid errors when running the algorithm
settings.canvas = canvas
# Instance of exportKMZ class
exportKMZ = exportKmz.ExportKmzAlgorithm()

# Initialize a context
context = QgsProcessingContext()
context.setProject(project)
# Initialize and set a feedback
feedback = QgsProcessingFeedback()
context.setFeedback(feedback)

### Part 3.1 - Site layer export ###
# Define layer to be exported
layer_str = 'Sites_for_GE'
layer = site_layer
# Define label fiels
name_field = 'Site_ID'
# Define in case want to use a standard icon
google_icon = ''
# Map fields
field_list = [f.name() for f in layer.fields()]

# Specify output path and name
output_path = project_path + '\\outputs\\' + layer_str +'.kmz'

# Define the config parameters dict
params = {'InputLayer': layer_str,
            'OutputKmz': output_path,
            'NameField':name_field,
            #'UseGoogleIcon': google_icon,
            'DescriptionField': field_list
        }

# Initialize algorithm
exportKMZ.initAlgorithm(params)

# Finally run the algorithm to export layers
exportKMZ.processAlgorithm( params, context, feedback)
Overall, although both plugins followed a similar structure for their execution, there were slight changes in the required steps for each of them. For instance, KML Tools didn't define the initParameters and prepareAlgorithm methods, but it required the canvas to be defined. This variation in steps makes it challenging to establish universal rules that would work for all plugins. While I don't claim expertise, it's possible that I applied redundant steps or missed potential shortcuts. However, for my application, I encountered no issues by following the aforementioned steps.
Project Example
This final segment outlines all the steps required to create this project.
Create Input files
Let's begin by generating the input files. Unfortunately, I cannot share any sensitive customer data, so we'll create a dummy input where the objective is to generate random points (defined by their Latitude and Longitude) inside given country boundaries. Unsure of which country to pick, I sought a suggestion from chatGPT:

The complete python code for input generation can be found in the following notebook, which utilizes geopandas to generate random points within a box defined by the country's min and max coordinates. Then a shapefile with the country boundaries is used to filter out any points that fall outside of it.
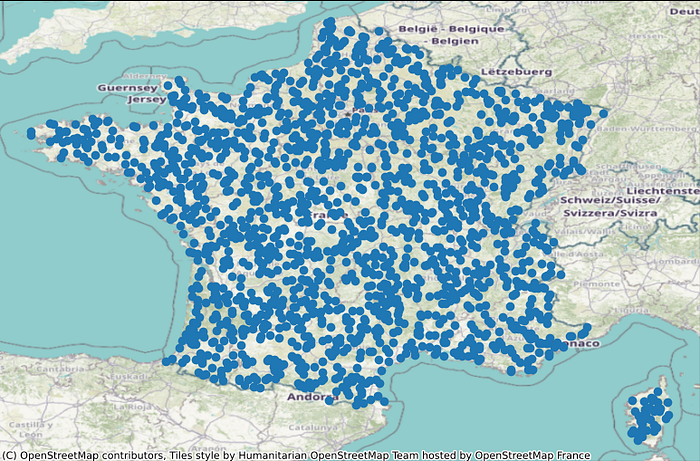
Here are some plots of how the random points created for France look like (before and after filtering):

Here's how the data looks like: We have a first table with unique IDs representing geographical locations (sites), along with the corresponding Latitude and Longitude coordinates for each point:

Next, we have a second table containing the same unique IDs along with azimuth values (only the values of 0, 120, and 240 were used, for simplicity). These azimuth values will be used to draw polygons (wedges) representing new features.

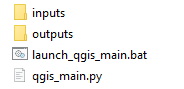
The project structure includes both 'inputs' and 'outputs' folders, the batch file used to set the variables required to use the QGIS Python installation correctly, and the actual standalone Python script:
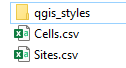
Inside the 'inputs' folder I placed both csv files as well as a 'qgis_styles' folder, which will contain the '.qml' files used for styling the outputs:
All the csv input files, QGIS styling files, as well as the batch file and python code used in this project are available in the following repository:
Conclusion
This article provided an overview of the integration of external QGIS plugins (Shape Tools and KML Tools) into a standalone Python script designed for automating QGIS tasks. Additionally, the principles for writing code for plugins were discussed, with the caveat that these guidelines are not definitive. The process of calling plugins may necessitate in-depth research of the source code for the algorithm to be employed.
This article provided an overview of the integration of external QGIS plugins (Shape Tools and KML Tools) into a standalone Python script designed for automating QGIS tasks. Additionally, the principles for writing code for any plugin were discussed, with the caveat that these guidelines are not definitive. The process of calling plugins may necessitate in-depth research of the source code for the algorithm to be employed. Happy coding!