
If you landed on this article I'm guessing one of the many shortcomings with the Arduino IDE was finally enough. Don't get me wrong, the Arduino IDE is an awesome starting point for many users. Nervertheless, I use Arduinos as prototyping platforms and things like better source control integration and project structure go a long way. For the other users like me, here is an alternate way to program arduinos.
Configuration
Here is the version of all pieces for this solution. If you're just following along and not really sure what's going on, install the exact version listed to improve your odds of success. If you're a pro, the versions may give you an insight of where the issue is in case something goes wrong.
Operating System: macOS Big Sur 11.5.2
IDE: Visual Studio Code 1.60.0
IDE Extension: Arduino 0.4.4
Toolchain: Arduino CLI 0.13.0
Board: Arduino Nano 33 IOT
Installation
- Follow instructions at https://code.visualstudio.com to install Visual Studio Code. Verify your installation by launching it.

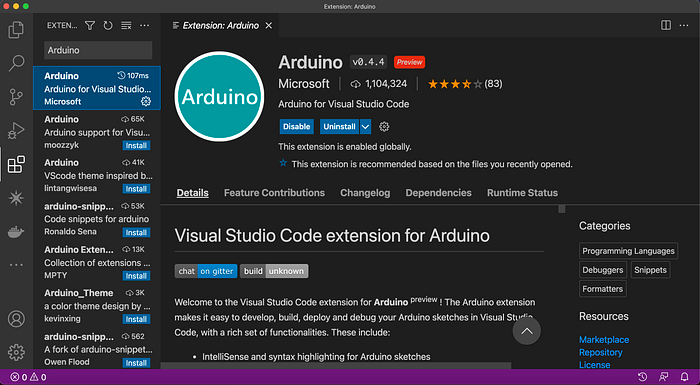
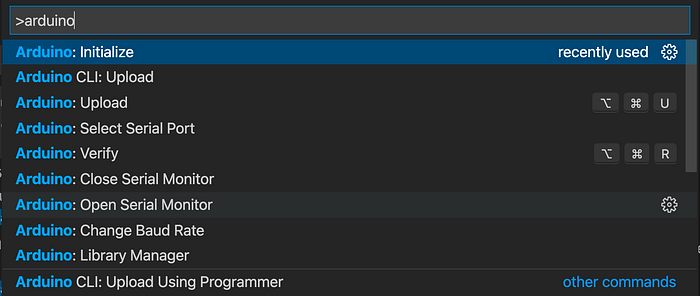
2. On the left tool bar, click on the 4 blocks icon to install the Arduino extension by Microsoft. Verify your installation by pressing ⌘+shift+P and typing Arduino, you should see available extension commands.
3. Install Arduino CLI by following the instructions here https://arduino.github.io/arduino-cli/0.19/installation/, I used the install script. Make note of the installation location, in my case it is ~/bin/arduino-cli.
Verify installation of Arduino CLI by running ~/bin/arduino-cli version on the Terminal.

Visual Studio Code Settings
To configure the Arduino extension settings press ⌘+, to open the Visual Studio Code settings page. Search for Arduino and set the following:
Arduino: Command Path: arduino-cli
Arduino: Path: ~/bin/
Arduino: Use Arduino Cli: checked
**Important! Restart Visual Studio Code
Create a Project
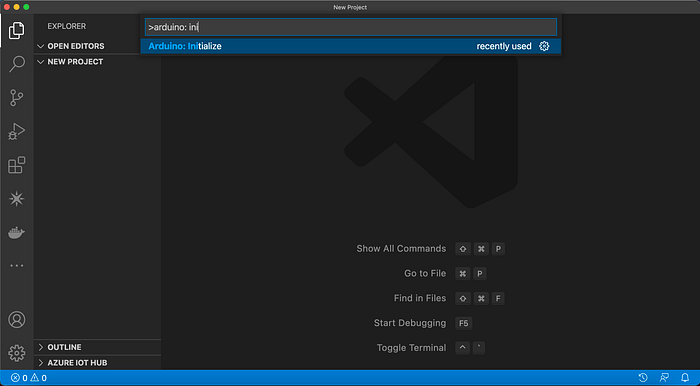
Now that all is setup, open your project folder in Visual Studio Code and initialize the project with the command Arduino: Initialize (press ⌘+shift+P to search for commands).
Name your Arduino file the same as your folder name and select your board.
As an example here is the blink code from https://arduino.cc
/*
  Blink
Turns an LED on for one second, then off for one second, repeatedly.
Most Arduinos have an on-board LED you can control. On the UNO, MEGA and ZERO
  it is attached to digital pin 13, on MKR1000 on pin 6. LED_BUILTIN is set to
  the correct LED pin independent of which board is used.
  If you want to know what pin the on-board LED is connected to on your Arduino
  model, check the Technical Specs of your board at:
  https://www.arduino.cc/en/Main/Products
modified 8 May 2014
  by Scott Fitzgerald
  modified 2 Sep 2016
  by Arturo Guadalupi
  modified 8 Sep 2016
  by Colby Newman
This example code is in the public domain.
https://www.arduino.cc/en/Tutorial/BuiltInExamples/Blink
*/
// the setup function runs once when you press reset or power the board
void setup() {
  // initialize digital pin LED_BUILTIN as an output.
  pinMode(LED_BUILTIN, OUTPUT);
}
// the loop function runs over and over again forever
void loop() {
  digitalWrite(LED_BUILTIN, HIGH);   // turn the LED on (HIGH is the voltage level)
  delay(1000);                       // wait for a second
  digitalWrite(LED_BUILTIN, LOW);    // turn the LED off by making the voltage LOW
  delay(1000);                       // wait for a second
}
Once you type this in your .ino file you will get a few errors. This is because the IDE is not configured to include default Arduino file. Just click on the verify icon (check mark) on the top right and the Arduino Extension will take care of that by creating the file c_cpp_properties.json under .vscode directory.

Use the Select Serial Port on the bottom right and click on the upload button to program your Arduino.
Code away!