


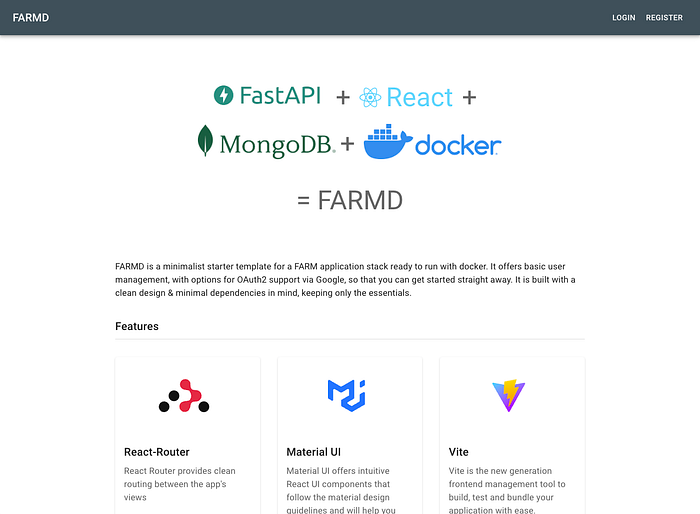
Instead of initiating the project from scratch, it is generally wiser to start with an existing foundation, especially if it is both high-quality and not overly intricate. After evaluating several projects, I recommend to use Fastapi-React-React-Mongodb-Docker.
Clone or download the repository. Explore the contents, split in two parts: an API server built with FastAPI (backend directory) and a web application in React (frontend directory).
A common challenge in developing a new application is the implementation of authentication. However, there's no need to worry about it because this template already incorporates authentication features.
If you choose to use a different database, such as PostgreSQL instead of MongoDB, the transition is relatively straightforward. The project has been designed to facilitate the integration of alternative databases.
Configuration
Create a Google service for authentication, following this steps.
- On the OAuth consent screen, choose
Externalfor the User Type. - Add your email contact to the required fields and any other necessary information.
- Complete the process, and you will receive your client ID and client secret
- On the Credentials screen add the redirect URL: http://127.0.0.1:8000/api/v1/login/google/callback.
Once the process is completed, put the client ID and client secret values in the env.dev file of the backend directory:
GOOGLE_CLIENT_ID=
GOOGLE_CLIENT_SECRET=
Execution
Backend
Execute the provided commands below:
cd backend
poetry config virtualenvs.in-project true
poetry install --with dev
poetry shell
uvicorn app.main:app --reload
Access the URL http://127.0.0.1:8000/docs in your web browser to confirm the availability of endpoints.
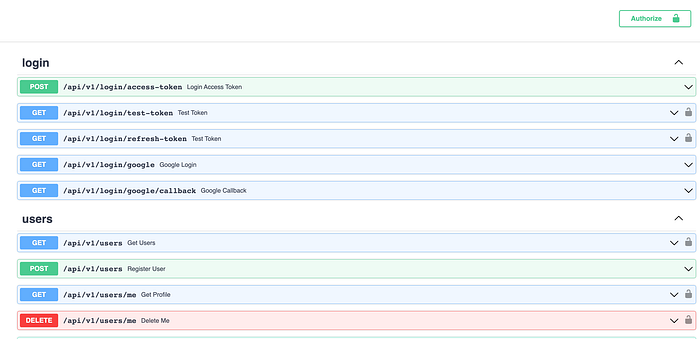
Notice that the project already has numerous registration and login services developed for us!
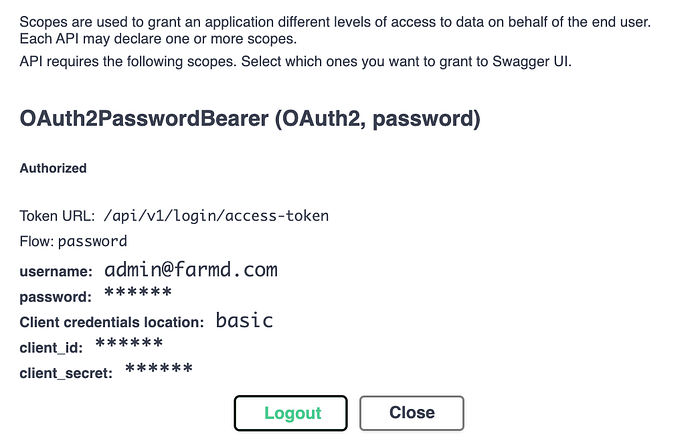
By default, our services are secured. To test our endpoints, we need to start by clicking the Authorize button and entering the following details:
- Username:
admin@farmd.com - Password:
admin - Client credentials location:
Authorization header - Client ID: Value acquired during configuration
- Client Secret: Value obtained during configuration
Upon successfully clicking the Authorize button, a window will appear confirming the correctness of the provided information, as illustrated below:
Our services are by default protected. In order to perform tests of our endpoints we must first press the Authorize button, and enter:
- username:
admin@farmd.com - password:
admin - Client credentials location:
Authorization header - client_id: Value obtained from Google OAuth customer configuration
- client_secret: Value obtained from Google OAuth customer configuration
Upon successfully clicking the Authorize button, a window will appear confirming the correctness of the provided information, as illustrated below:
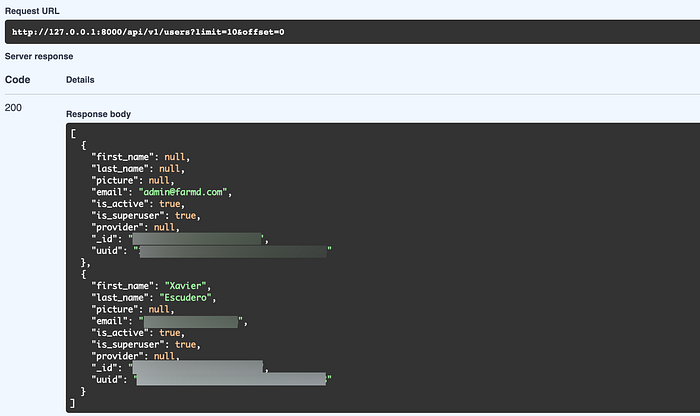
Close the window and navigate back to the endpoint screen. To test any endpoint, select the Try button, set the parameters, and then click the Execute button.
Frontend
Run the commands:
cd frontend
npm install
npm run dev
Access the url: http://localhost:5173/ in your browser.

Verify the proper functioning of the login and register options. The project is already configured to seamlessly incorporate new features!
👏 Did you like the story? Give 1 to 50 claps to show your support! Your claps really helps me out and motivates me to keep creating valuable content. Thank you for your support! 👏
Stackademic
Thank you for reading until the end. Before you go: