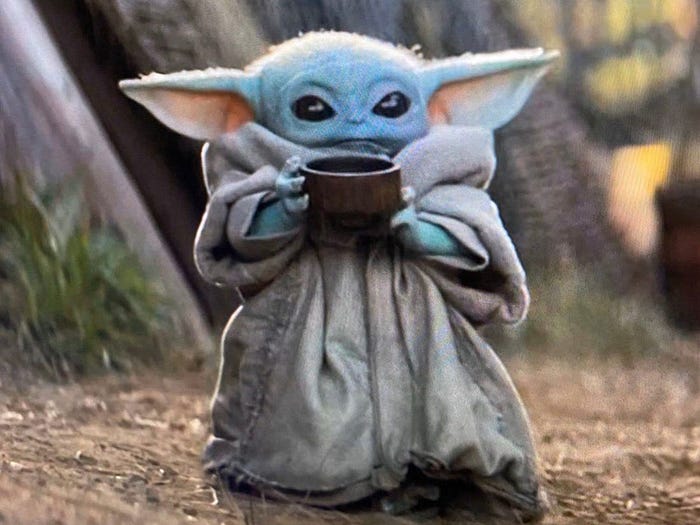


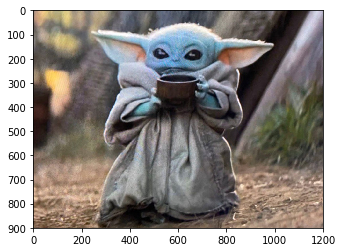
The internet has been losing its collective mind over baby Yoda, and for good reason. I mean … look at him.
I was recently helping some of my students prepare for their Python final exam and thought it would be fun to learn some basic image processing in the popular Python library Numpy, using baby Yoda as our source material.
Reading an Image with Numpy
First off, how do we even read an image using Numpy? Turns out, its pretty simple! Assuming you've got a file in your working directory called baby_yoda.jpg, here's the code you need.
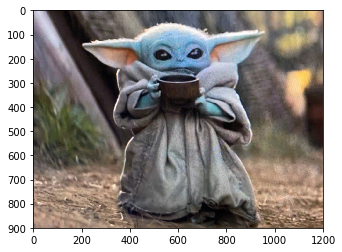
We should see our baby Yoda:
But How Does Python Represent Images?
Now, to really understand the five image transformations we're about to do, we should get a basic idea of how an image is represented in Python.
An image is basically a big, rectangular grid of pixels. And, each pixel is fully defined by three values: red, green, and blue (RGB). Each of these values is an integer between 0 and 255. The higher the value, the more of that color is in the image.
At one extreme we have a pixel with RGB values (0,0,0), meaning there is absolutely no color in that pixel, AKA its black. At the other extreme, we have a pixel with the maximum RGB values (255,255,255), meaning there is as much color as possible in the image, AKA its white. Every color you can imagine falls somewhere in between.
If your image has size 100 pixels by 200 pixels, Python will encode the entire image in a 3-dimensional Numpy array with dimensions 100 by 200 by 3. The 3 corresponds to the three color channels we mentioned before. By getting creative with this 3-dimensional Numpy array, we can perform all sorts of cool transformations to our image!
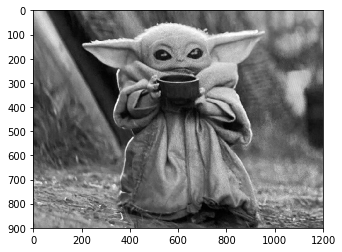
1. Greyscale
To start, off we will be taking our color image of baby Yoda and converting him to greyscale. Note that all the colors we call "grey" are simply RGB combinations where the red, green, and blue values are exactly the same. So, for example RGB (60,60,60) is one shade of grey and (200,200,200) is another.
Hmm … how would we take a pixel with RGB values such as (60, 100, 200), and turn it into a grey pixel? Well, one basic idea is to just take the average of the three numbers, and then pick the shade of grey where all three numbers are this average. So, with the pixel (60, 100, 200), the average is 120, so we map it to the grey pixel (120, 120, 120).
Let's see how to achieve this result with code!
To explain a few of the subtleties here:
- With a 3-dimensional array, there are multiple ways to interpret "taking the average". For example, we might intend to take the average across every single number in the array, resulting in a single number. We might mean the average of each row, average of each column, or average of each pixel. Thus, we need to use the "axis" keyword to specify which average we would like. In this case, it is the average across the pixels.
- Once we got the averages, we'll need to "stack" the averages on top of each other, to create the greyscale image. Another way to think about this is that we would like to set the red, green, and blue values of each pixel to the average value of that pixel.
- Note that it's likely that the average of the RGB values for any pixel might not be an integer, but Numpy expects integers in the image, so we will simply cast the greyscale image back to integers.
And … if all went well, we should get the still-adorable greyscale baby Yoda:
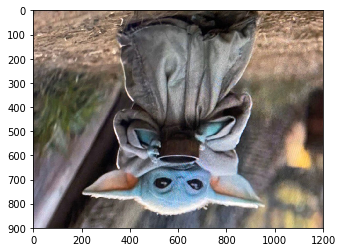
2. Horizontal / Vertical Flip
We might also want to flip our baby Yoda horizontally or vertically. Taking a step back, let's look at how we would reverse just a regular list of numbers.
If I have list_of_nums which are [1, 2, 3, 4, 5], running the following:
list_of_nums[::-1]
would result in the reversed list: [5, 4, 3, 2, 1].
To explain the [::-1], it is a shorthand for [0:len(list_of_nums),-1] which says:
"traverse my entire list, taking steps of size -1" which, even more simply means "traverse my list backwards"
We can use this convenient notation to flip an entire image as well. Here's the code for a vertical flip:
Since the rows are the first axis of our image (which is a 3-dimensional array), we can simply just use the same [::-1] transformation on the entire image and we will reverse the order of all the rows. Reversing the order of the rows is the same as vertically flipping the image, resulting in the upside down baby Yoda:
Horizontally flipping our image is just as simple, with the following code:
Whoa! What's with the confusing syntax: [:,::-1]. Well, this is again just a shorthand for [0:numRows, 0:numCols:-1], which in words says "iterate overall my rows and iterate over all my columns in reverse order". This has the effect of keeping the rows as they are, but flipping the columns, resulting in a horizontal flip:
3. Blurring an Image
To finish off, let's take a look at a slightly more complicated transformation, the blur.
Blurring is a pretty intuitive concept when it comes to images. It's what happens when your camera is out of focus or if something is moving too fast for the camera to properly capture. It turns out we can actually perform a transformation onto our baby Yoda image to create this blurring effect.
First, let's look at what it means to "blur" a pixel mathematically. In the image below, we have a center pixel outlined in red. We create a small box around that pixel, outlined in blue. In order to "blur" the center pixel, we will take the average value of all pixels in the larger blue box, and set that average value equal to the new value of the center pixel.

Doing this transformation to each pixel in the baby Yoda image (except ones on the border because we cant create these boxes), we are causing each pixel to incorporate information about the pixels that are nearby. Thus, the pixels are no longer independent, but rather "blur" into one another.
Let's take a look at the code needed to make this happen.
Looks kind of intimidating! Hopefully the comments help a bit but the general idea is:
- Work on the greyscale version of baby Yoda we made (for simplicity)
- For each pixel in the image, define a small box around the pixel
- Take the average of all pixels in that box and set this value as the new pixel value
- Reconstruct the image by stacking three copies of our blurred images together
The result:

Blurry, but still cute. If you look closely, you can see the small border around the image that was not affected by the blur.
And that's it! Hopefully you learned a bit about image manipulations in Numpy, and fell in love with baby Yoda all over again.
~Best of luck!