

If you're new to Power Platform and have read about the ease of creating model-driven apps, you'll quickly discover that Dataverse is not only a powerful database but also the core of your applications. This article will guide you on how easily you can get started with Dataverse.
Imagine you're working at a company that encourages the use of Microsoft Power Platform. You and your team currently manage certain activities using Excel, but you're interested in trying Power Platform to streamline these tasks. Or perhaps you've been part of an ERP project implementing D365 Finance and have heard about Power Platform's capabilities. In both cases, you could start with a mini application using Dataverse and model-driven apps to handle specific calculations or manage data integrations. These are just a few easy use cases where Dataverse can become your reliable foundation.
Imagine you're part of an ERP migration project, moving from an old ERP system to D365 Finance. In the old system, every vendor had a unique vendorID, and some of these vendors received purchase orders that now need to be invoiced in D365 Finance. However, because the vendorID format in D365 Finance is different, each invoice needs the vendorID to be mapped from the old system to the new one.
Typically, an integration developer might suggest creating a configuration file to handle these mappings at runtime. This approach works if you have a complete list of vendorID mappings from the start. But what if the ERP migration happens in phases, requiring support for both the old and new systems simultaneously? This scenario leads to missed mappings in the configuration file, causing invoices to fail. Updating configuration files can also be time-consuming and error-prone, especially under tight deadlines.
A more reliable solution would be to use a Dataverse table and a model-driven app. Dataverse can store the vendorID mappings in a centralized, easily updatable table, and a model-driven app can allow you to manage these mappings dynamically. This approach minimizes errors, speeds up updates, and ensures smooth integration between the old and new ERP systems.
Let's look at a small example. Suppose the old ERP system used vendorIDs like VEN001, VEN002, etc. During migration, each vendor will ideally have a corresponding vendorID in D365 Finance if created through a streamlined vendor management process. To handle this mapping, I'll create a VendorMapping table in Dataverse with four primary columns: OldSystem, OldSystemVendorID, NewSystem, and NewSystemVendorID.
In addition to these four columns, Dataverse will automatically create additional system fields as part of the table setup, such as CreatedOn, CreatedBy, ModifiedOn, and ModifiedBy. These system fields allow for auditing and tracking changes, providing a structured and managed approach to handling vendorID mappings.
Lets go to make.powerapps.com and start with the creation of the table.
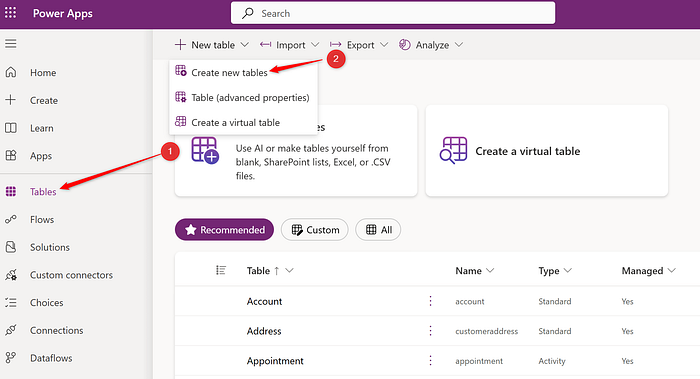
Once you select "Create new tables" you will see several options with co-pilot and all. Lets use the basic where we say "add columns and data" and proceed.
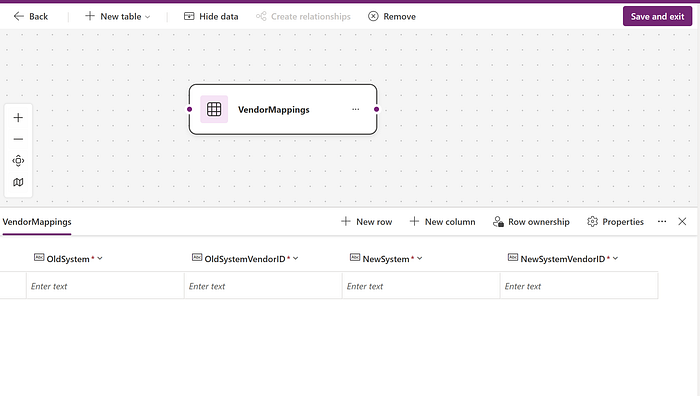
Create or add the columns one by one and also name the table.
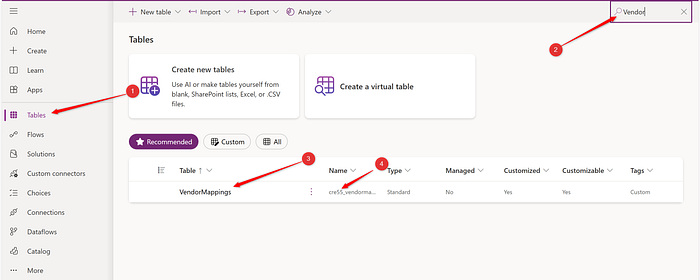
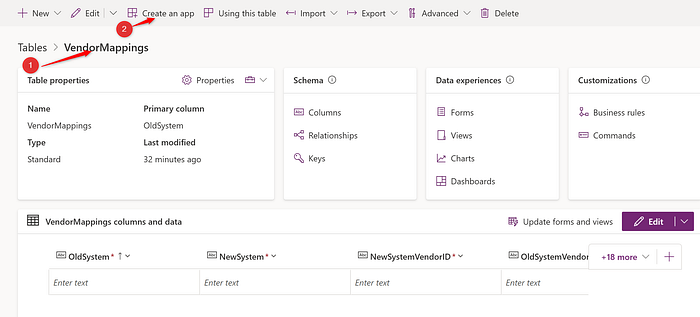
Once you have saved the table, you can go and search for the table created as shown in the above screenshot. You must notice that table "VendorMappings" has an internal name which is vendormappings in small case with a prefix "cre55" separated by an underscore. This is nothing but the default publisher used when creating the table. You can read more about publishers in my another article shared in the below link:
Before moving on to building the model-driven app, we need to finalize an important aspect: defining the key for our Dataverse table. In the old ERP system, each vendorID is unique — no two vendors share the same ID unless two companies have merged into a single entity in D365 Finance. However, even in such cases, they still had unique vendorIDs in the old ERP system.
Therefore, the best approach is to use a composite key, combining OldSystem and OldSystemVendorID. This composite key ensures that each entry remains unique and accurately represents each vendor's identity in the old system, allowing smooth mapping to the new system.
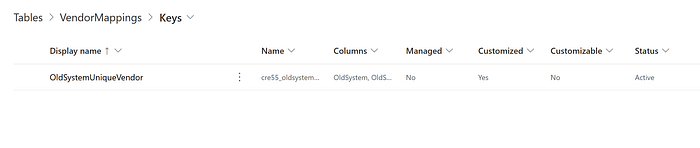
Lets select the table and look for the option called "Keys".

Click "New Key" and enter a name. I chose "OldSystemUniqueVendor" as the name for the key. Then choose the OldSystem and OldSystemVendorID columns.
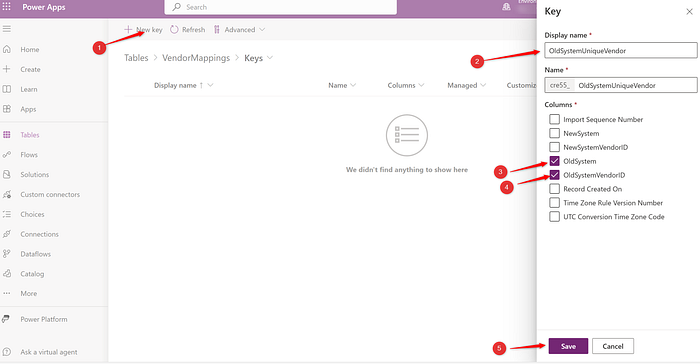
Note, if you get any error saying the key size exceeds 1700 character count then edit the column and go to the advanced settings and change the mac character count to stay within the key limit.
Now that you have created the key, the key is first in the status "Pending" as shown below:

You need to wait until the status becomes "Active" as shown below to start entering or uploading data.
There are several ways to upload data into Dataverse. In this article, we'll focus on one of the simplest approaches: building a model-driven app on our VendorMappings table. This app will allow easy data entry and management for vendorID mappings. Additionally, we'll configure it so only the relevant department, authorized for mapping translations, can access and update the data. This approach streamlines the process and ensures secure, controlled access.
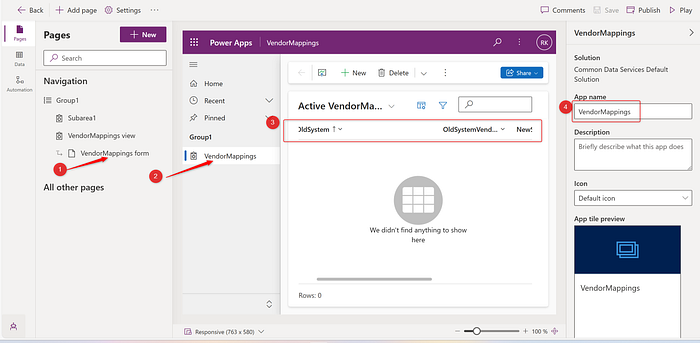
Lets create a Model Driven App.
Name the app.

Now, since we want to keep things simple, we will not do a lot of changes on the app. The only thing we will do is to rearrange the columns and that is just a simple drag and drop.
We need to now first publish the app and then play the app.
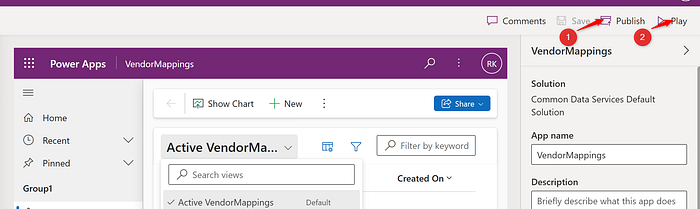
The app opens in a browser and looks like follows:

Now you can add the rows in the table one by one by clicking the "+New".
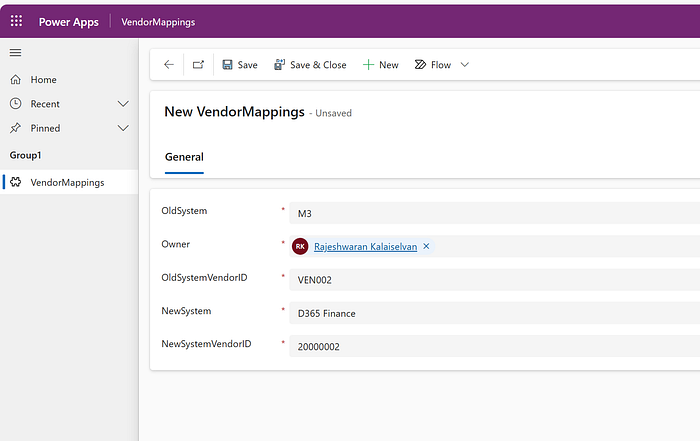
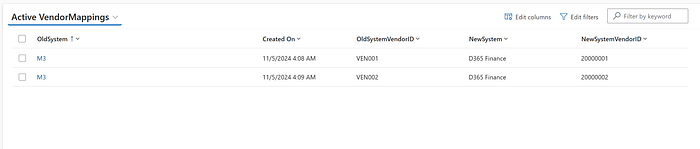
Once you have added fields, the table looks as following:
The final piece we'll cover in this article is how the integration handling invoices can access the VendorMappings table to translate old system vendorIDs to new system values. Let's assume the integration team is using Logic Apps, which allows seamless use of the Dataverse connector. For example, if an incoming invoice lists the vendorID as VEN002, the Logic App can query Dataverse to retrieve the corresponding new system vendorID, ensuring smooth and accurate processing.
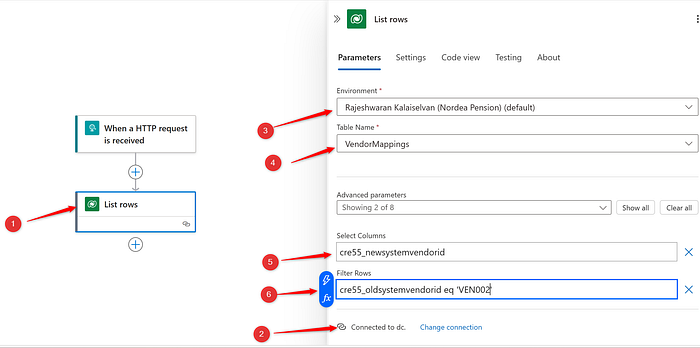
In my integration Logic App, I'll use the Dataverse connector and select the 'List Rows' option. First, I'll establish a connection using a service principal that has 'service reader' access to the environment (details on setting this up will be in another article). Once connected, I'll select the appropriate Power Platform environment and the VendorMappings table. Since I only need the NewSystemVendorID column, I'll choose it as the output. To filter the data, I'll set a condition that matches the OldSystemVendorID column with the VendorID from the incoming invoice file. Note that I have hardcoded the value in the connector as VEN002, but in real life, it would be a dynamic value.
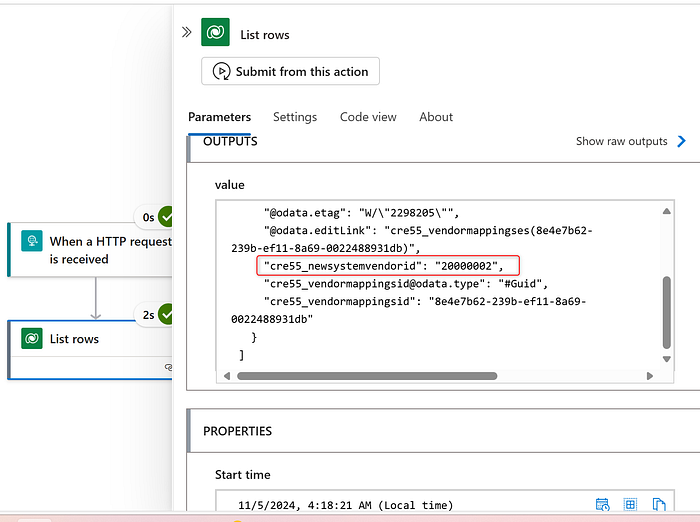
The result will be a JSON response generated by Dataverse, which includes the NewSystemVendorID value we need. This value can then be used directly in the integration logic to map the vendorID from the old system to the new system.
In conclusion, this example demonstrates just how simple it is to set up a Dataverse table and build a model-driven app for managing vendorID mappings. By sharing this app only with the authorized team, you ensure that updates are handled securely and by the right people, while reducing the risk of errors or delays. The integration team can then use this dynamic solution in real time, eliminating the need for error-prone configuration files and streamlining the process by avoiding time-consuming team handoffs.
The entire process becomes even more efficient when the Vendor Onboarding team includes these mappings in the VendorMappings table as part of the onboarding process itself. This proactive step ensures that all necessary mappings are in place, minimizing the chances of errors when invoices are processed. This Dataverse-driven approach not only improves accuracy but also reduces operational friction, providing a robust solution for managing vendorID translations during the ERP transition.