

There are so many ways we can build Angular apps and ship them for production. One way is to build the Angular app with NodeJS and PostgreSQL as a database. There are four things that make this stack popular and you can write everything in Javascript. The four things are PostgreSQL, Angular, Express, and NodeJS. This stack can be used for a lot of uses cases in web development.
Developing the application is one part and you need to package it based on your deployment needs once the development part is completed. There are so many ways we can package and ship PEAN Stack to production: manual, with webpack, with Gulp, etc we will see all these approaches in detail.
- Prerequisites
- Example Project
- PEAN Stack Development
- Manual Implementation
- With Webpack
- Packaging With Gulp
- With Docker
- Summary
- Conclusion
Prerequisites
There are some prerequisites for this post. You need to have a NodeJS installed on your machine and some other tools that are required to complete this project.
- NodeJS
- Express Framework
- PGAdmin
- PostgreSQL
- Postgresapp
- node-postgres
- VSCode
- Postman
- nodemon
- dotenv
- Angular CLI
- Typescript
- ngx-bootstrap
NodeJS: As an asynchronous event-driven JavaScript runtime, Node.js is designed to build scalable network applications.
Express Framework: Express is a minimal and flexible Node.js web application framework that provides a robust set of features for web and mobile applications.
PGAdmin: pgAdmin is an Open Source administration and development platform for PostgreSQL
PostgreSQL: Open Source relational Database
VSCode: The editor we are using for the project. It's open-source and you can download it here.
Postman: Manual testing your APIs
nodemon: To speed up the development
If you are a complete beginner and don't know how to build from scratch, I would recommend going through the below articles. We used these projects from this article as a basis for this post.
How to write production-ready Node.js Rest API — Javascript version
Example Project
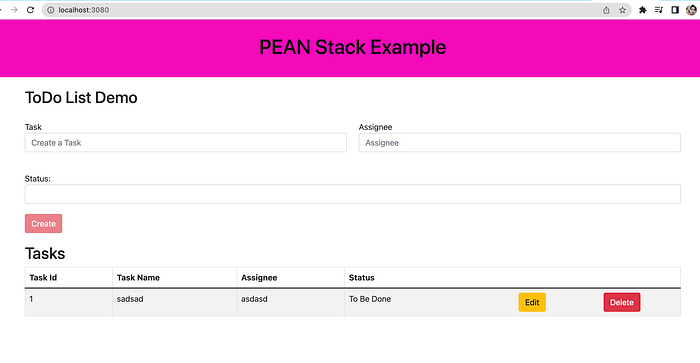
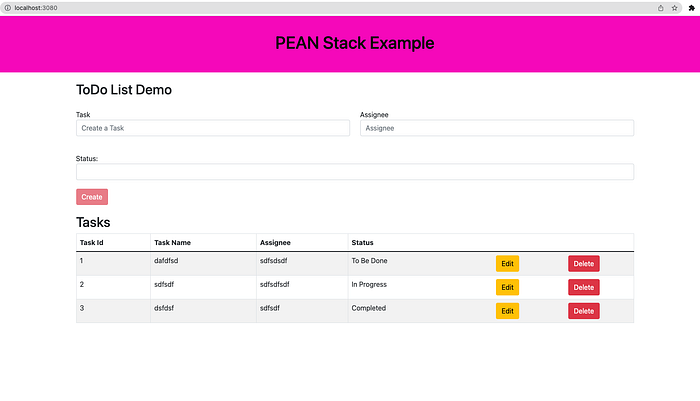
Here is an example of a simple tasks application that creates, retrieves, edits, and deletes tasks. We actually run the API on the NodeJS server and you can use PostgreSQL to save all these tasks.
As you add users we are making an API call to the nodejs server to store them and get the same data from the server when we retrieve them. You can see network calls in the following video.

Here is a Github link to this project. You can clone it and run it on your machine.
// clone the project
git clone https://github.com/bbachi/pean-stack-example.git
// Angular Code
cd ui
npm install
npm start
// API code
cd api
npm install
npm run dev
PEAN Stack Development
Angular is a javascript framework for building web apps and it doesn't load itself in the browser. We need some kind of mechanism that loads the index.html (single page) of Angular with all the dependencies(CSS and js files) in the browser. In this case, we are using node as the webserver which loads Angular assets and accepts any API calls from the Angular app.

If you look at the above diagram all the web requests without the /api will go to Angular routing and the Angular Router kicks in and loads components based on the path. All the paths that contain /api will be handled by the Node server itself.
Here is the complete detailed article about the development.
Manual Implementation
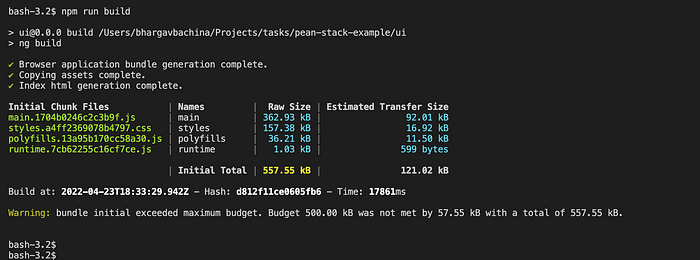
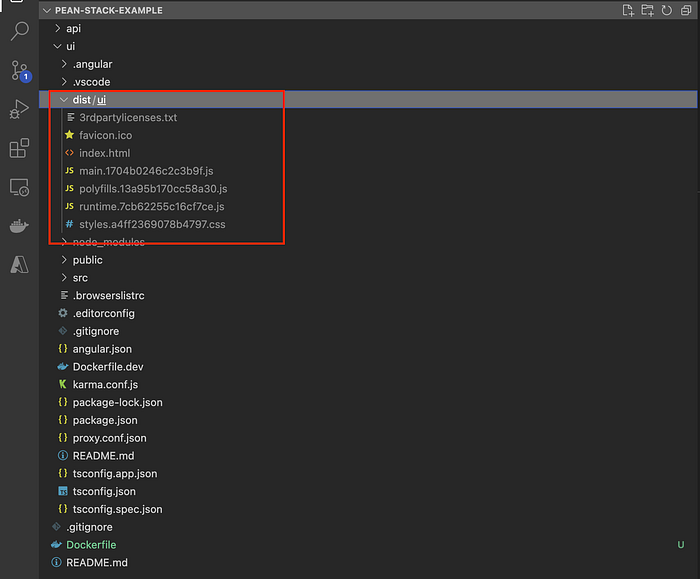
In this manual implementation, we build the Angular app and place the appropriate code into one folder and run or deploy the application. As a first step, we need to build the Angular app and all the static assets and built files are placed into the dist folder.
// change to ui directory
cd ui
// build the app
npm run build
All the built and static assets are placed under this folder dist/
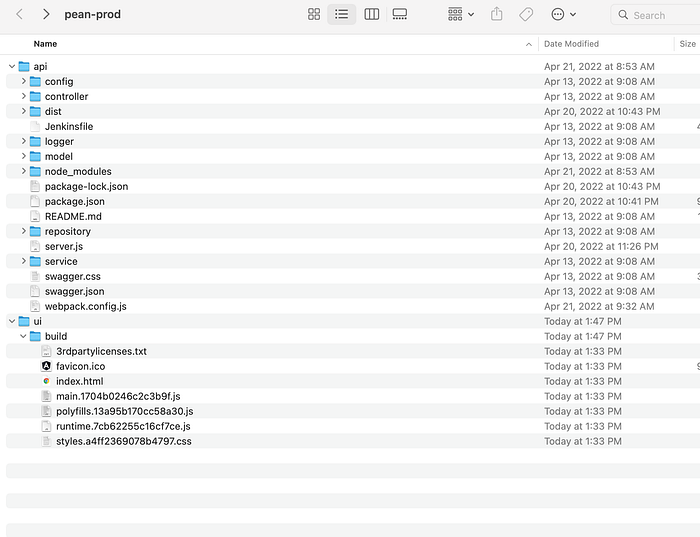
Once you built the application, all you need to do is create a separate folder and place the nodejs-related stuff in that folder. Let's create a folder called pean-prod and put the api folder (node server code) and the folder build inside it.
Run the application
Let's run the app by importing the whole folder pean-prod into the VSCode editor and installing the dependencies for the server.
//change the directory
cd pean-prod/api
// install dependencies
npm install
// run the app
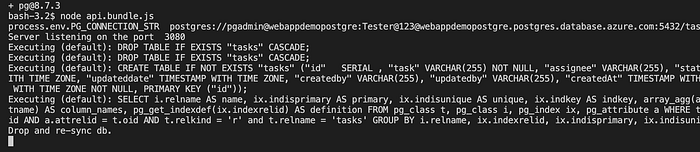
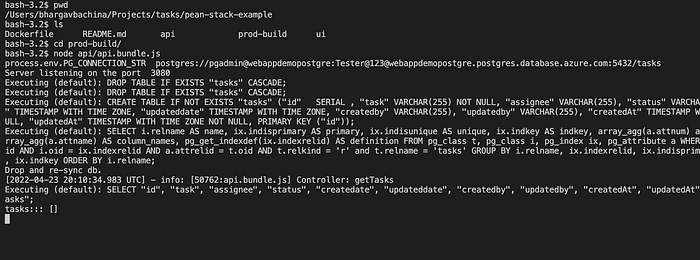
node server.jsYou need to make sure two things before you start the application. First, you need to put any environment variables such as PostgreSQL Connection string, PORT, etc. There are some other options as well check the below-detailed article.
// exporting env variables
export PORT=3080
export ENVIRONMENT=production
export PG_CONNECTION_STR=postgres://pgadmin@webappdemopostgre:Tester@123@webappdemopostgre.postgres.database.azure.com:5432/tasks
The second one is that update the UI static assets in the sever.js file as below. Notice the line numbers 17 and 43.

The app is running on the server port 3080.
Disadvantages
All the below steps should be done manually and these are time-consuming tasks.
- We have to build Angular code manually
- We have to place all the built files of Angular and API files into a separate folder
- We need to install node dependencies before we run the app
- We have to export all the environment variables
With Webpack
In the above implementation, once we put everything in the folder we need to install dependencies for the nodejs server to run the app. This is an additional step we need to do before running the app.
We can skip this step with the webpack. When we build the Angular code, the Angular CLI uses a webpack internally to build and bundle the entire code into a few files. We can use the same for the nodejs server as well.
First, we need to install a webpack globally and in the project as well.
// install webpack
npm install -g webpack webpack-cli
npm install webpack webpack-cli --save
We need to have a webpack.config.js in the /api folder since a webpack looks for this file. Here is the file. We have an entry file and output file and it is placed in the root folder. You can define environment variables based on the environment so that you don't have to export all the variables you need to run the application.
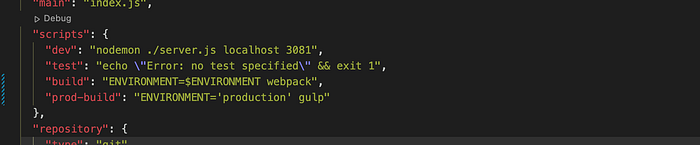
Let's build and bundle it. All you need to do is to run this command webpack and the webpack looks for this file called webpack.config.js and builds the entire server code and put it into one file called api.bundle.js. Here is the modified package.json file.
If the filename is different than webpack.config.js you need to pass that filename with the webpack command webpack <filename>. Once you build the server code all you need is api.bundle.js file. You don't even need any packages, package.json, etc. Run the following command to build the server code.
ENVIRONMENT=production npm run build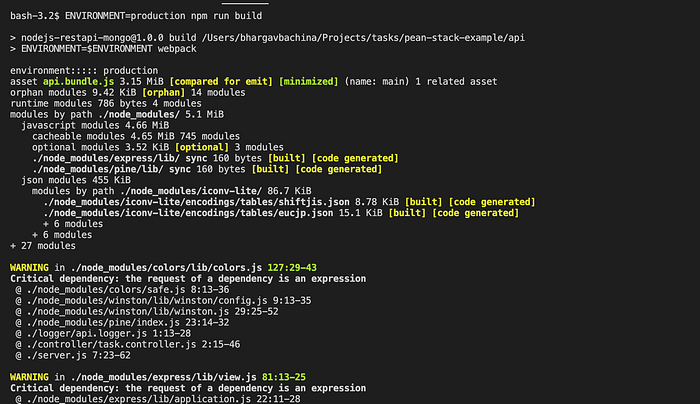

You can copy just the bundle file into the API folder.
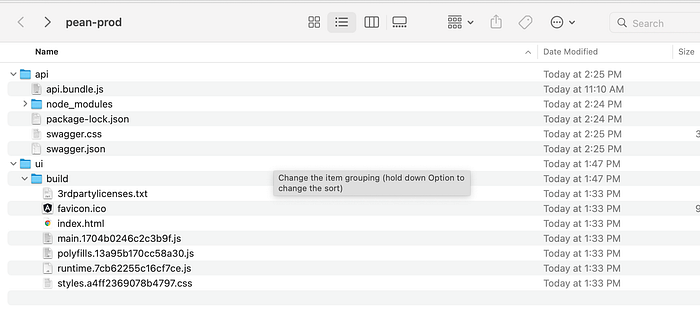
With this, we can skip the step npm install (installing dependencies) and you can just run node api.bundle.js and you can see the app running on port 3080. Since we need to have pg installed on the server where this code is running you need to have that node module installed.
Disadvantages
The only thing we have solved is to skipping node dependencies installation. There are still things we are doing here manually.
- We have to build Angular code manually
- We have to place all the built files into a separate folder
Packaging With Gulp
In the above sections, we have seen manual steps and these steps have to be eliminated. We can achieve complete automation with the gulp. All the following steps can be made automated with the gulp.
- Clean the directory if exists
- Create a directory if not exists to put all the production build
- Build Angular code with Angular CLI
- Place the UI code into the production directory
- Build the server code with the webpack
- Place the server code into the production directory
- Finally, zip all the files.
Let's install all the required gulp packages to accomplish the above points.
// install gulp globally
npm install gulp -g
// install as dev dependency
npm install gulp gulp-zip fancy-log del webpack-stream --save-dev
// gulp              - core library
// gulp-zip          - zipping the code
// fancy-log         - logging
// del               - deleting files/folders
// webpack-stream    - Build with webpack
when you run the command gulp it looks for the gulpfile.js file and executes all the tasks mentioned in that file. We can execute these tasks one by one or in parallel with the help of these modules series, parallel. Here is the file gulpfile.js.
You can actually see some tasks are run one by one and others are in parallel. For example, copying Angular code and building server code (line 78) can be run in parallel because there is no dependency between these. With the gulpfile.js in place, all you need to do is issue this command gulp in the package.json file.
Once the build is complete, you can see the packaged app under the folder prod-build.
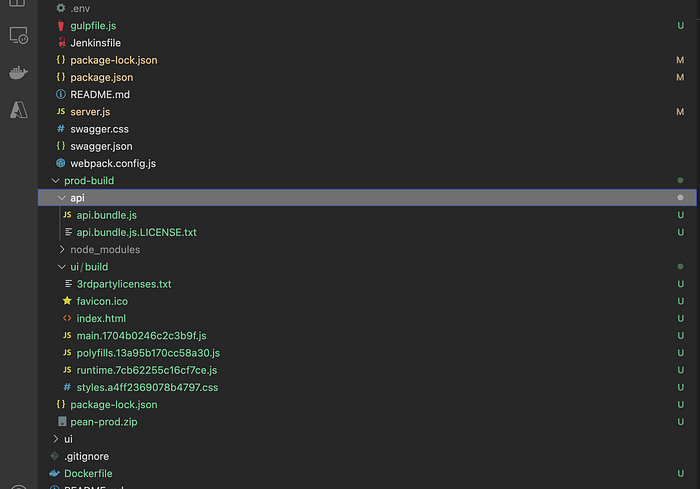
You can run the app with this command by going to the folder prod-build
With Docker
We have seen different implementations so far. All these implementations include putting all the related files together and packaging them. We used different tools and bundlers to do that. But with Docker, we place all the files in the Docker file system and create a Docker image out of it. Here is the detailed article about dockerizing the PEAN Stack application.
Here is the Dockerfile to create an image for this application.
You can follow the below commands to create an image and run the container.
// build the image
docker build -t pean-image .
// check the images
docker images
// run the image
docker run -d -p 3080:3080 --name pean-stack pean-image
// check the container
docker ps
You can access the application on the web at this address http://localhost:3080.
Summary
- In traditional architectures, there are so many ways we can package and ship the PEAN app to production.
- If you are new to the Angular app with the nodejs backend, please follow this link to get familiar with it.
- With the manual implementation, we have to build the Angular code, place the appropriate file, and zip the code manually.
- We can automate all these tasks with the help of gulp.
- Angular CLI uses a webpack internally to build the UI code. We can use the same with the NodeJS code as well. In this way, we can skip installing all the dependencies.
- Docker is another way to package your application but you need to run those Docker images on some container platforms such as Docker, EKS, ECS, etc.
- Always use multi-stage builds while building your Docker images so that you can avoid unnecessary files packaged into your build.
- Always automate the tasks with some kind of tools such as gulp or grunt.
Conclusion
Always automate packaging your app. In that way, you can save lots of time and be more productive. In future posts, we can take this packaged app and deploy it in different environments.