


Testing is a crucial aspect of developing React applications. It ensures that your components work as expected and provides a safety net for future changes.
When testing React components, Jest is a widely recognized JavaScript testing framework that simplifies the process of testing React components. Its ease of use, powerful features, and strong community support make it an ideal choice for React testing.
Getting Started with Jest and React
Step 01: Setting up Jest in a React project
If you're new to React, using Create React App is a great choice because it includes Jest for testing by default, and you only need to add react-test-renderer for snapshot testing.
npm install --save-dev react-test-rendererIf you have an existing application, Installing a few packages is necessary in order for everything to function properly. You can do this by installing Jest and its necessary dependencies. Here's a guide to get you started.
npm install --save-dev jest babel-jest @babel/preset-env @babel/preset-react react-test-rendererNext, create a tests folder in your project directory to organize your test files. Jest will look for your test files in this directory. To configure Jest, add the following lines to your package.json file.
"scripts": {
  "test": "jest"
 }
With these steps, you're ready to embark on your testing journey with Jest.
Step 02: Organizing Test Directories
Organizing your tests is essential for maintaining a structured and efficient testing suite. In the tests folder, you can create subfolders for different components or features, keeping your tests well-organized. This not only helps you find specific tests easily but also ensures that your test suite remains manageable as your project grows.
For example, consider a React application with components like Header, Sidebar, and MainContent. You can structure your tests folder as follows:
/tests
  /Header
    - Header.test.js
  /Sidebar
    - Sidebar.test.js
  /MainContent
    - MainContent.test.js
By creating separate subfolders for each component, you can maintain a clear and organized test suite.
Step 03: Configuring Jest to Work with React Components
To ensure that Jest works seamlessly with your React components, proper configuration is crucial. This configuration step will help Jest understand and handle React components effectively. Let's illustrate this with an example configuration for a typical React project.
In your package.json file, you can include a jest configuration like this.
"jest": {
  "moduleNameMapper": {
    "\\.(css|less|sass|scss)$": "identity-obj-proxy"
  },
  "setupFilesAfterEnv": ["@testing-library/jest-dom/extend-expect"]
}
The moduleNameMapper allows Jest to handle CSS imports by using identity-obj-proxy, which is a common choice for mocking styles.
The setupFilesAfterEnv specifies setup files to be executed before running the tests. Here, we're extending Jest with jest-dom/extend-expect, which provides helpful matchers for working with the DOM.
Writing Tests in Jest for React Components
Now that your project is set up, it's time to start writing tests for your React components. This section will guide you through the fundamental aspects of testing React components.
Step 05: Testing Component Rendering
Ensuring that your components render as expected is the foundation of component testing. You can use Jest's render function from @testing-library/react to achieve this. Here's an example:
import React from 'react';
import { render } from '@testing-library/react';
import Button from '../Button'; // Import your component

test('Button component renders correctly', () => {
  const { getByText } = render(<Button label="Click me" />);
  const button = getByText('Click me');
  expect(button).toBeInTheDocument();
});
This test checks if the "Button" component renders correctly and displays the "Click me" label as expected. Testing component rendering ensures that your components visually appear as intended.
Step 06: Testing Component Props and State
Your components often rely on props and may manage their state. Testing how they behave under different prop and state conditions is crucial. Here's an example:
test('Button component receives and displays the correct label', () => {
  const { getByText } = render(<Button label="Click me" />);
  const button = getByText('Click me');
  expect(button).toBeInTheDocument();
});
In this test, we validate that the "Button" component correctly receives the "Click me" label as a prop and displays it. This ensures that your component behaves as expected when provided with specific props.
Step 07: Testing Component Interactions and Events
In many cases, your components respond to user interactions and events. Jest allows you to simulate user interactions and test event handling. Here's an example:
import { fireEvent } from '@testing-library/react';

test('Button onClick event works', () => {
  const handleClick = jest.fn(); // Create a mock functionconst { getByText } = render(<Button label="Click me" onClick={handleClick} />);
  const button = getByText('Click me');

  fireEvent.click(button); // Simulate a click eventexpect(handleClick).toHaveBeenCalledTimes(1); // Check if the onClick event was called once
});
In this test, we create a mock function to simulate the onClick event. We then use fireEvent.click to simulate a button click and check if the onClick handler is invoked. This demonstrates how to test interactions and event handling in your components.
What are Snapshots in Jest?
Jest's snapshot testing captures component snapshots to identify unexpected changes easily. This concept is powerful and simplifies testing.
App.js
import React, { useState } from "react";

const STATUS = {
  HOVERED: "hovered",
  NORMAL: "normal",
};

export default function App() {
  const [status, setStatus] = useState(STATUS.NORMAL);

  const onMouseEnter = () => {
    setStatus(STATUS.HOVERED);
  };

  const onMouseLeave = () => {
    setStatus(STATUS.NORMAL);
  };

  return (
    <div
      className={status}
      onMouseEnter={onMouseEnter}
      onMouseLeave={onMouseLeave}
    >
      Hover over me
    </div>
  );
}
App.test.js
import renderer from "react-test-renderer";
import App from "../App";
it("changes the class when hovered", () => {
const component = renderer.create(<App />);
let tree = component.toJSON();
expect(tree).toMatchSnapshot();
// Manually trigger the callback
renderer.act(() => {
tree.props.onMouseEnter();
});
// Re-rendering
tree = component.toJSON();
expect(tree).toMatchSnapshot();
// Manually trigger the callback
renderer.act(() => {
tree.props.onMouseLeave();
});
// Re-rendering
tree = component.toJSON();
expect(tree).toMatchSnapshot();
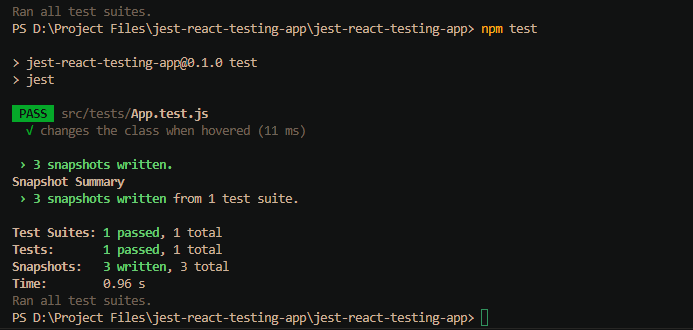
});After running npm test, the output will be provided in App.test.js.snap file. This snapshot file captures the expected rendering and class changes when the component is hovered.
App.test.js.snap
// Jest Snapshot v1, https://goo.gl/fbAQLP

exports[changes the class when hovered 1] =
<div
  className="normal"
  onMouseEnter={[Function]}
  onMouseLeave={[Function]}
  Hover over me
</div>
`;

exports[changes the class when hovered 2] =
<div
  className="hovered"
  onMouseEnter={[Function]}
  onMouseLeave={[Function]}
  Hover over me
</div>
`;

exports[changes the class when hovered 3] =
<div
  className="normal"
  onMouseEnter={[Function]}
  onMouseLeave={[Function]}
  Hover over me
</div>
`;
What are advanced testing techniques using Jest and React?
Technique 01: Mocking Dependencies and API Calls
Jest offers a powerful mocking system that allows you to mock both dependencies and API calls with ease. This is crucial for isolating your components during testing.
To mock API calls, you can use jest.mock to create a mock implementation for your API calls. For example:
jest.mock('../API'); // Mocking API callsWhen it comes to mocking React components, you can use a similar approach. Here's an example of how to mock a React component using Jest:
jest.mock('../AnotherComponent', () => {
  return jest.fn(() => <div>Mocked Component</div>); // Mocking React components
});
These advanced mocking techniques enable you to control the behavior of dependencies and simulate various scenarios in your tests, making them more comprehensive and realistic.
Technique 02: Testing Async Behavior
Handling asynchronous behavior in your components is a common requirement. Jest provides powerful tools for testing asynchronous code. For example, if you have an async function like fetchData, you can test it like this:
test('fetchData resolves correctly', async () => {
  await expect(fetchData()).resolves.toEqual('data');
});
Jest's async and await keywords make it straightforward to test async functions, ensuring your components perform as expected in real-world scenarios, even when dealing with data fetching or asynchronous operations.
Technique 03: Code Coverage and Generating Test Reports
Ensuring that your tests provide good code coverage and generate informative reports is crucial. Jest simplifies this process. To check code coverage and generate detailed reports, you can run the following command:
npm test -- --coverageThis command provides a comprehensive report showing which parts of your codebase are covered by tests and which areas may need additional testing. It's a valuable tool for maintaining high-quality code.
What are the best practices for testing React components with Jest?
To wrap up this guide, let's delve into some best practices that will help you maintain high standards of quality and effectiveness in your testing efforts.
Best Practise 01: Use Minimal Efforts in Setting Up Jest for React
Sometimes, when you're using languages like TypeScript, it might be difficult to spin up Jest environments for React with TypeScript, and you might spend a lot of time trying to get things started. Ultimately, this causes you to forget about testing and leave it as an afterthought.
To avoid such cases, consider using composable-software building tools like Bit that encourage you to adopt test driven development on your development workflow right out of the box.
Bit lets you design and build anything in components that are developed in isolation. And, with the help of its Ripple CI, you can ensure that the changes you make to a single component does not break the rest, as shown below.
Best Practise 02: Structured Approach for Testing
Organizing your tests logically is essential for effective testing. A structured approach not only makes your test suite easier to navigate but also simplifies maintenance and extensions. Consider grouping your tests based on components, features, or use cases. This logical organization helps you keep your tests well-structured and manageable.
Best Practise 03: Avoiding Common Mistakes
While writing tests, it's essential to be mindful of common pitfalls that can lead to test failures. Some common mistakes include incorrect imports, mismatched component props in your tests, or overlooking important details. Thoroughly review your test setup to avoid these issues and ensure your tests are accurate and reliable.
Best Practise 04: Tips for Reliability and Readability
Reliable and readable tests are essential for effective collaboration and future maintenance. When writing tests, keep the following tips in mind:
- Use meaningful variable names that describe the purpose of each test.
- Write clear and descriptive test descriptions that explain what is being tested.
- Organize your test suite logically to make it easy for developers to find specific tests.
- Comment your tests when necessary to provide context and explanations for complex scenarios.
By following these best practices, you can create tests that not only verify the functionality of your components but also make it easier for you and your team to work with the codebase, maintain the tests, and extend them as your project evolves.
Wrapping Up
Testing is not just a task; it's a discipline that ensures your React applications are sturdy and dependable. By mastering Jest and embracing these testing techniques and best practices, you elevate your development prowess. Remember, testing is your key to crafting exceptional user experiences in React.
Explore this GitHub repository to see the full code.
This comprehensive guide should equip you with the knowledge and skills to effectively test React components with Jest.
If you have any questions or need additional resources, feel free to reach out. Happy testing and coding!