

Animations can bring your app to life, making it more engaging and interactive. In this guide, we'll explore how to add animations using React Native's `Animated` API.
We'll cover different animation types, configuration options, and practical examples.
Imagine you want to add animation to your app, like a box moving on the screen. You can control how the box moves in many ways.
Basic Animation Concepts
- Speed: You can make the box move fast or slow.
- Smoothness: You can make the box start and stop smoothly, or jerk around.
- Bounce: You can make the box bounce a little before it reaches its final spot.
Configuration Options
The different ways to control the animation are called configuration options. There are many options, but some of the most common are:
- Easing: This controls how smoothly the box starts and stops moving. Imagine the box easing into its starting speed and easing out of its ending speed.
- Duration: This controls how long the animation takes, like 2 seconds for the box to move.
- Delay: You can make the box wait a bit before it starts moving.
These options are available for different types of animations. The most common type is called Animated. timing(). You can set the easing, duration, and delay for this type of animation.
Example: Moving Box
React Native's Animated.timing(). This animation will demonstrate the use of configuration options like speed, smoothness (easing), duration, and delay.
Step-by-Step Implementation
1. Setting Up the Animated Box Component
We'll create a component that moves a box across the screen with different animation configurations.
import React, { useRef } from 'react';
import { View, Animated, TouchableOpacity, StyleSheet, Easing } from 'react-native';

const MovingBox = () => {
  const moveValue = useRef(new Animated.Value(0)).current;

  const startAnimation = () => {
    Animated.timing(moveValue, {
      toValue: 300,
      duration: 2000, // Duration of the animation in milliseconds
      easing: Easing.bounce, // Easing function for smoothness
      delay: 500, // Delay before the animation starts
      useNativeDriver: true,
    }).start(() => {
      // Reset the animation after it finishes
      Animated.timing(moveValue, {
        toValue: 0,
        duration: 2000,
        easing: Easing.bounce,
        delay: 500,
        useNativeDriver: true,
      }).start();
    });
  };

  return (
    <View style={styles.container}>
      <TouchableOpacity onPress={startAnimation} style={styles.button}>
        <Animated.View style={[styles.box, { transform: [{ translateX: moveValue }] }]} />
      </TouchableOpacity>
    </View>
  );
};

const styles = StyleSheet.create({
  container: {
    flex: 1,
    justifyContent: 'center',
    alignItems: 'center',
    backgroundColor: '#fff5ee', // Seashell color for a kitchen-like background
  },
  button: {
    padding: 20,
    backgroundColor: '#ff6347', // Tomato color like a kitchen timer
    borderRadius: 10,
  },
  box: {
    width: 50,
    height: 50,
    backgroundColor: '#8fbc8f', // Pale green like a kitchen item
  },
});

export default MovingBox;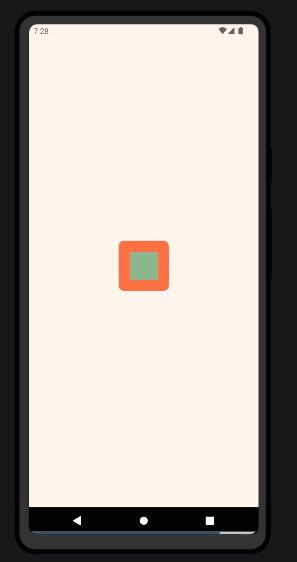
Explanation:
- Animated Value (
moveValue): We create an animated value usinguseRefto keep track of the box's horizontal position. - Animation Configuration:
toValue: Sets the end value of the animation. Here, the box will move to 300 units on the X-axis.duration: Specifies the duration of the animation (2000 milliseconds or 2 seconds).easing: UsesAnimated.Easing.bounceto add a bouncing effect to the animation.delay: Adds a 500-millisecond delay before the animation starts.useNativeDriver: Optimizes the animation performance by using the native driver.- TouchableOpacity: Wrapped around the
Animated.Viewto trigger the animation when pressed. - Animated.View: Moves horizontally based on
moveValue, using thetransformproperty. - Styles: Defines styles for the container, button, and box.
Animate It Your Way!
There are different ways to control how things move in your app, like a ball bouncing or a window sliding open. These controls are called animation configurations.
Common Animation Types
There are three main types of animations you can use:
- Slow and Steady (Animated.decay()): Imagine a ball rolling on the ground. It slows down gradually until it stops. This animation type mimics that gradual slowdown.
Advanced Animation Examples
We'll create a DecayAnimation component with a playful fruit icon that rolls to a stop.
import React, { useRef } from 'react';
import { View, Animated, TouchableOpacity, StyleSheet, Text } from 'react-native';

const DecayAnimation = () => {
  const moveValue = useRef(new Animated.Value(0)).current;

  const startAnimation = () => {
    moveValue.setValue(0); // Reset to initial position
    Animated.decay(moveValue, {
      velocity: 1, // Initial velocity
      deceleration: 0.997, // Deceleration factor
      useNativeDriver: true,
    }).start();
  };

  return (
    <View style={styles.container}>
      <TouchableOpacity onPress={startAnimation} style={styles.button}>
        <Text style={styles.buttonText}>Roll the Orange</Text>
      </TouchableOpacity>
      <Animated.Image
        source={require('../assets/orange.png')}
        style={[styles.fruit, { transform: [{ translateX: moveValue }] }]}
      />
    </View>
  );
};


export default DecayAnimation;
2. Bouncy Fun (Animated.spring()): Think of a spring toy. You push it down and it bounces back up. This animation type creates that springy effect.
We'll create a SpringAnimation component with a bouncing strawberry icon.
import React, { useRef } from 'react';
import { View, Animated, TouchableOpacity, StyleSheet, Text } from 'react-native';

const SpringAnimation = () => {
  const moveValue = useRef(new Animated.Value(0)).current;

  const startAnimation = () => {
    moveValue.setValue(0); // Reset to initial position
    Animated.spring(moveValue, {
      toValue: 300,
      friction: 5, // Controls the "bounciness"
      useNativeDriver: true,
    }).start(() => {
      Animated.spring(moveValue, {
        toValue: 0,
        friction: 5,
        useNativeDriver: true,
      }).start();
    });
  };

  return (
    <View style={styles.container}>
      <TouchableOpacity onPress={startAnimation} style={styles.button}>
        <Text style={styles.buttonText}>Bounce the Strawberry</Text>
      </TouchableOpacity>
      <Animated.Image
        source={require('../assets/strawberry.png')}
        style={[styles.fruit, { transform: [{ translateX: moveValue }] }]}
      />
    </View>
  );
};


export default SpringAnimation;
Just Right Timing (Animated.timing()): This is the most common type. You can set how fast or slow things move, and how smoothly they start and stop. Imagine a window smoothly sliding open over a certain amount of time.
- Easing: This controls how smoothly things start and stop moving. Imagine a car gently accelerating and then braking softly.
- Speed: This controls how fast the animation happens. Make it slow and graceful or quick and zippy!
We'll create a TimingAnimation component with a sliding banana icon.
import React, { useRef } from 'react';
import { View, Animated, TouchableOpacity, StyleSheet, Text, Easing } from 'react-native';
const TimingAnimation = () => {
const moveValue = useRef(new Animated.Value(0)).current;
const startAnimation = () => {
moveValue.setValue(0); // Reset to initial position
Animated.timing(moveValue, {
toValue: 300,
duration: 2000, // Duration of the animation in milliseconds
easing: Easing.inOut(Easing.ease), // Easing function for smoothness
delay: 500, // Delay before the animation starts
useNativeDriver: true,
}).start(() => {
Animated.timing(moveValue, {
toValue: 0,
duration: 2000,
easing: Easing.inOut(Easing.ease),
delay: 500,
useNativeDriver: true,
}).start();
});
};
return (
<View style={styles.container}>
<TouchableOpacity onPress={startAnimation} style={styles.button}>
<Text style={styles.buttonText}>Slide the Banana</Text>
</TouchableOpacity>
<Animated.Image
source={require('../assets/banana.png')}
style={[styles.fruit, { transform: [{ translateX: moveValue }] }]}
/>
</View>
);
};
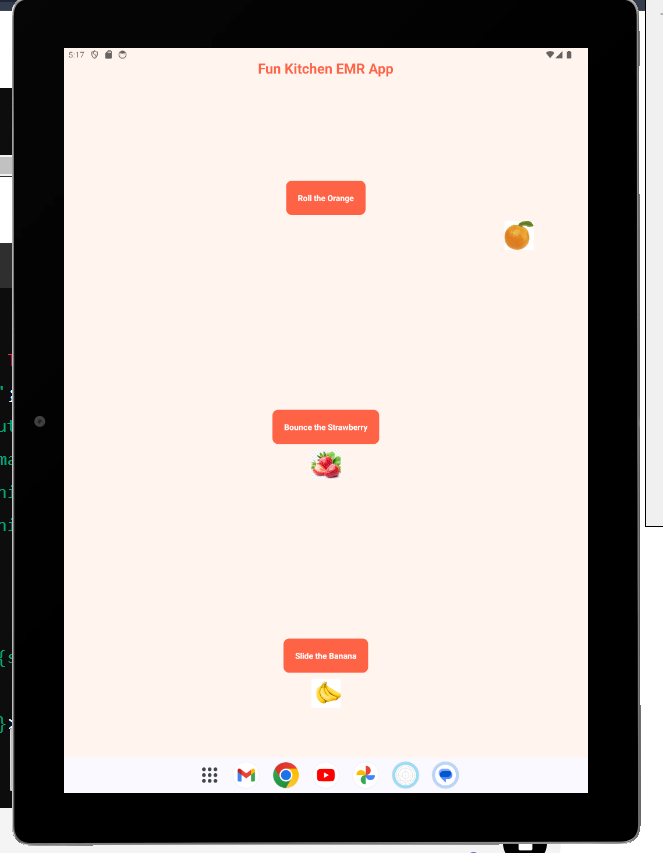
export default TimingAnimation;Integrating Components in KitchenApp
We'll integrate these fun animation components into our main KitchenApp component.
import React from "react";
import { StatusBar } from "expo-status-bar";
import { ScrollView, StyleSheet, View, Text, } from "react-native";
import DecayAnimation from "./DecayAnimation";
import SpringAnimation from "./SpringAnimation";
import TimingAnimation from "./TimingAnimation";


export default function App() {
 return (
  <ScrollView contentContainerStyle={styles.container}>
   <View style={styles.header}>
    <Text style={styles.headerText}>Fun Kitchen EMR App</Text>
   </View>

   <View style={styles.section}>
    <DecayAnimation />
    <SpringAnimation />
    <TimingAnimation />
   </View>
   <StatusBar style="auto" />
  </ScrollView>
 );
}
Most of the time, you'll probably use the timing animation. By default, it makes things move smoothly, starting slow, picking up speed, and then slowing down again to a stop. You can also change this default behavior to create different effects.
Behind the scenes trick for smoother animations
Normally, animations in your app involve some back-and-forth between the Javascript code and the native code of your phone. This can slow things down a bit.
The "native driver" is a special option that lets you send all the animation info to your phone's native code at once, before the animation even starts. This way, the native code can handle the animation smoothly without needing to check back with the Javascript code every frame.
To use the native driver, just add useNativeDriver: true to your animation configuration. This can make your animations faster and smoother. But keep in mind it doesn't work for all types of animations.
Bringing your app to life with animation
Animations can make your app feel more alive and engaging. Imagine a button that bounces slightly when tapped, or a menu that slides in smoothly. With React Native, you can easily add these kinds of animations to your app.
There are special components you can use for animation, like Animated.View instead of a regular View. These components can connect to the animation controls we talked about earlier (like speed and smoothness). This allows you to animate the properties of these components, like their position or size.
Here are some of the built-in animatable components you can use:
Animated.Image: Animate an imageAnimated.ScrollView: Animate a scrolling viewAnimated.Text: Animate textAnimated.View: Animate a generic viewAnimated.FlatList: Animate a flat listAnimated.SectionList: Animate a section list
Practical Real World Example
Let's create Hatch a Surprise App
To create a surprise egg feature in the kitchen-themed EMR app, we can design it so that children can tap on eggs to "crack" them open and reveal a surprise inside. The surprises can include their names, images, fruits, or educational items. This interactive feature will make the app fun and engaging.
Here's how we can implement this:
- Egg Component: This component will represent an egg that the child can tap to crack open.
- Cracking Animation: Use an animation to simulate the egg cracking.
- Surprise Reveal: Display the surprise content (name, image, fruit, or learning item) inside the egg.
Let's create the Egg component with a cracking animation and a surprise reveal.
Egg Component with Cracking Animation
import React, { useState } from 'react';
import { StyleSheet, View, Text, TouchableOpacity, Animated, Image } from 'react-native';

const Egg = ({ surprise }) => {
  const [cracked, setCracked] = useState(false);
  const animatedValue = new Animated.Value(1);
  const rotateValue = new Animated.Value(0);

  const crackEgg = () => {
    Animated.parallel([
      Animated.timing(animatedValue, {
        toValue: 0,
        duration: 500,
        useNativeDriver: true,
      }),
      Animated.timing(rotateValue, {
        toValue: 1,
        duration: 500,
        useNativeDriver: true,
      }),
    ]).start(() => setCracked(true));
  };

  const rotateInterpolate = rotateValue.interpolate({
    inputRange: [0, 1],
    outputRange: ['0deg', '360deg'],
  });

  const animatedStyle = {
    transform: [{ scale: animatedValue }, { rotate: rotateInterpolate }],
  };

  return (
    <TouchableOpacity onPress={crackEgg} disabled={cracked}>
      <Animated.View style={[styles.egg, animatedStyle]}>
        {!cracked ? (
          <Animated.Image source={require('./assets/egg.png')} style={styles.eggImage} />
        ) : (
          <View style={styles.surprise}>
            {surprise.type === 'name' && (
              <Animated.Text style={styles.surpriseText}>{surprise.content}</Animated.Text>
            )}
            {surprise.type === 'image' && (
              <Animated.Image source={surprise.content} style={styles.surpriseImage} />
            )}
            {surprise.type === 'fruit' && (
              <Animated.Text style={styles.surpriseText}>{surprise.content}</Animated.Text>
            )}
            {surprise.type === 'learning' && (
              <Animated.Text style={styles.surpriseText}>{surprise.content}</Animated.Text>
            )}
            {surprise.type === 'affirmation' && (
              <Animated.Text style={styles.surpriseText}>{surprise.content} 😊R</Animated.Text>
           )}
          </View>
        )}
      </Animated.View>
    </TouchableOpacity>
  );
};


export default Egg;
Integrating Egg Component in KitchenApp
import React from 'react';
import { StyleSheet, View, Text, Animated } from 'react-native';
import Egg from './Egg';

const AnimatedSectionList = Animated.createAnimatedComponent(SectionList);
const AnimatedFlatList = Animated.createAnimatedComponent(FlatList);
const AnimatedScrollView = Animated.createAnimatedComponent(ScrollView);

const KitchenApp = () => {
  const animatedValue = new Animated.Value(0);

  const sections = [
    { title: 'Fruits', data: ['Apple', 'Banana', 'Orange', 'Strawberry'] },
    { title: 'Vegetables', data: ['Carrot', 'Broccoli', 'Spinach', 'Potato'] },
  ];

  const surprises = [
    { type: 'name', content: 'Alice' },
    { type: 'image', content: require('./assets/child_image.png') },
    { type: 'fruit', content: 'Apple' },
    { type: 'learning', content: '2 + 2 = 4' },
    { type: 'affirmation', content: 'You are awesome!' },
    { type: 'image', content: require('./assets/fruit.png') },
    { type: 'affirmation', content: 'Keep smiling!' },
  ];

  return (
    <AnimatedScrollView style={styles.container}>
      <View style={styles.header}>
        <Animated.Text style={styles.headerText}>Hatch a Surprise App</Animated.Text>
      </View>
      <View style={styles.eggsContainer}>
        {surprises.map((surprise, index) => (
          <Egg key={index} surprise={surprise} />
        ))}
      </View>
      <AnimatedSectionList
        sections={sections}
        keyExtractor={(item, index) => item + index}
        renderItem={({ item }) => (
          <Animated.Text style={styles.item}>{item}</Animated.Text>
        )}
        renderSectionHeader={({ section: { title } }) => (
          <Animated.Text style={styles.sectionHeader}>{title}</Animated.Text>
        )}
        onScroll={Animated.event(
          [{ nativeEvent: { contentOffset: { y: animatedValue } } }],
          { useNativeDriver: true }
        )}
      />
    </AnimatedScrollView>
  );
};


export default KitchenApp;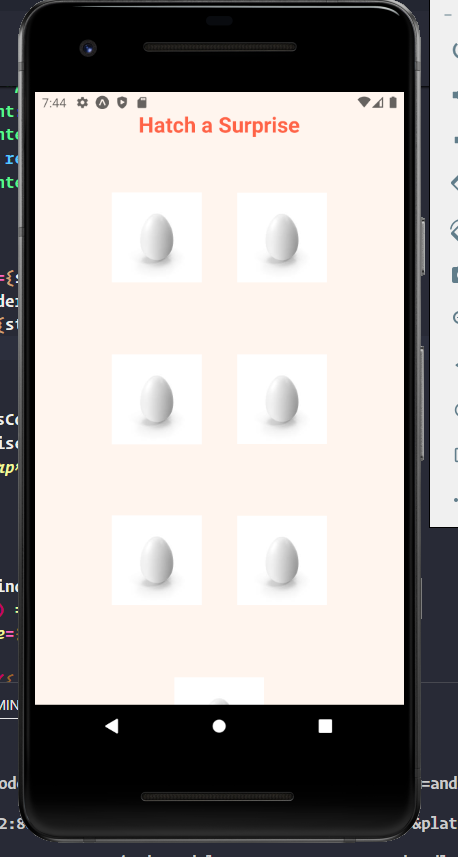
Explanation
- Egg Component:
- The
Eggcomponent handles the cracking animation and reveals the surprise inside. - The
surpriseprop determines the type of surprise (name, image, fruit, or learning item). - Surprise Content:
- Surprises are passed as props to the
Eggcomponent. These can be names, images, fruits, or learning items. - Cracking Animation:
- The cracking animation is handled using
Animated.timing. - Integration:
- The
Eggcomponents are included in theListHeaderComponentof theSectionList.
- Animated Components:
- Wrapped
Image,ScrollView,Text,View,FlatList, andSectionListwithAnimated.createAnimatedComponentto enable animation properties. - Used
Animated.Image,Animated.ScrollView,Animated.Text,Animated.View,Animated.FlatList, andAnimated.SectionListfor various parts of the app.
2. Animations:
- Animated the scaling of the egg when cracked using
Animated.timing. - Used
Animated.ScrollViewto wrap the entire app, allowing for animated scrolling. - Added animations to text and images within the
Eggcomponent for surprise elements.
Tips for Smooth Animations:
- Use
useNativeDriverfor better performance. - Test animations on multiple devices to ensure consistency.
- Keep animations simple to avoid performance issues.
By following these steps, you can bring your React Native app to life with smooth, interactive animations.
By using these components and the animation controls, you can create all sorts of cool animations in your React Native app!
Attention readers! 📚 Dive into the transformative journey of self-discovery with my new book, "Per Minute," available now on Amazon
Explore the profound insights on intentional breaks, productivity, and well-being. Uncover practical strategies to reclaim your time, reduce stress, and enhance your overall quality of life.
Don't miss out on this empowering read! Order your copy today and embark on a path towards a more fulfilling and balanced life.
🙏 Thank you so much, dear wonderful reader! 😊
Stackademic 🎓
Thank you for reading until the end. Before you go:
- Please consider clapping and following the writer! 👏
- Follow us X | LinkedIn | YouTube | Discord
- Visit our other platforms: In Plain English | CoFeed | Differ
- More content at Stackademic.com