
Imagine watching an intense scene from your favorite Marvel movie, and right when the plot thickens, your friend sends you a message about weekend plans. Normally, this would interrupt your viewing experience, but with Picture-in-Picture (PiP) mode, you can keep watching while replying to the message. PiP minimizes the video into a small floating window, allowing you to multitask without missing a single frame of the action.
In this guide, we'll dive into how you can implement Picture-in-Picture (PiP) mode in your Flutter application, providing users with an enhanced and flexible video playback experience.
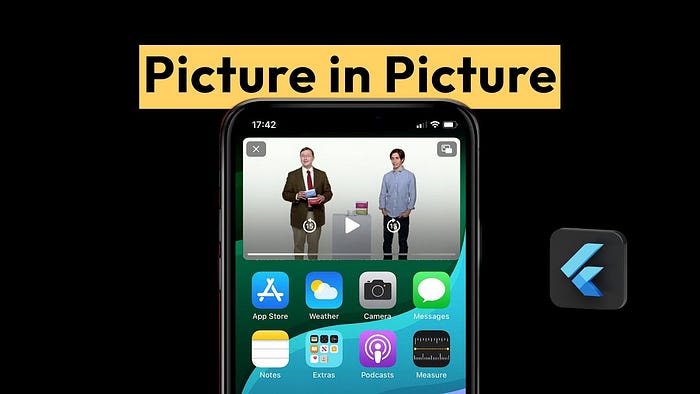
What is Picture-in-Picture Mode?
Picture-in-Picture (PiP) is a feature that allows video content to be minimized into a small, resizable, and movable window that overlays other apps. This means users can continue watching videos while browsing other parts of the app or interacting with other apps entirely. The implementation of PiP not only enhances multitasking capabilities but also keeps users engaged with your content.
Why Implement PiP in Flutter?
- Enhanced Multitasking: Users can multitask easily by keeping videos playing in a small window while performing other actions on the app.
- Increased Engagement: By allowing users to stay connected with video content even when navigating away from the main player, PiP encourages longer interaction with your app.
- Flexibility and Convenience: Users can adjust the size and position of the PiP window according to their preferences, allowing for a personalized viewing experience.
- Modern Design Trends: Adopting PiP brings your app up-to-date with modern, user-centric UI/UX trends.
Step 1: Setup and Dependencies
To implement PiP in your Flutter app, you'll need to add the following dependencies in your pubspec.yaml file:
Required Packages:
- Floating — This package helps manage PiP functionality in Flutter.
floating: latest_version2. Video_Player — This package provides video playback support for both Android and iOS.
video_player: latest_versionMake sure to run flutter pub get to install the necessary packages.
Step 2: Modify AndroidManifest.xml
Next, we need to modify the AndroidManifest.xml to declare PiP support. Open android/app/src/main/AndroidManifest.xml and add the following lines within the <activity> tag:
<activity
    android:name=".MainActivity"
    android:supportsPictureInPicture="true"
    android:resizeableActivity="true"
    android:configChanges="screenSize|smallestScreenSize|screenLayout|orientation|keyboardHidden">
These changes ensure that the app supports PiP mode and can handle orientation changes and screen size adjustments smoothly.
Step 3: Building a Simple Video Player
Before implementing PiP, let's set up a basic video player in Flutter using the video_player package. Below is a simple widget for playing a video:
import 'package:flutter/material.dart';
import 'package:video_player/video_player.dart';

class VideoPlayerWidget extends StatefulWidget {
  final String videoUrl;

  const VideoPlayerWidget({Key? key, required this.videoUrl}) : super(key: key);

  @override
  _VideoPlayerWidgetState createState() => _VideoPlayerWidgetState();
}

class _VideoPlayerWidgetState extends State<VideoPlayerWidget> {
  late VideoPlayerController _controller;

  @override
  void initState() {
    super.initState();
    _controller = VideoPlayerController.network(widget.videoUrl)
      ..initialize().then((_) {
        setState(() {});
        _controller.play();
      });
  }

  @override
  Widget build(BuildContext context) {
    return _controller.value.isInitialized
        ? AspectRatio(
            aspectRatio: _controller.value.aspectRatio,
            child: VideoPlayer(_controller),
          )
        : Center(child: CircularProgressIndicator());
  }

  @override
  void dispose() {
    _controller.dispose();
    super.dispose();
  }
}
This widget handles the video loading and playback. Now we'll integrate PiP functionality around this video player.
Step 4: Integrating PiP with the Floating Package
The floating package makes it easy to implement PiP in Flutter. We can wrap our video player in a PiPSwitcher, which will switch between normal playback mode and PiP mode.
Create a Stateful Widget:
import 'package:floating/floating.dart';
import 'package:flutter/material.dart';

class PIPExampleApp extends StatefulWidget {
  const PIPExampleApp({super.key});

  @override
  State<PIPExampleApp> createState() => _PIPExampleAppState();
}

class _PIPExampleAppState extends State<PIPExampleApp> {
  final String videoUrl = 'https://commondatastorage.googleapis.com/gtv-videos-bucket/sample/ElephantsDream.mp4';

  late Floating pip;
  bool isPipAvailable = false;

  @override
  void initState() {
    pip = Floating();
    super.initState();
    _checkPiPAvailability();
  }

  _checkPiPAvailability() async {
    isPipAvailable = await pip.isPipAvailable;
    setState(() {});
  }

  @override
  Widget build(BuildContext context) {
    return PiPSwitcher(
      childWhenDisabled: Scaffold(
        appBar: AppBar(title: Text('PiP Video Player')),
        body: Column(
          children: [
            VideoPlayerWidget(videoUrl: videoUrl),
            Expanded(
              child: Center(
                child: ElevatedButton(
                  onPressed: () {
                    if (isPipAvailable) {
                      pip.enable(aspectRatio: const Rational.landscape());
                    }
                  },
                  child: Text(isPipAvailable ? 'Enable PiP' : 'PiP not available'),
                ),
              ),
            ),
          ],
        ),
      ),
      childWhenEnabled: VideoPlayerWidget(videoUrl: videoUrl),
    );
  }
}
In the above code:
- The
PiPSwitcherwidget switches between the full-screen video player and the PiP mode. - The
Floatingpackage handles PiP functionality, including checking whether PiP is available and enabling it.
Step 5: Auto-Enable PiP on App Minimize
One advanced feature you can implement is automatic PiP mode activation when the app is minimized. For this, we use WidgetsBindingObserver to detect when the app moves to the background and enable PiP mode accordingly.
Add Auto PiP Feature:
class _PIPExampleAppState extends State<PIPExampleApp> with WidgetsBindingObserver {
  late Floating pip;
  bool isPipAvailable = false;

  @override
  void initState() {
    super.initState();
    WidgetsBinding.instance.addObserver(this);
    pip = Floating();
    _checkPiPAvailability();
  }

  _checkPiPAvailability() async {
    isPipAvailable = await pip.isPipAvailable;
    setState(() {});
  }

  @override
  void didChangeAppLifecycleState(AppLifecycleState state) {
    if (state == AppLifecycleState.paused && isPipAvailable) {
      pip.enable(aspectRatio: const Rational.landscape());
    }
  }

  @override
  void dispose() {
    WidgetsBinding.instance.removeObserver(this);
    super.dispose();
  }

  @override
  Widget build(BuildContext context) {
    return PiPSwitcher(
      childWhenDisabled: Scaffold(
        body: Column(
          children: [
            VideoPlayerWidget(videoUrl: videoUrl),
            Expanded(
              child: Center(
                child: ElevatedButton(
                  onPressed: () {
                    if (isPipAvailable) {
                      pip.enable(aspectRatio: const Rational.landscape());
                    }
                  },
                  child: Text(isPipAvailable ? 'Enable PiP' : 'PiP not available'),
                ),
              ),
            ),
          ],
        ),
      ),
      childWhenEnabled: VideoPlayerWidget(videoUrl: videoUrl),
    );
  }
}
This implementation uses the didChangeAppLifecycleState method to listen for changes in the app's lifecycle. If the app is minimized (AppLifecycleState.paused), PiP is enabled automatically, creating a seamless experience for the user.
Bonus: Customizing the PiP Experience
- Adjusting PiP Window Size: You can customize the aspect ratio of the PiP window to fit specific needs. For instance, you can opt for a square ratio or portrait mode depending on the video content:
pip.enable(aspectRatio: const Rational(1, 1)); // Square window
pip.enable(aspectRatio: const Rational.portrait()); // Portrait mode
2. Handling PiP Controls: You can add playback controls in PiP mode for a more interactive user experience. For example, you can provide options to pause, fast-forward, or close the PiP window.
3. PiP on iOS: While this guide is Android-specific (since PiP is natively supported on Android), you can achieve similar behavior on iOS using custom layouts and overlays.
Conclusion: Elevating the User Experience with PiP
Implementing Picture-in-Picture mode in your Flutter app adds a layer of flexibility, allowing users to multitask while engaging with your content. It aligns with modern app design trends and enhances user retention and satisfaction. By enabling PiP, you give users the power to watch