
Nowadays, we have the possibility to config CI/CD pipelines for Power BI reports directly in the Power BI Service; but this is only for workspaces with Power BI Premium capacity assignment, or with an Azure Power BI Embedded instance linked.
Companies that don't have one of the mentioned Power BI capacities, can't use this featuring. But now, I want to share an option to deploy new or modified Power BI reports to other environments (i.e. from dev to quality, or from quality to production), this time, using Azure DevOps.
To reach our objective, I'll slice this in 3 steps: the first one is creating a service principal (SP) and security group in Azure Active Directory, followed by configuring a Power BI workspace and the access for the SP; and finally, We will be configuring Azure Devops and developing an CI/CD pipeline for Power BI.
So, let's start.
Creating a service principal (SP) and security group in Azure Active Directory
Step 1: Create a Service Principal
This service principal will be used to authenticate Azure DevOps on Microsoft Power BI Service, by that, will be needed to grant admin access to this SP over our workspaces where Power BI reports will be deployed.
To create a SP, you need to go to Azure Portal (https://portal.azure.com); then, click Azure Active Directory:
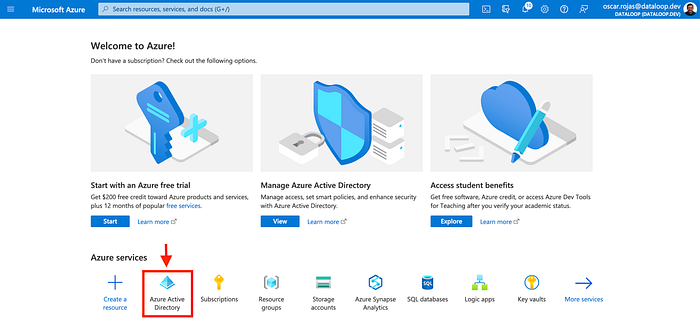
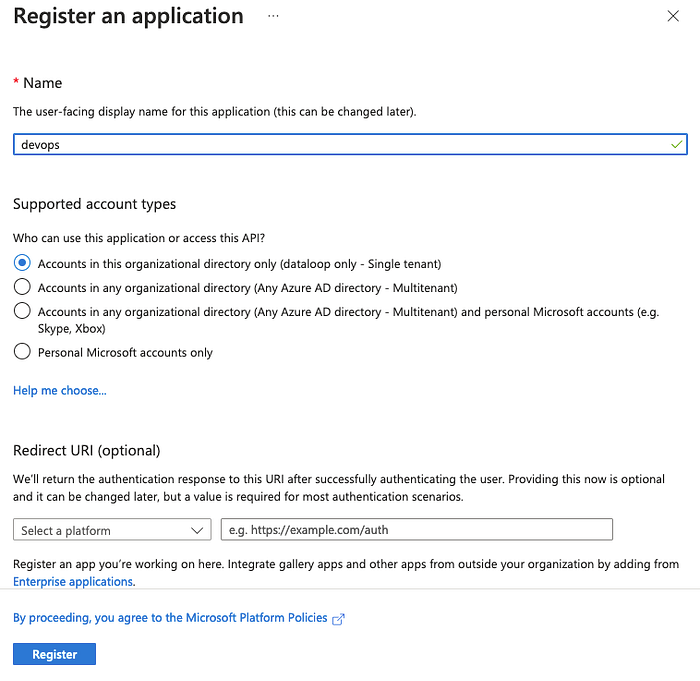
Then, click "App registrations", and then "+ New registration" to create our SP. In this point, you will be watching a form like the following, where you need to give a name to your SP. Also, take care about the account types supported by this SP, if the DevOps project is in the same tenant, the first option is enough, but, if isn't, one of next 2 options will be required.
Once registered, I recommend you to take the following information (Application ID and Directory ID) from overview to a notes file before leave this page.

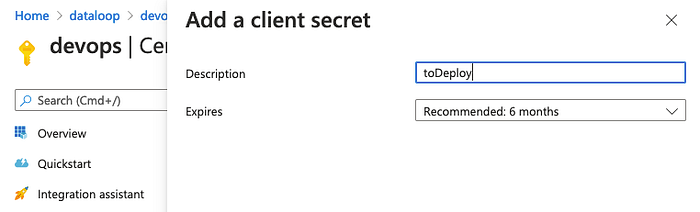
Now, create a secret value for your SP is necessary, and to do that, click "Certificates & secrets", and click "+ New client secret". In the form, give it a name, and select the appropriated expiration time.
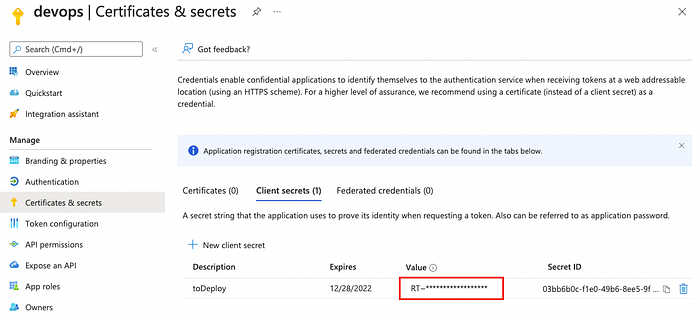
Please, copy the secret value generated for this SP, because it will be necessary in the following steps.
Step 2: Create a security group
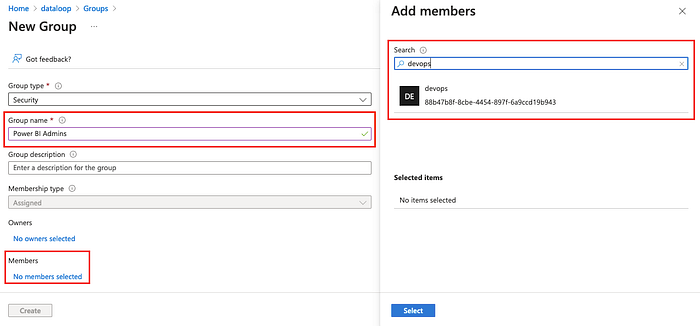
Now, let's create a security group to add this SP. In Azure Active Directory, click "Groups" option in the left pane; then, click "New group". In the new form, write the name you want for this security group, then click "No members selected", and search for the SP created previously. Don't forget the group name.
That is all in Azure, now we need to move to Power BI Portal (https://app.powerbi.com)
Configuring Power BI
Step 1: Allowing service principal access to use Power BI APIs
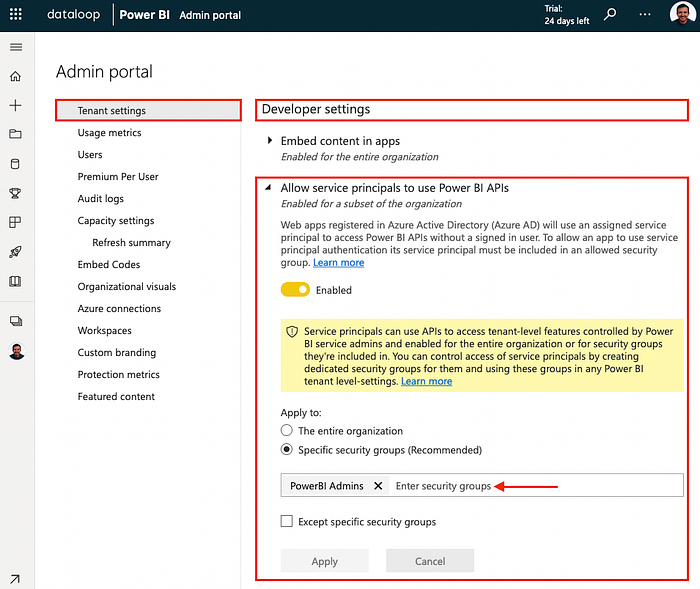
In Power BI Service, go to admin portal and search for "Allow service principals to use Power BI APIs" option. Enable it, and select the option to apply to specific security groups; then search the user group created in the previous step. Finally, click "Apply".
Step 2: Grant admin access to users group
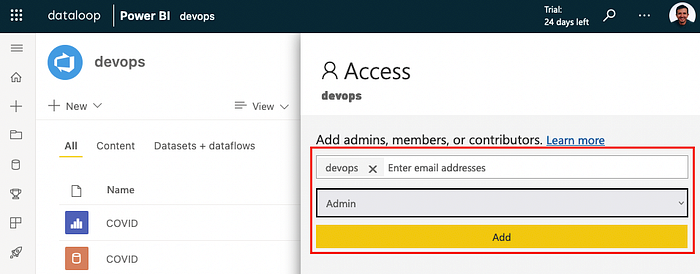
Go to the workspace where you will deploy the Power BI report, and click "Access" option, and grant admin access to the security group.
Configuring Azure DevOps and developing an CICD pipeline for Power BI
Step 1: Adding a new DevOps extension
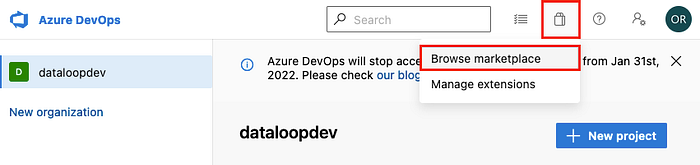
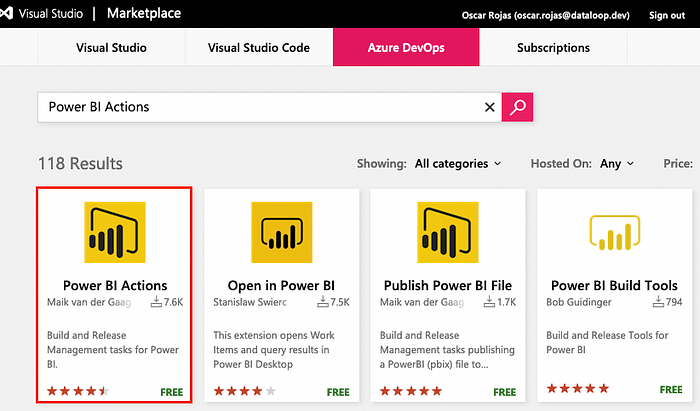
If you are in Azure DevOps, you can go to "Browse marketplace" option.
There, you will need to search for "Power BI Actions", and select the extension published by Maik van der Gaag, then click "Get it free".
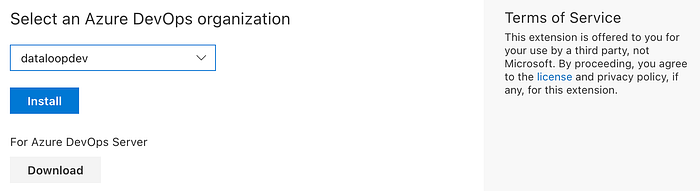
Finally, click "Install".
Step 2: Creating a service connection
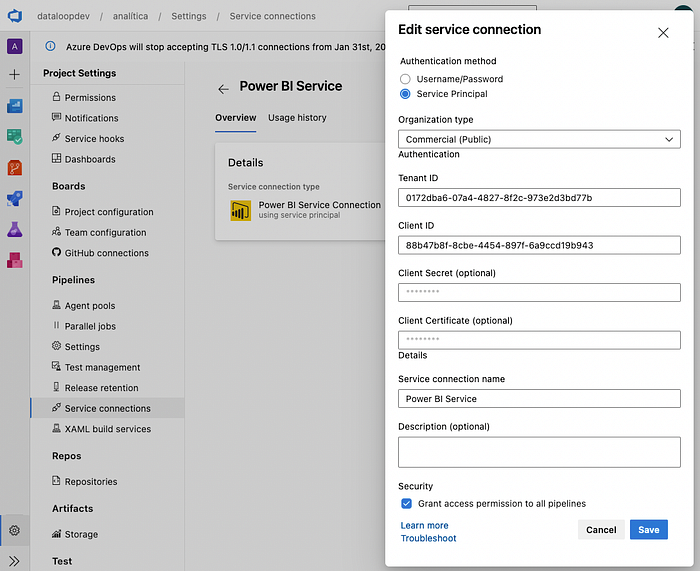
Now, staying in the project where you will create the CI/CD pipeline, go to "Project Settings", and then to "Service connections". There, you can add a new service connection by clicking "New service connection" button.

In this form, you will configure your service connection using the information previously got it, as your tenant ID, the client secret of your service principal, and its client secret.
Step 3: Developing the CI/CD pipeline
Now, we are in the last step. Finally, we are going to create our first CI/CD pipeline for Power BI using Azure DevOps.
To create the CI part, go to create a new pipeline, and select "Azure Repos Git" as source code.
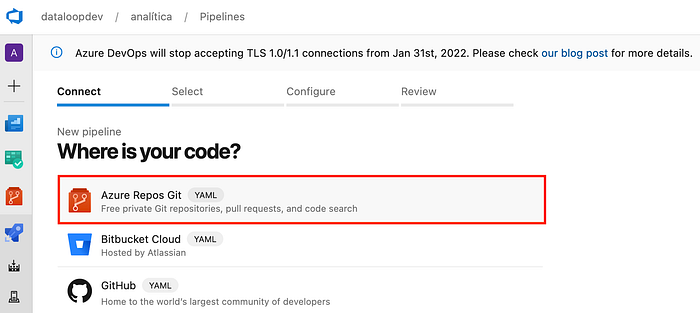
Then, select the name of your repo.

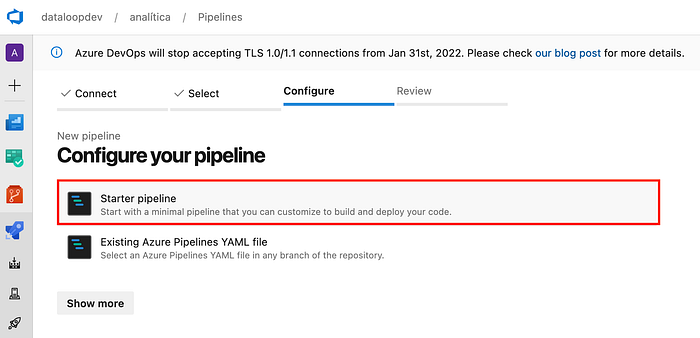
And select "Starter pipeline"
Copy and paste the following YAML code:
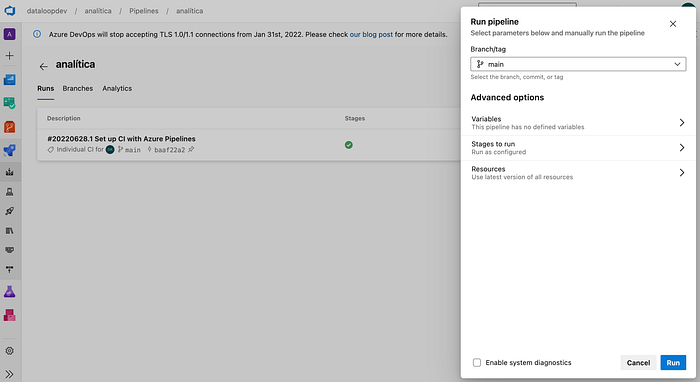
When you are done, click "Save and run"
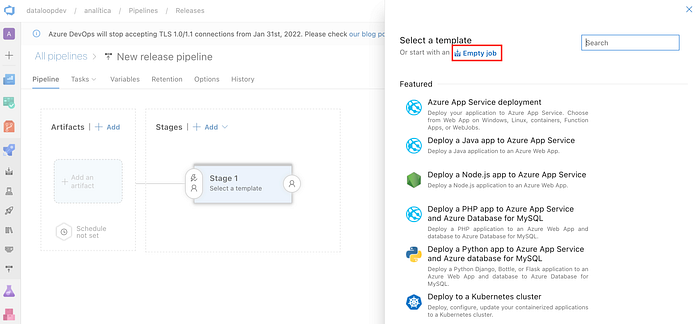
Now, go to create a release on Azure DevOps
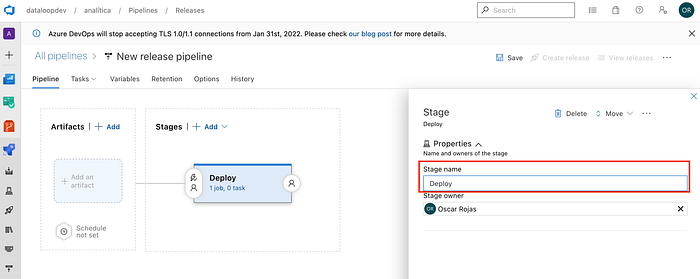
Give a name to the stage.
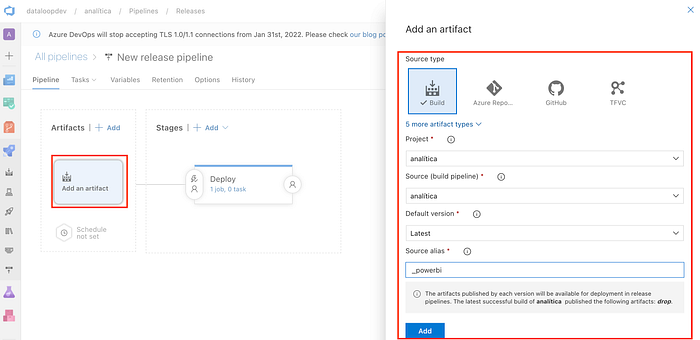
Select the build option, and the source. Click "Add" button.
In the first stage, click jobs link.
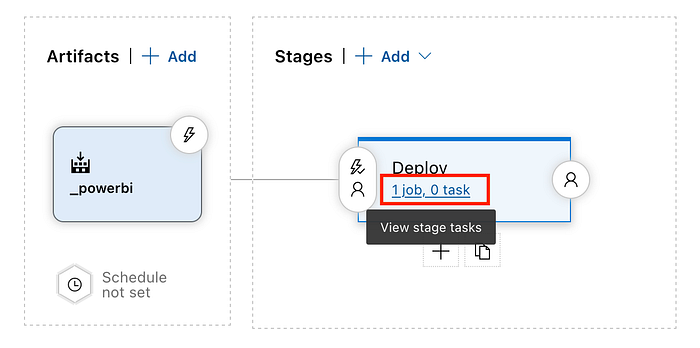
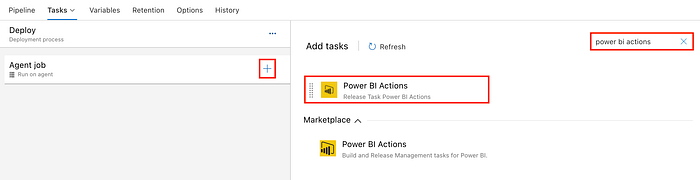
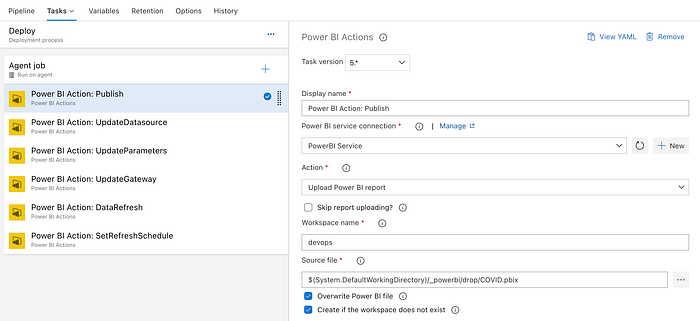
Over "Agent job" click "+" button, and search "Power BI Actions".
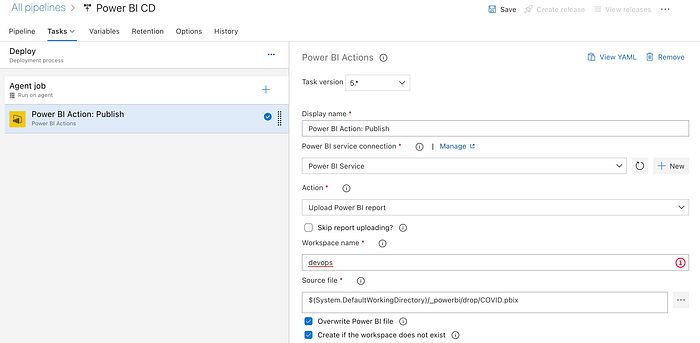
Select the action "Upload Power BI report". Write the workspace sink name, and select the build path.
At this moment, we have the most of this step by step done. Only click "Save" button and "Create release" to test it.
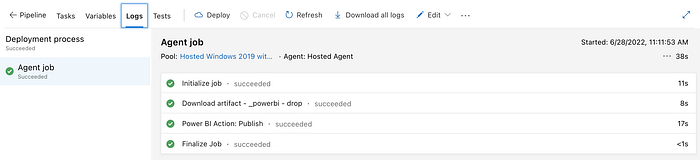
Testing
When you test it, you will see something like this, where the process list all the steps done.
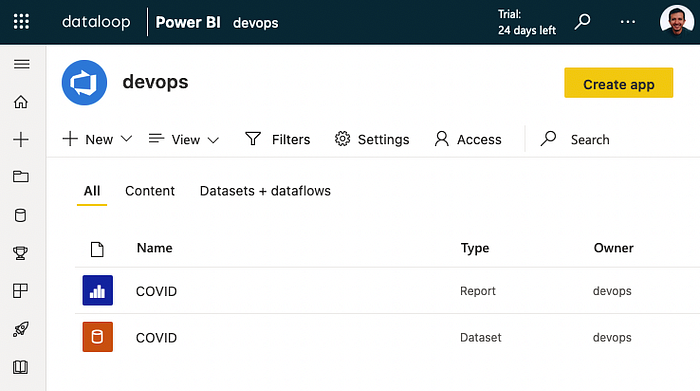
And if you go to Power BI workspace, you'll can see the report deployed.
Final thoughts
To not long this post, I'm not showing all possibilities you have to automate Power BI deployments; but it is possible to create more complex pipelines to update data source or parameters, update gateway, refresh data, set refresh schedule, or share with a person or group, for give you some examples.
Please explore this extension.
Greetings.