
Python, with its simplicity & versatility, has become one of the most popular programming language. It's widely used in various domains, from web development to data science.
In this tutorial, we'll explore one of Python's built-in libraries for creating graphical user interfaces (GUIs):
Tkinter: Whether you're a beginner or an experienced developer, understanding how to create a Python GUI can enhance your ability to build interactive applications.
Tkinter is the standard GUI toolkit that comes with Python. It provides a set of tools and widgets for creating graphical user interfaces. First install and import the tkinter library.
Hello World with Tkinter
Let's start with a basic example to get a feel for Tkinter. Open your favorite Python editor and create a new file, for example, hello_tkinter.py. Write the following code:
import tkinter as tk

def say_hello():
    label.config(text="Hello, Tkinter!")

# Create the main window
root = tk.Tk()
root.title("Tkinter Hello World")

# Create a label widget
label = tk.Label(root, text="Welcome to Tkinter!")

# Pack the label into the main window
label.pack(pady=10)

# Create a button widget
button = tk.Button(root, text="Say Hello", command=say_hello)

# Pack the button into the main window
button.pack(pady=10)

# Start the Tkinter event loop
root.mainloop()
OUTPUT:
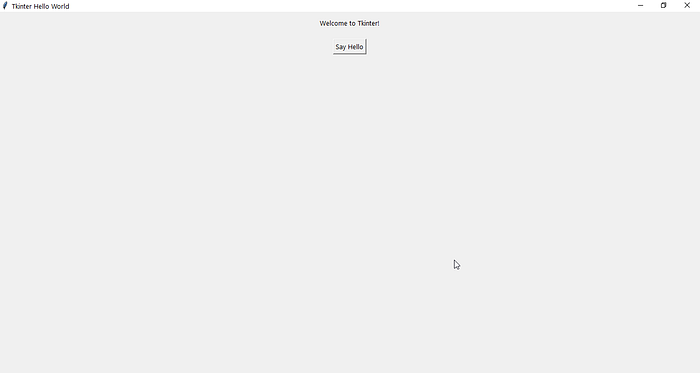
Save the file and run it. You should see a window with a label and a button. Clicking the button will change the label text to "Hello, Tkinter!"
Tkinter Basics
Now that we've created a simple Tkinter application, let's delve deeper into some essential concepts and widgets.
Widgets
Widgets are the building blocks of a Tkinter GUI. They can be buttons, labels, entry fields, and more. We've already used Label and Button widgets in the previous example.
Entry Widget
The Entry widget allows users to input a single line of text. Let's enhance our "Hello, Tkinter!" example by adding an Entry widget to take the user's name:
import tkinter as tk

def say_hello():
    name = entry.get()
    label.config(text=f"Hello, {name}!")


# Create the main window
root = tk.Tk()
root.title("Tkinter Hello World")

# Create a label widget
label = tk.Label(root, text="Welcome to Tkinter!")

# Pack the label into the main window
label.pack(pady=10)

# Create a button widget
button = tk.Button(root, text="Say Hello", command=say_hello)

# Pack the button into the main window
button.pack(pady=10)

# Create an entry widget
entry = tk.Entry(root)

# Pack the entry widget into the main window
entry.pack(pady=10)


# Start the Tkinter event loop
root.mainloop()
With this modification, users can enter their name in the Entry widget, and the "Say Hello" button will greet them personally.
Layout Management
Tkinter provides several geometry managers for organizing widgets within a window. The pack() method we used earlier is one of them. Additionally, you can use grid() and place() for more complex layouts.
Grid Layout
The grid() method allows you to create a table-like layout. Let's modify our example to use the grid layout:
# ...

# Pack the label and entry widgets into the main window using the grid layout
label.grid(row=0, column=0, pady=10)
entry.grid(row=1, column=0, pady=10)

# ...
Events and Event Handling
In the previous examples, we used the command parameter to specify the function to be called when a button is clicked. Tkinter allows you to bind functions to various events, such as button clicks, key presses, or mouse movements.
Let's add an event handler to our Entry widget to greet the user when they press the "Enter" key:
# ...

def on_enter(event):
    say_hello()

# Bind the on_enter function to the Enter key press event
entry.bind("<Return>", on_enter)

# ...
Now, pressing "Enter" in the Entry widget will trigger the say_hello function.
Intermediate Tkinter Concepts
Now that we've covered the basics, let's explore more advanced concepts in Tkinter.
Menus
Tkinter allows you to create menus for your applications. A menu typically contains items like File, Edit, and Help. Each menu item can have sub-menus and commands.
# ...

def exit_app():
    root.destroy()

# Create a menu bar
menu_bar = tk.Menu(root)
root.config(menu=menu_bar)

# Create a File menu
file_menu = tk.Menu(menu_bar, tearoff=0)
menu_bar.add_cascade(label="File", menu=file_menu)

# Add an "Exit" command to the File menu
file_menu.add_command(label="Exit", command=exit_app)

# ...
Now, your application has a "File" menu with an "Exit" option. Clicking "Exit" will close the application.
Frames
Frames are containers used to group and organize widgets. They help in achieving a cleaner and more organized layout.
# ...

# Create a frame
frame = tk.Frame(root)
frame.pack(pady=10)

# Create widgets inside the frame
label_in_frame = tk.Label(frame, text="Inside the Frame")
button_in_frame = tk.Button(frame, text="Click me!")

# Pack widgets inside the frame
label_in_frame.pack()
button_in_frame.pack()

# ...
Here, we've created a frame and packed widgets inside it. Frames are particularly useful for dividing your interface into sections.
Dialog Boxes
Dialog boxes are pop-up windows that prompt the user for input or provide information. Tkinter provides a simple way to create dialog boxes using the tkinter.messagebox module.
# ...

from tkinter import messagebox

def show_info():
    messagebox.showinfo("Information", "This is an information message.")

# ...

# Create a button to show the information dialog
info_button = tk.Button(root, text="Show Info", command=show_info)
info_button.pack(pady=10)

# ...
Clicking the "Show Info" button will display an information dialog box.
Advanced Tkinter Features
Using Images
Tkinter supports displaying images in various formats. You can use the PhotoImage class to load and display images.
# ...

# Load an image
image = tk.PhotoImage(file="path/to/image.png")

# Create a label to display the image
image_label = tk.Label(root, image=image)
image_label.pack(pady=10)

# ...
Replace "path/to/image.png" with the path to your image file.
Customizing Styles
Tkinter allows you to customize the appearance of widgets using styles. You can define your styles for buttons, labels, and other widgets.
# ...

# Create a style
style = tk.Style()
style.configure("TButton", foreground="green", font=("Arial", 12))

# Create a button with the custom style
styled_button = tk.Button(root, text="Styled Button", style="TButton")
styled_button.pack(pady=10)

# ...
In this example, we've created a custom style for buttons with green text and a specific font.
That's all now here I give me best resources to learn it completely and master it:
Python — GUI Programming (tutorialspoint.com)
Python GUI — tkinter — GeeksforGeeks
tkinter — Python interface to Tcl/Tk — Python 3.12.0 documentation
Conclusion
This comprehensive tutorial has covered the basics and advanced features of Tkinter, Python's built-in GUI library. From creating a simple "Hello, Tkinter!" application to exploring advanced concepts like menus, frames, and dialog boxes, you now have a solid foundation for building interactive and user-friendly applications.
Remember, practice is key to mastering GUI development. Experiment with different widgets, layouts, and styles to create the perfect interface for your Python applications. Tkinter's documentation is an excellent resource for further exploration and fine-tuning. Happy coding!