
No, it is not NocoDB, don't get mix up, both are equally good solution, just different approaches.
For a simple CRM database, NocoBase offered more than enough features, and even include advance data permission! Given that the development is still in alpha stage.
It provide docker installation, and the very first time when I use it, it simply "wow" me as I don't even need to RTFM — That's because the user manual is not even complete!
But hey! It simply get the job done!
Pre-requisite check
URL: https://www.nocobase.com/
Platform: NocoBase is an open source project, at the moment, they provide 3 installation type. I suggest docker, as I somehow only able to get docker installation work.
Email: Same as WordPress, you may need to make sure SMTP is working, as you are on your own server.
What? You don't know what is SMTP? Ok, it is time to get to your friendly IT department again…
Cost: It is an open source project, hence technically no cost to use the software, but you will have to pay for the cost of the infrastructure — server hosting.
Developer mindset
Unlike most of the low code tools, NocoBase seems like design by developer, and design for developer. Imagine I actually din't really refer to developer manual, and it just work as I go along.
To use NocoBase, you need to
- Know how to install and run docker, or install on Linux server
- The flow and logic, and the way it do data filtering, you just need to follow how developer usually do it
- You need setup every single page, include user page — although users and roles are default collection created during installation
Let's get started
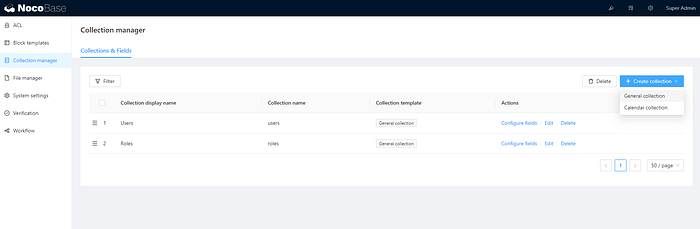
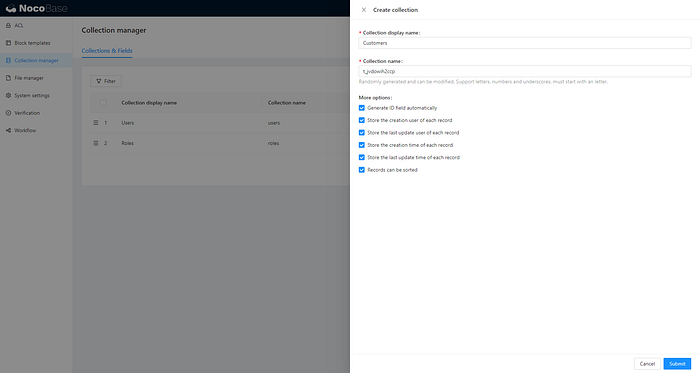
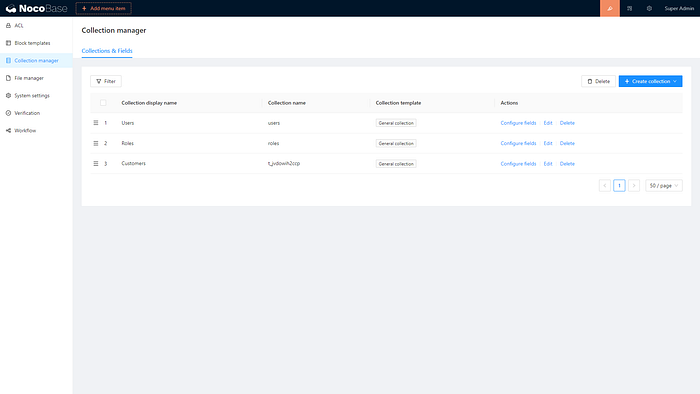
Creating table (collection)
1. Create a new collection called Customers, it is same as creating database table
2. Configure the fields for Customers

3. For the field "Assigned To", we use the field type "One to one (belongs to). It linked to default user collection

4. For "Status", let's use field type "Single Select". To setup default value for single select, you have to click on submit, and edit again
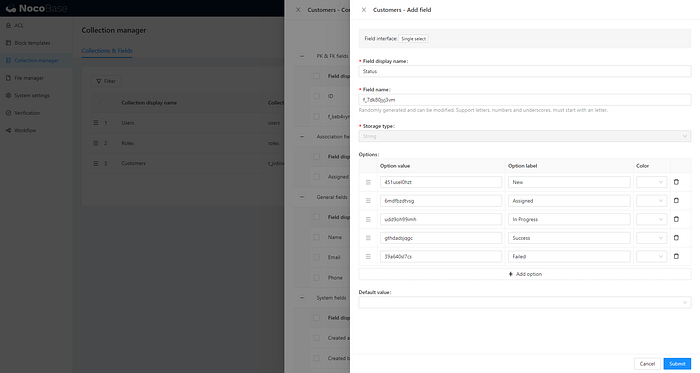
5. Here are all the fields we just created, let's ignore those auto-created fields for now.

Creating pages
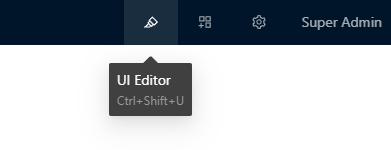
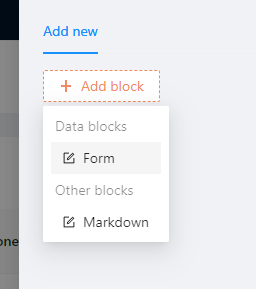
1. To create pages and all UI related items, you have to switch on UI Editor mode. The special thing about NocoBase is, the UI Editor blended with the data together, which I going to show you in next few steps
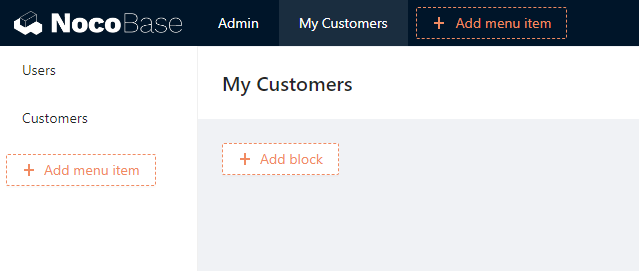
2. There is "Add menu item" now appear. To create a page, you have to start with menu item.
3. We have 3 options
- Group — If you need a parent page and a child page
- Page — If you need a single page
- Link — Obviously this is just a URL

4. For our simple CRM, let's setup the pages as below. Let me explain a bit more over here:
4.1. Admin — Only view by admin
User — for admin to manage users
Customers — for admin to manage customers, and that include assign sales personnel to customers
4.2. My Customers — Only view by sales personnel
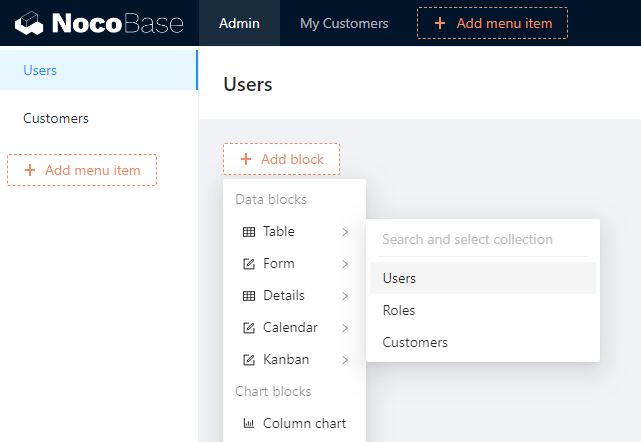
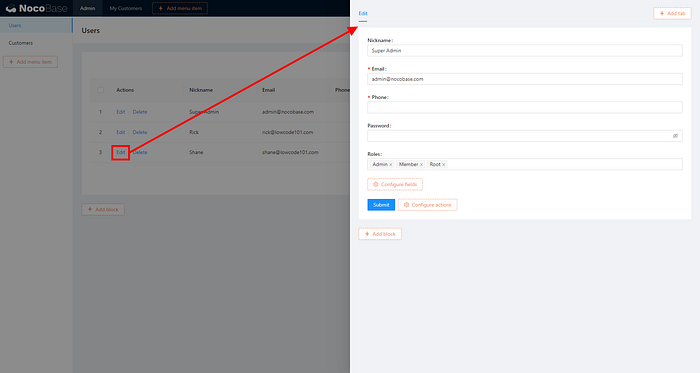
5. Let's start with User page, click on the menu item will bring you there. We start with a Table, which displaying Users collection
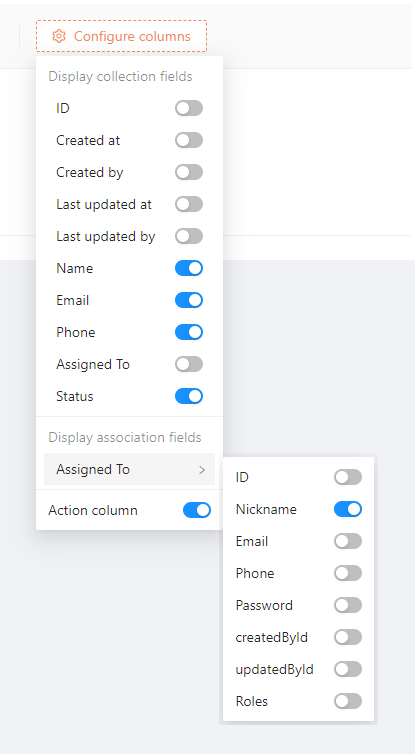
6. We continue to configure the fields to display on the table. In this case, we only need to display the Nickname, Email, Phone

7. Under the Actions column, let's switch on Edit and Delete button
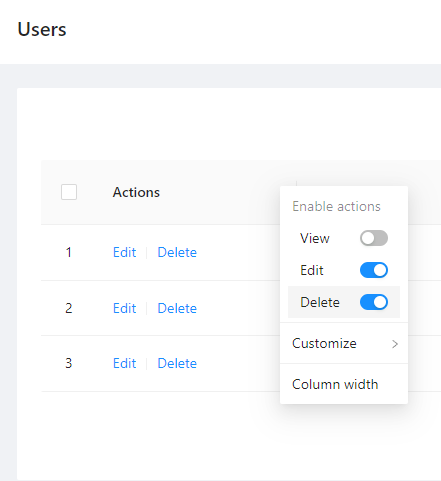
8. We also switch on the main actions for this table, which is Add New button. Click on the Add New button, will bring you to the form in drawer style, you will need to start configure the new user form here.
9. At the new user form, display all the necessary fields, as well as the Submit button action
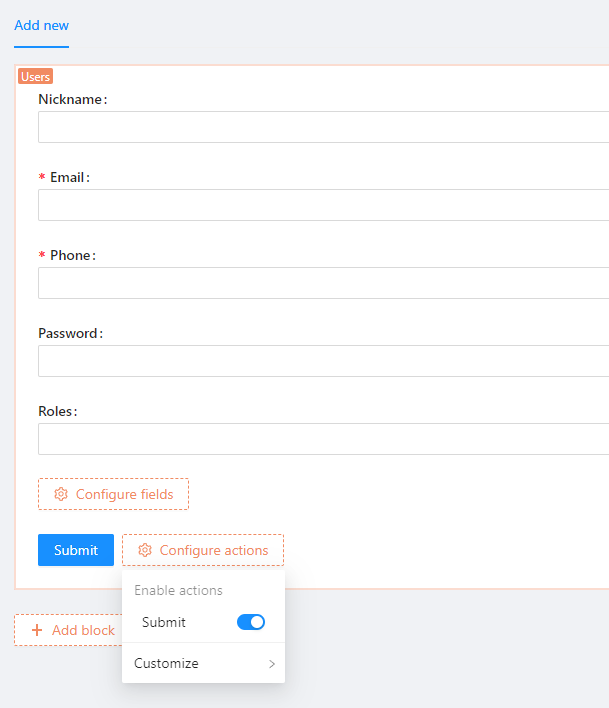
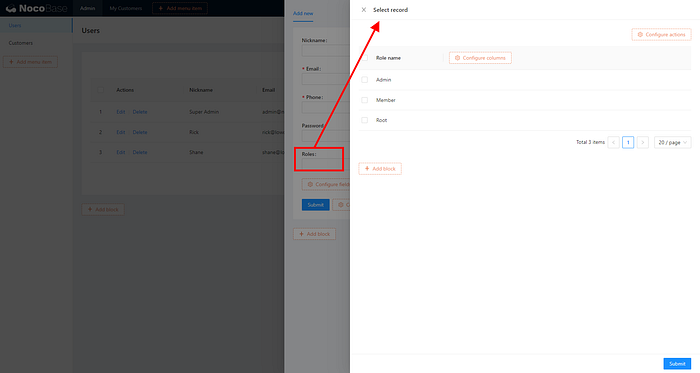
10. Roles is being linked to Role collection, click on it will display another drawer form, which display all the Roles. You can configure the columns, what type of Roles' data to be display
11. After you done the New User form, you need to do the same form building by click on Edit field.
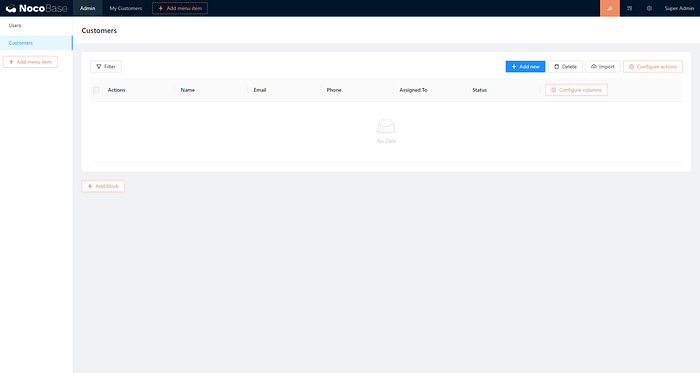
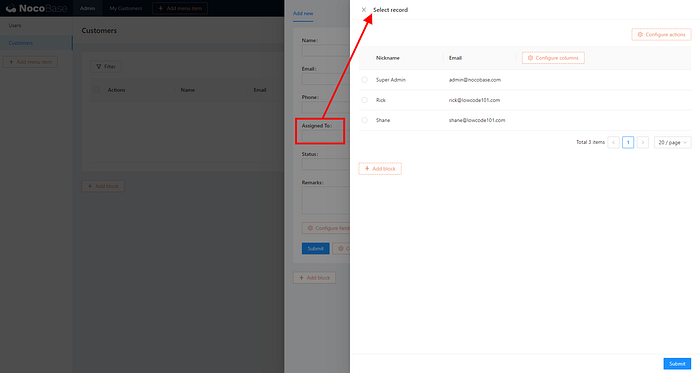
12. Now, let's move to "Customers" page, same thing we going to create a table to display all customers at this page. We only select necessary data to display.
Take note of Assigned To, as it is a linked record, we can't display ID on the table, we will display the Nickname — Usually how we as a developers always do were, we using a View or Join Table statement.
NocoBase did it automatically, neat huh?
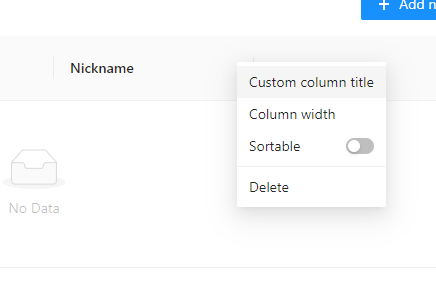
13. On the table itself, no one will understand what is "Nickname", hence we need to change the column title to "Assigned To"
14. This is how the final customer table should look like. You can re-arrange the fields' order as you like
15. Now, let's configure the "Add New" button like what we did for Users. Click on "Assigned To" at the Add New Customer page, will trigger the Users to be assigned to page. Again, for this selection, we only need to display Nickname, and Email.
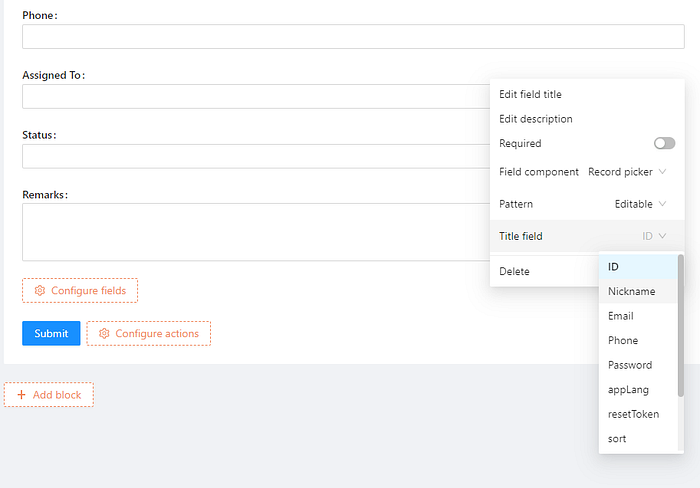
16. After we done configure the "Assigned To" at the form, there is 1 more step: the way the assigned to display. For every single field on the form, you can
- Set if it is mandatory
- Change field title / description
- Change the way it display — again, if we were hard code developer, we have to write a View or Join Table statement here.
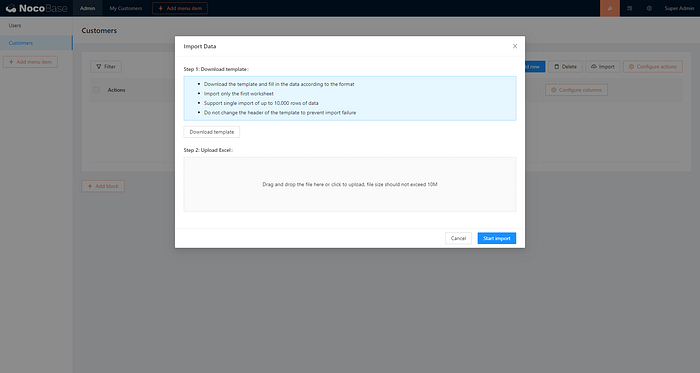
17. Now, here come the weird part of NocoBase, we can't continue to setup Edit page, as there is no data to display the edit link. That's what I meant by: The UI Editor blend the data together.
In any case, let's just import some data? NocoBase will generate the Microsoft Excel template automatically for you to enter the data by bulk.
If you were follow my fields setup closely, you may download the sample from here.
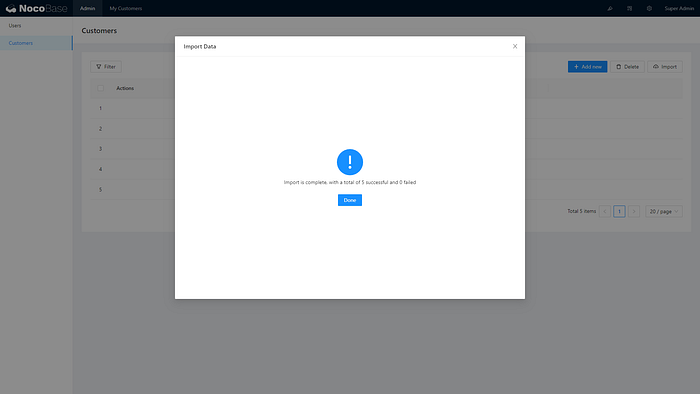
18. Now, you imported the data, you can continue to the built the Edit Form for Customer — By now, you should be able to know how to do that.
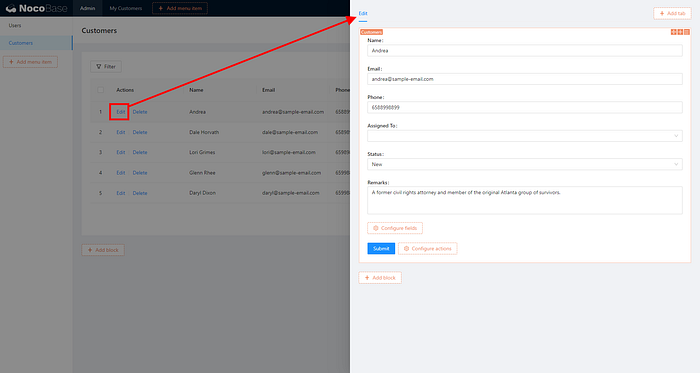
Do take note of which mode you are in, normal application mode, or UI Editor mode, you might get confused why some features are not there. Usually this is due to you are at the different mode.
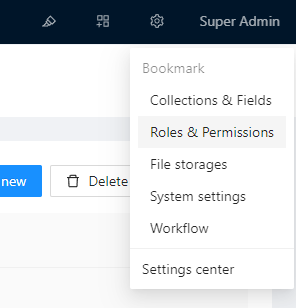
Setup permission
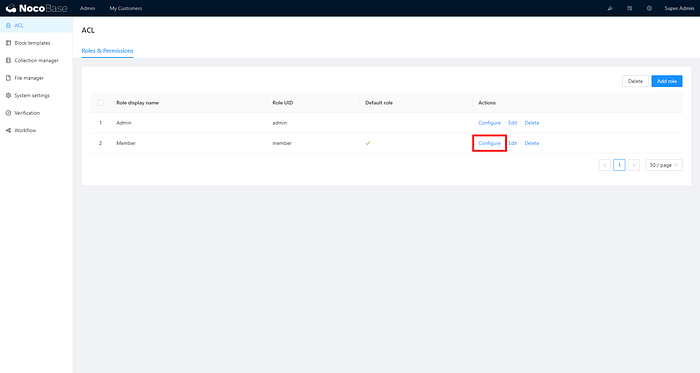
1. Alright, we have come so far, not too bad right? Now, it the time to setup permission
2. Under the ACL setup, we only need to setup "Member" permission, as those are for sales personnel's role
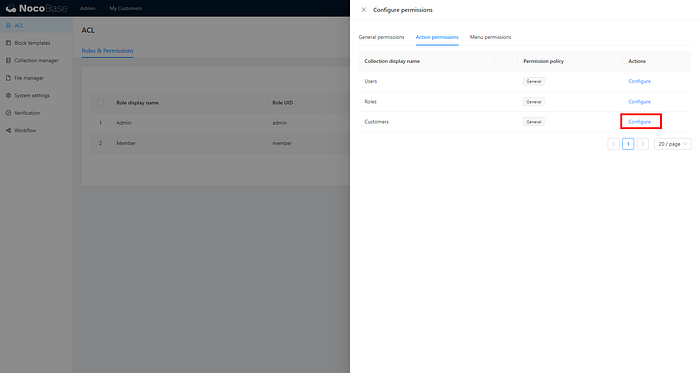
3. First of all, setup the "Menu permissions" first, the "Member" only allowed to view "My Customers"

4. Then, go to "Action permissions", configure only the "Customers" collection
5. For permission policy, let's select "Individual". We allow sales personnel to view and edit the customers' records, but no delete allowed
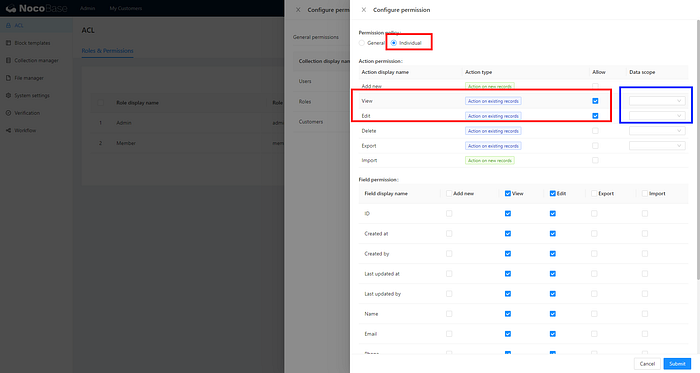
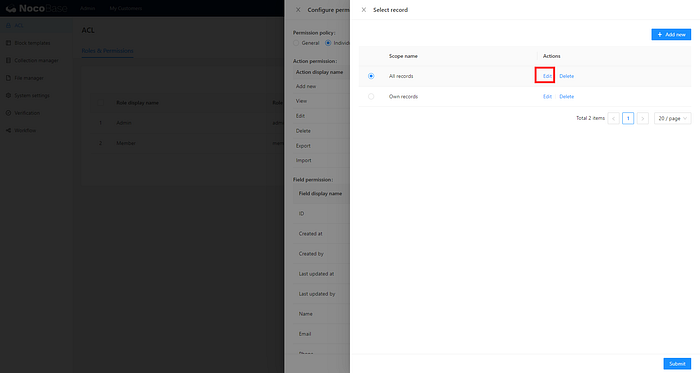
6. Now, click the data scope for both View and Edit, select the "All records", and Edit it
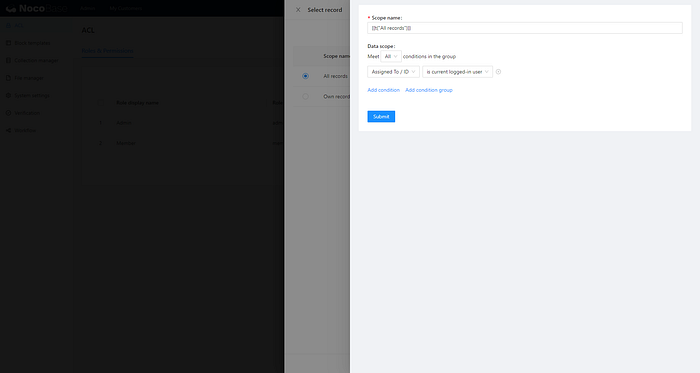
7. The Members' data scope for Customers are to set to based on Assigned To / ID, which is current logged-in user.
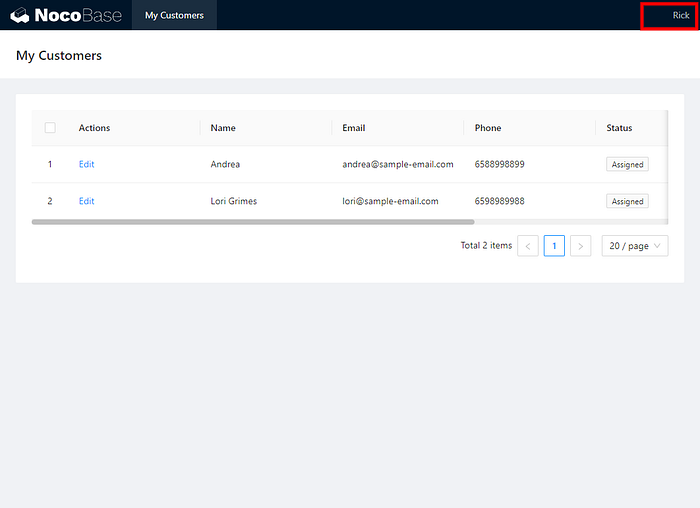
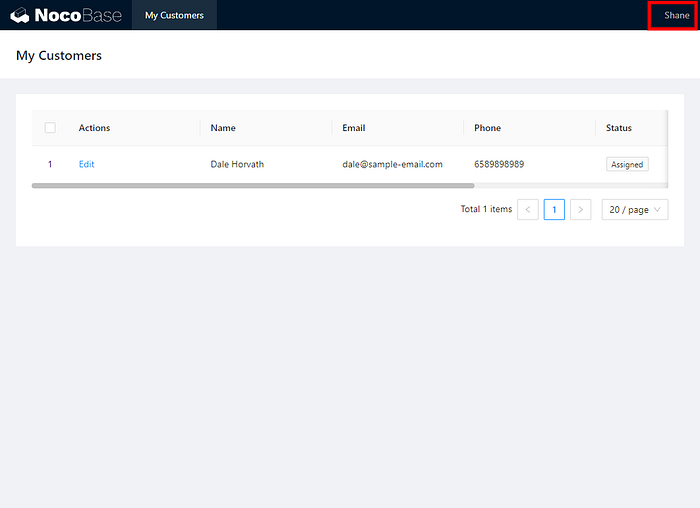
Meaning, for sales personnel login to the system, they only see the customers that assigned to them
Same goes to Customer Edit mode — Only allowed to edit the customers being assigned to them
Let's try it out
1. Let's assign the sales personnel yo the customers
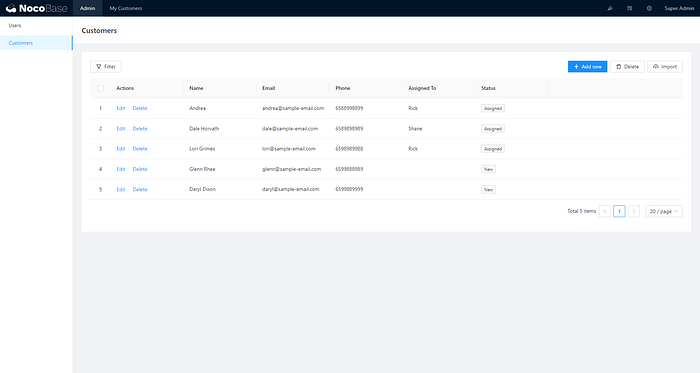
2. This is what Rick see when he login
3. This is what Shane see when he login
4. That's all we just created a simple CRM with permission using NocoBase!
NocoBase is an impressive piece of work from the team, however please take note that, at this moment the article published, it is still under Alpha stage, meaning it might have bugs and some unknown issue. Having said that, it is still some low code / no code solution I am looking forward to — To help the project grow, do report the bugs you found at their github.
It is not mobile responsive