
Once I created my Azure account it was so easy to make my virtual machines for my home lab. I chose Azure due to the fact that I simply liked their GUI and as a student I get $100 Azure credits for a year. I love that I can have access to an AD (Active Directory) without physically needing the infrastructure. I can still learn without putting a dent in my budget or using more space on my hardware utilizing VMware.
Let's get into it!
Step 1: Create a resource
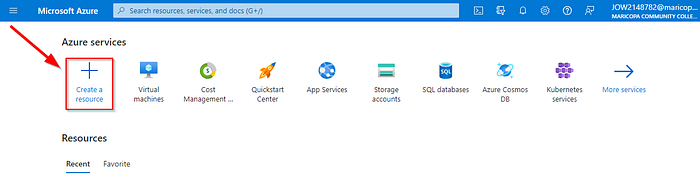
Clicking 'create a resource' takes you to all of the available resources that Azure has, which is A LOT.
— — I found this page (click to open link) that shows the possibilies of Azure. They explain each in detail and some even have labs to practice learning with hands on comprehension.
Step 2: Click 'create' under Virtual Machine
Step 3: Configure the project
You will see the below page open up and this is where you configure the compute power, networking, adding tags and all the personal needed details for your virtual machine resource.
For my simple home lab no other changes are required. Fill in the required (*). Leave the defaults and click 'Review + create.'
And bam! Just like that I had created a powerful VM that can be accessed remotely on my personal laptop using RDP.
I created lab for Server 2019 and Windows 10. They were both created in the portal.
To further my Azure knowledge my next goal is to provision resources using the AZ CLI or Powershell.
Having my own lab to access resources in such a quick, easy and fun way has been a game changer. Learning Azure and all that it has to offer is going to be a fun venture. Excited to share more as I learn and grow within the ever changing field of technology.
"1% everyday."